KITCHENS
WHAT’S BEING BUILT
MATERIALS NEEDED
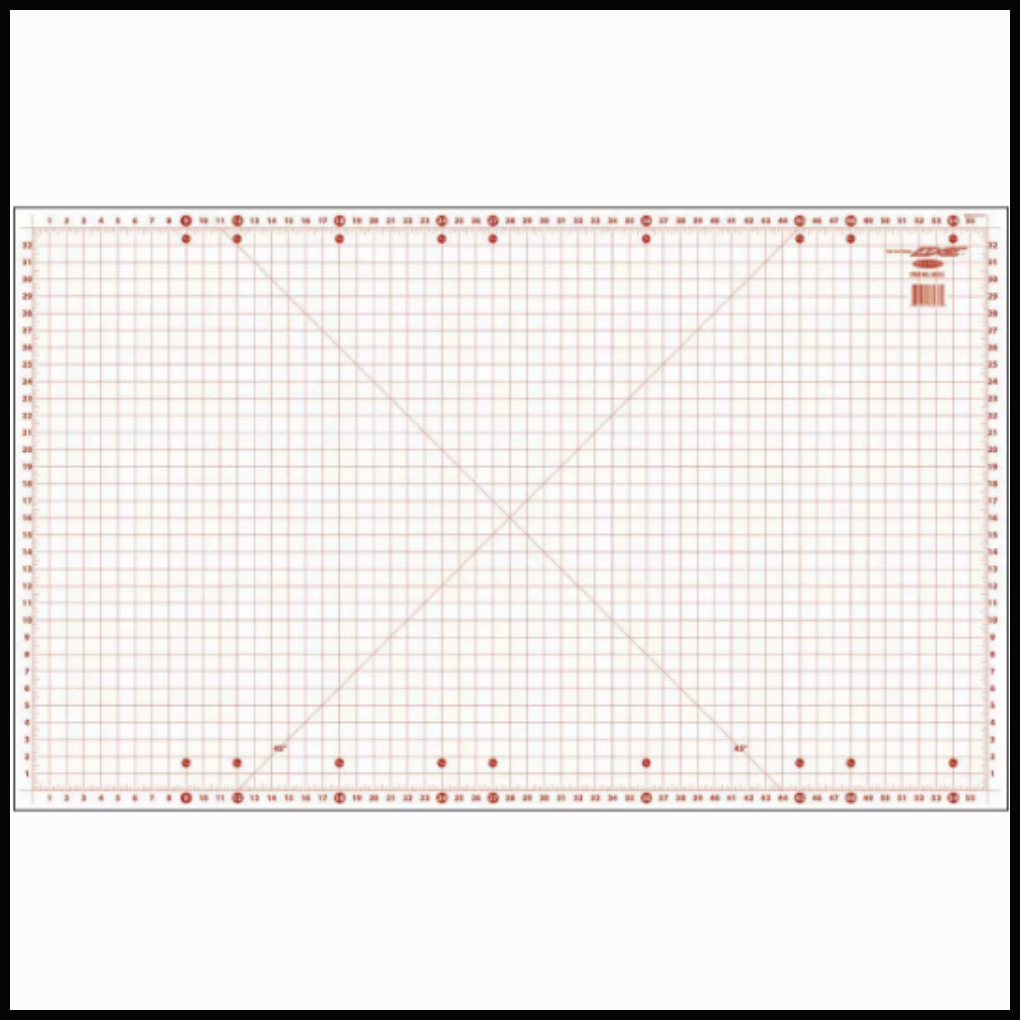
Cutting Board
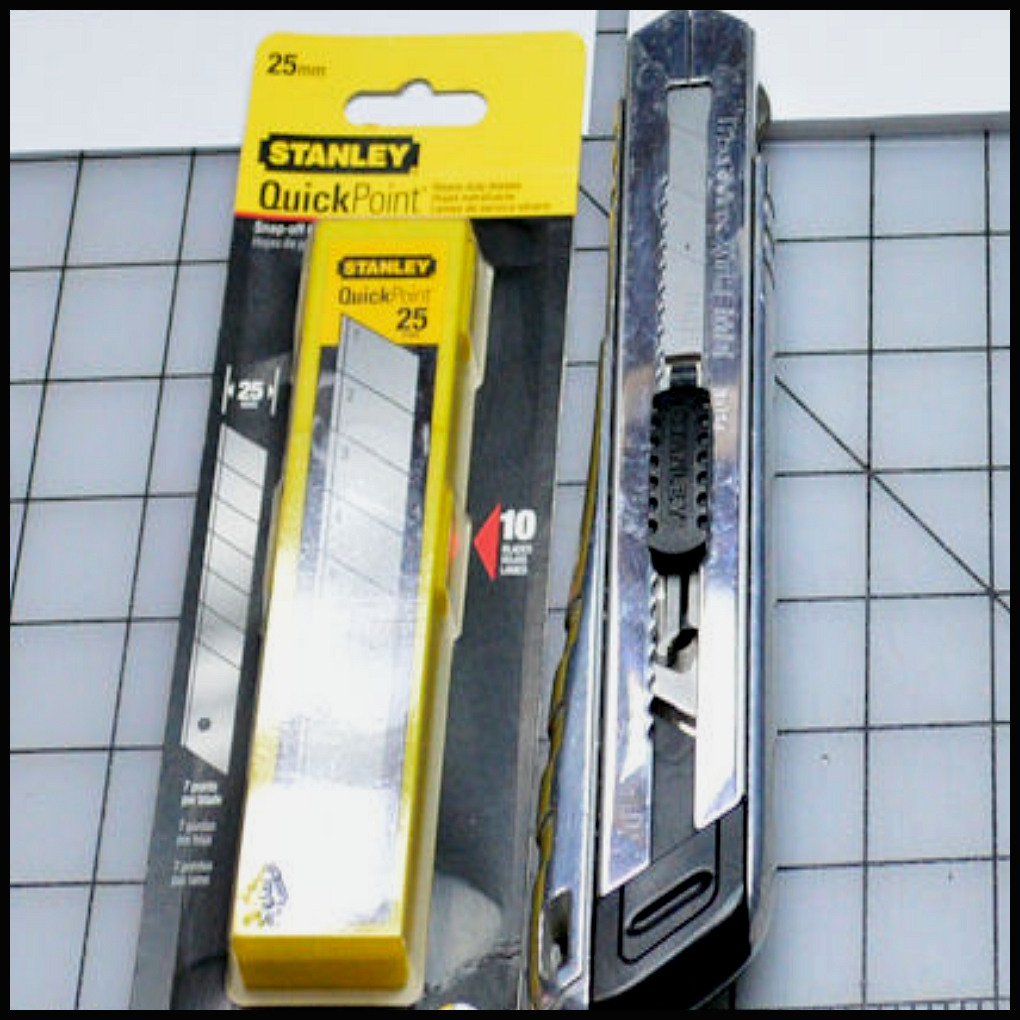
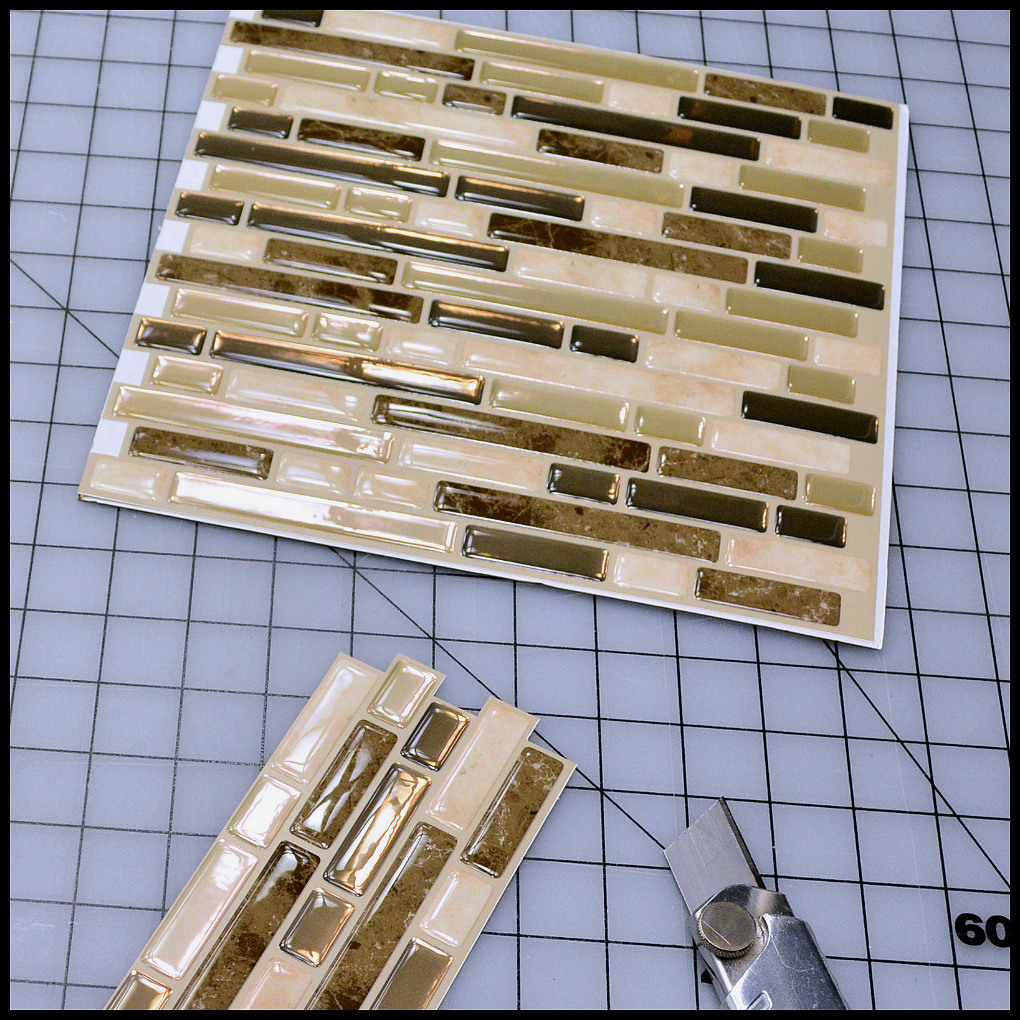
Cutting Tool

Hair Clip
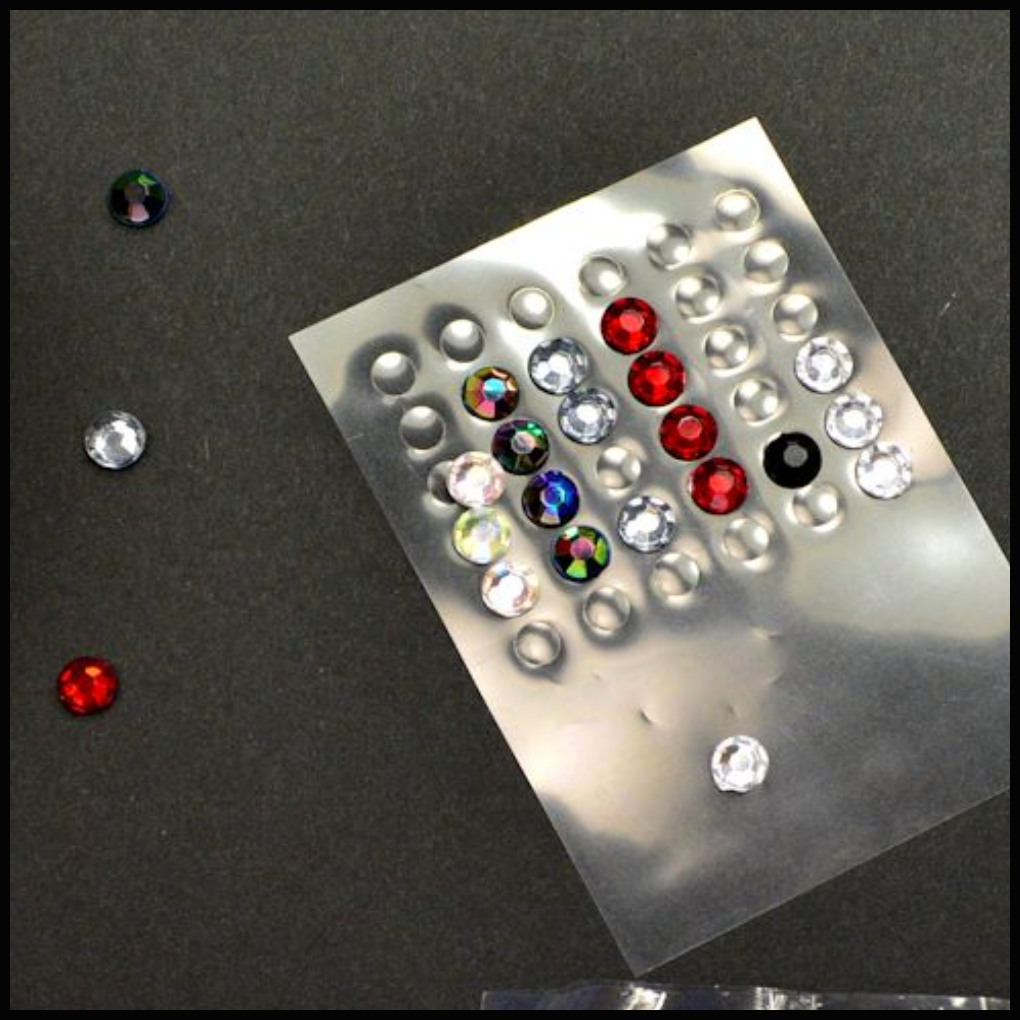
3-D Stickers
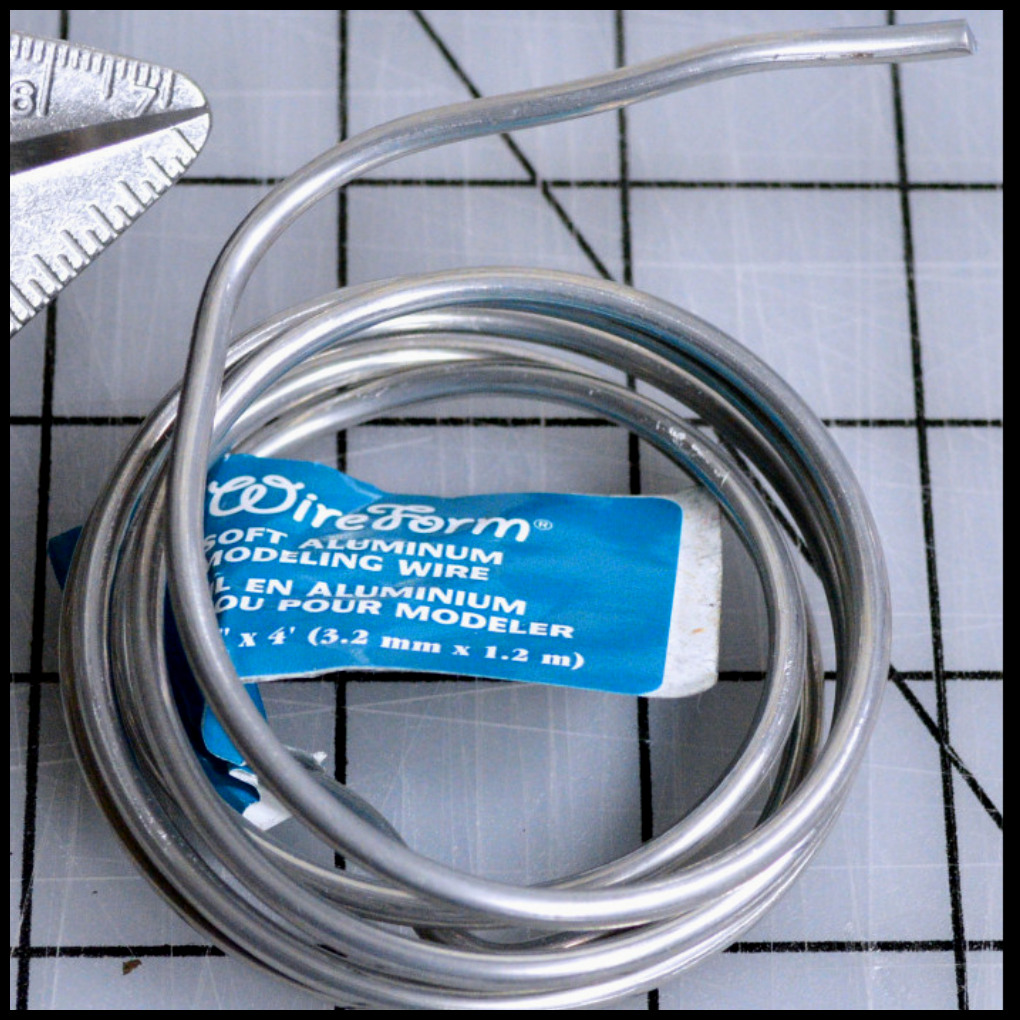
Wire - Thick Flexible
Project Board 3-Panel
Foam Board 1/4"
Contact Paper
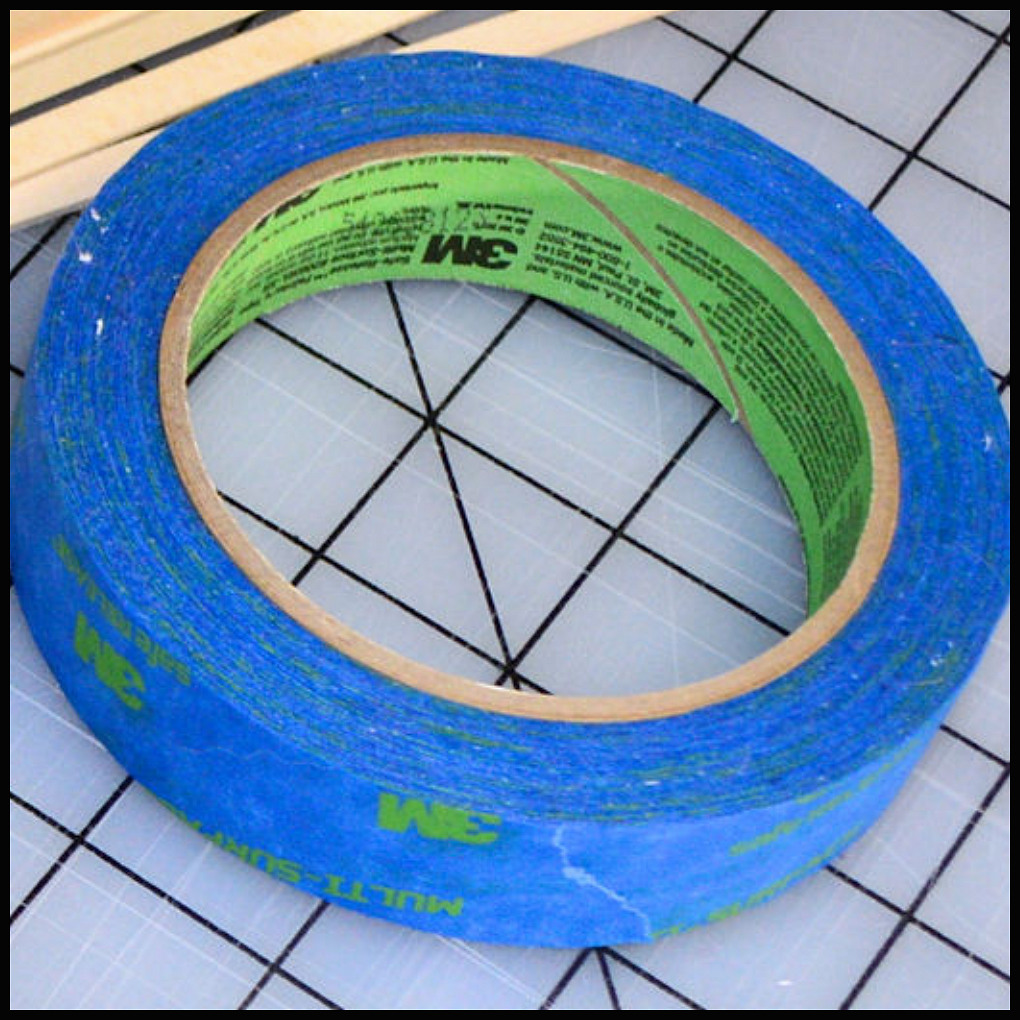
Masking Tape
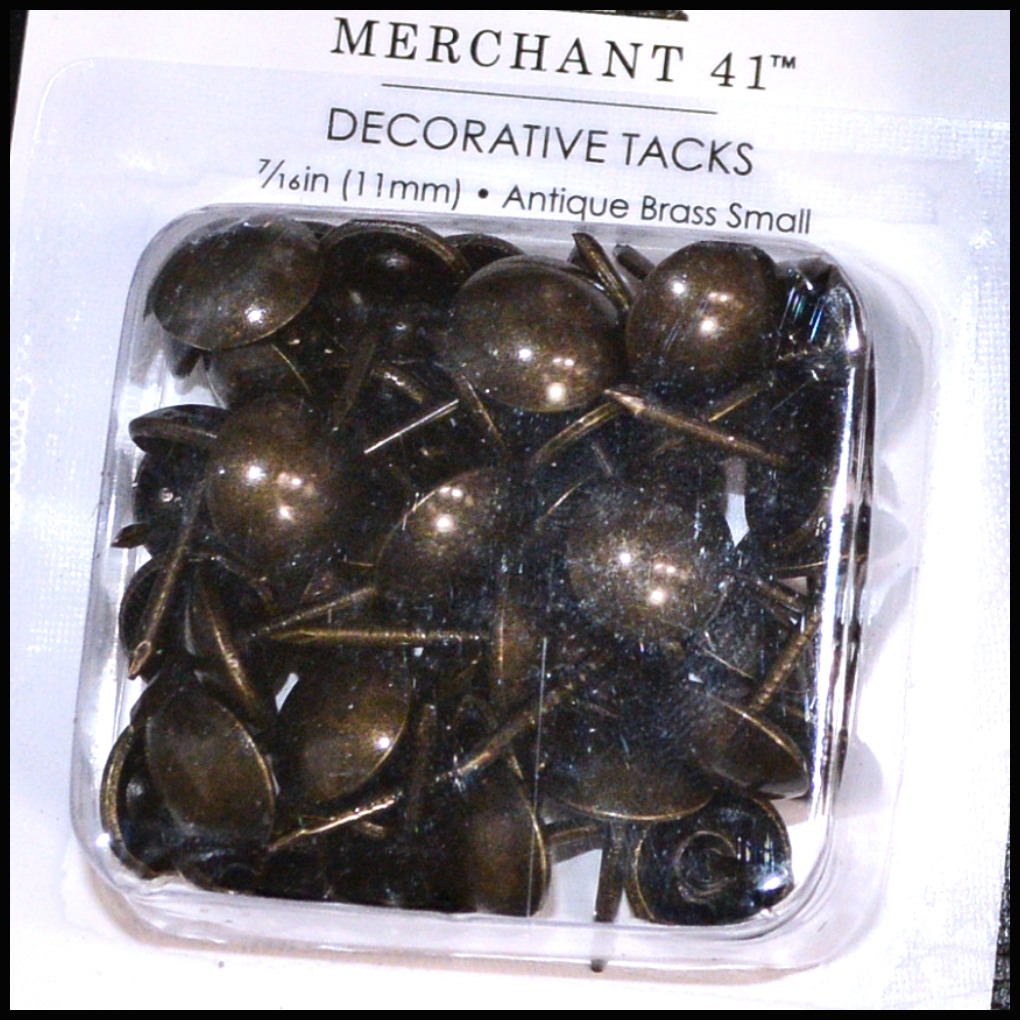
Decorative Tacks
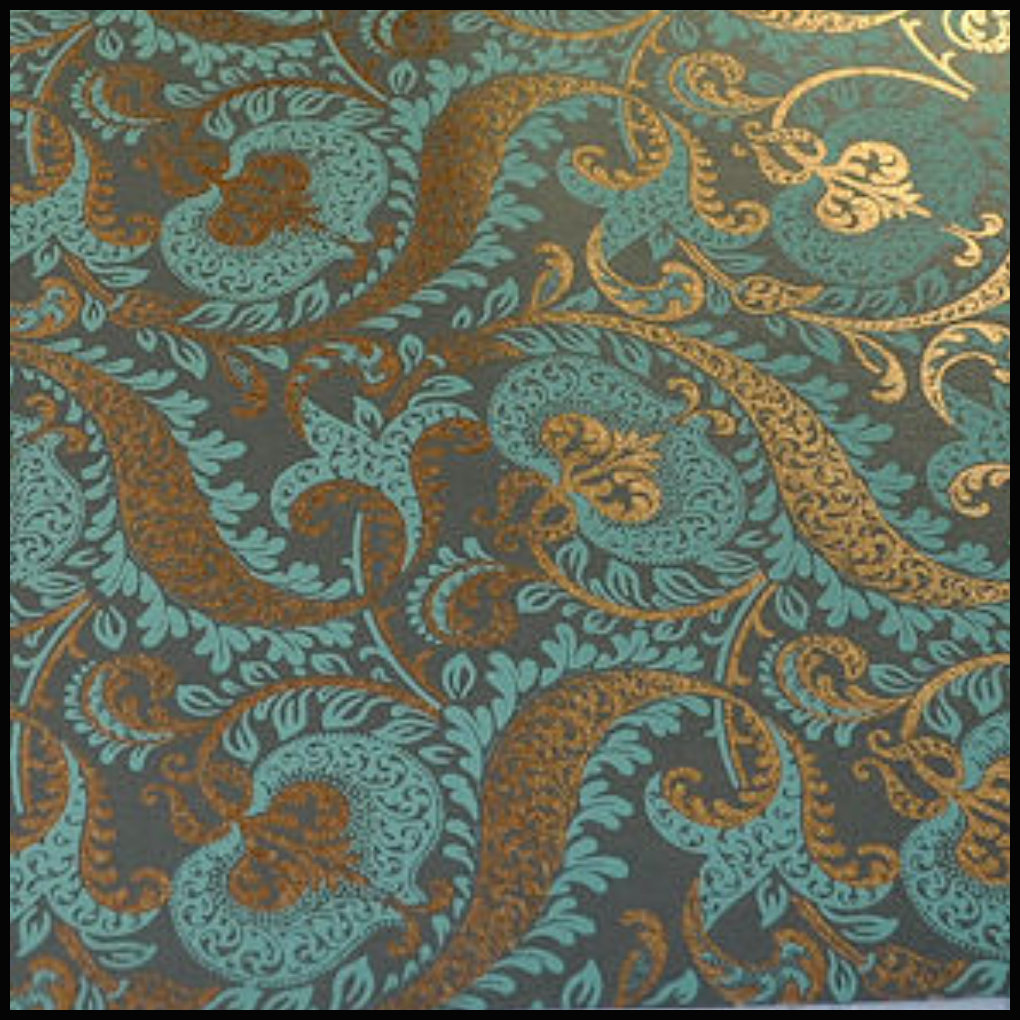
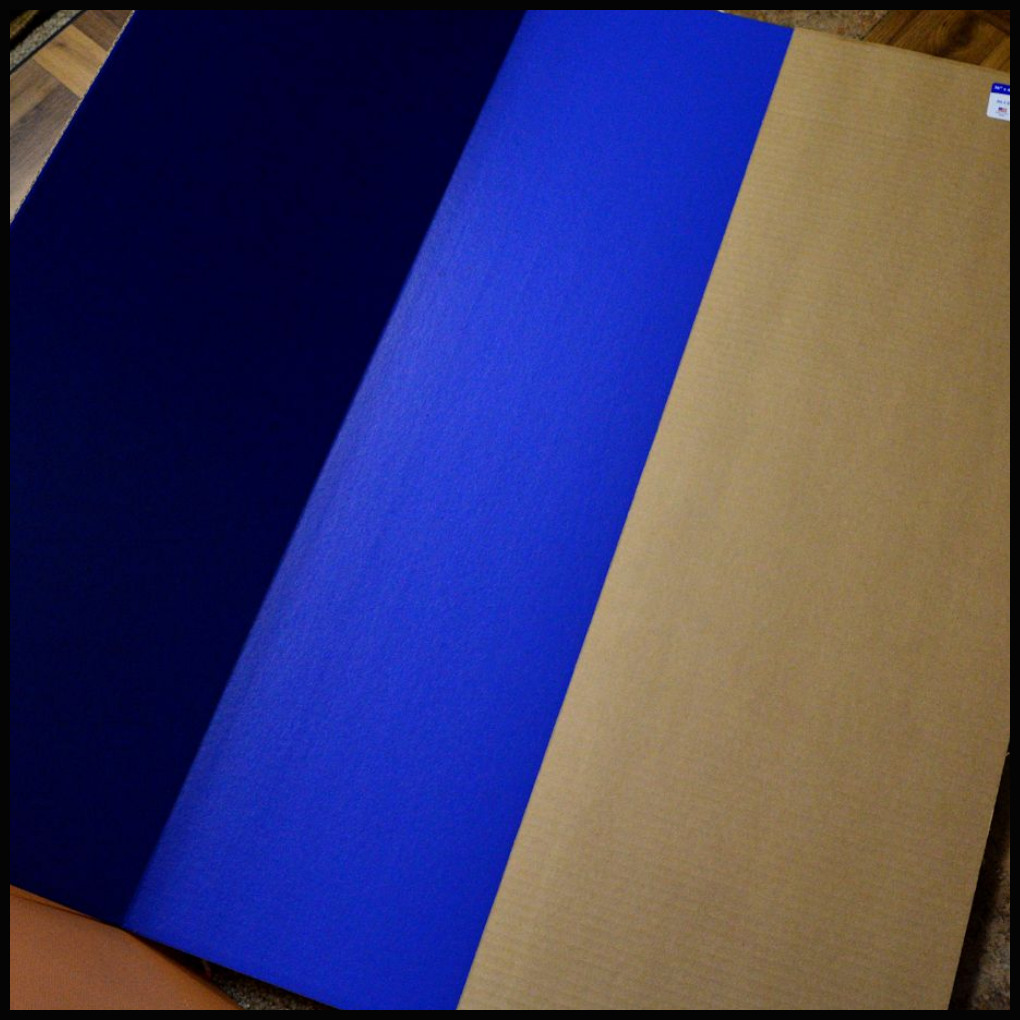
Decorative Paper
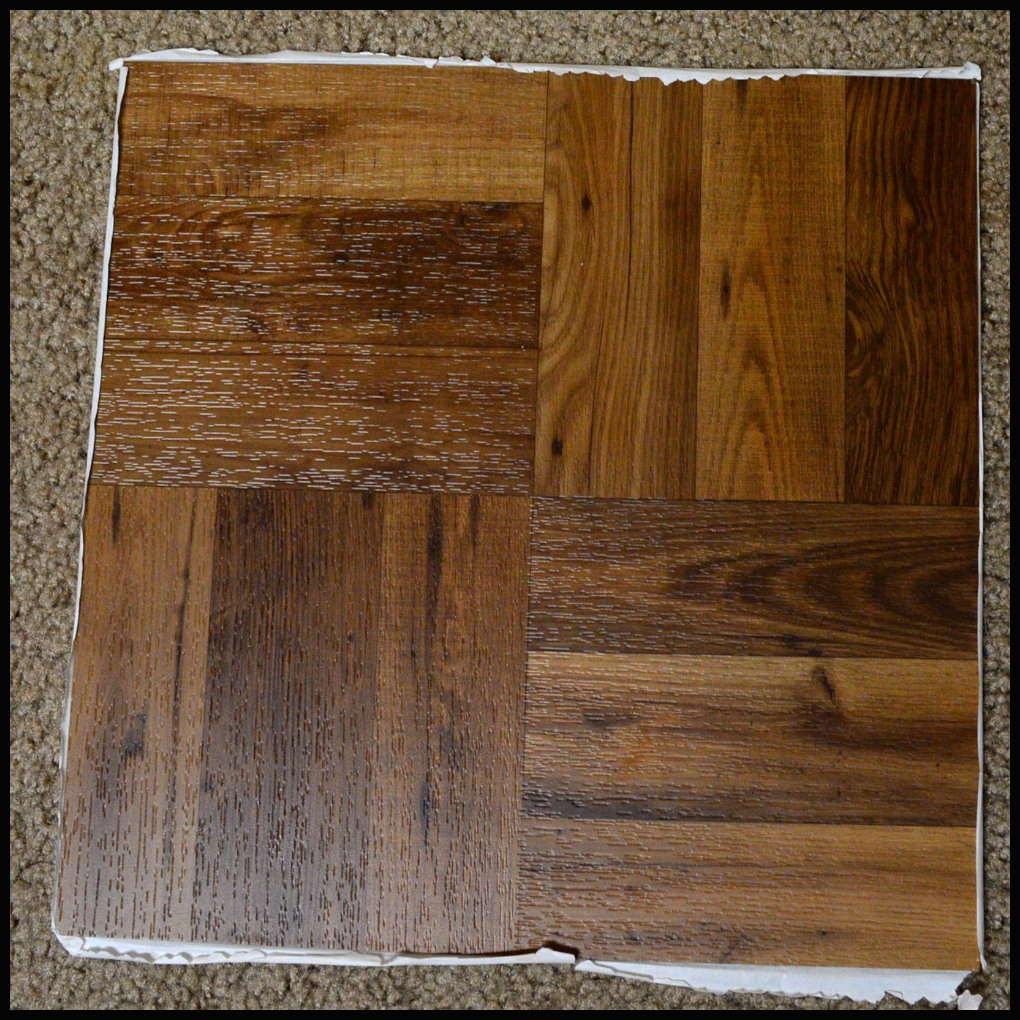
Floor Tile

Foam Board 1/2"

Sewing Pins - Ball Head
Duck Tape
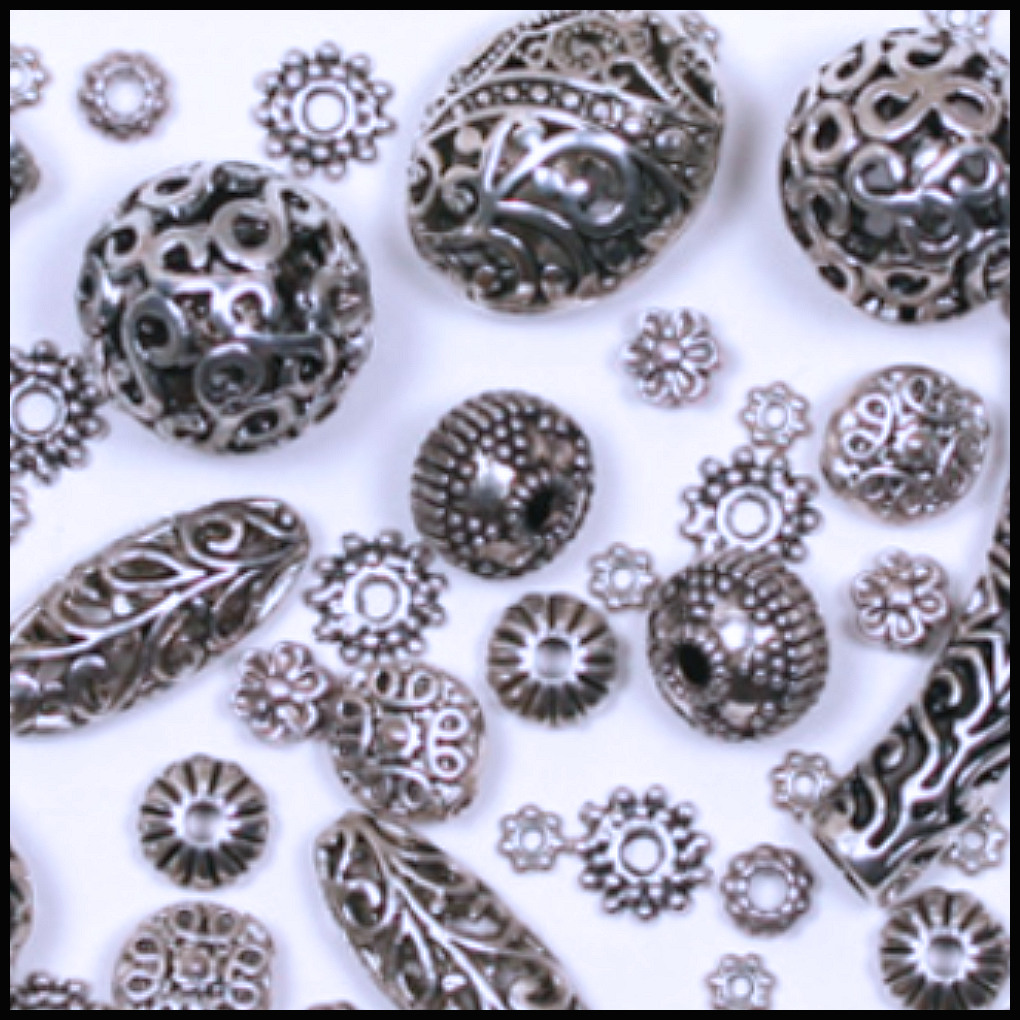
Jewelry Beads
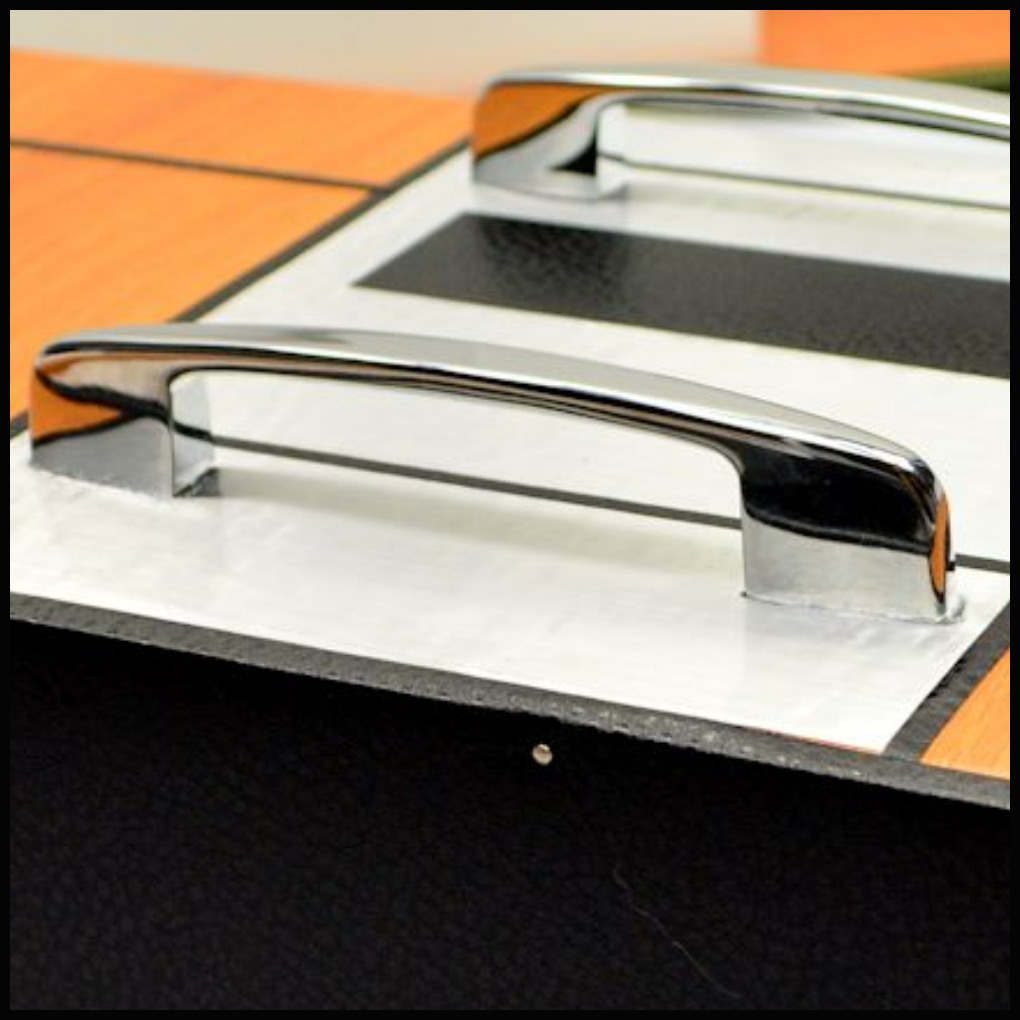
Drawer Pull
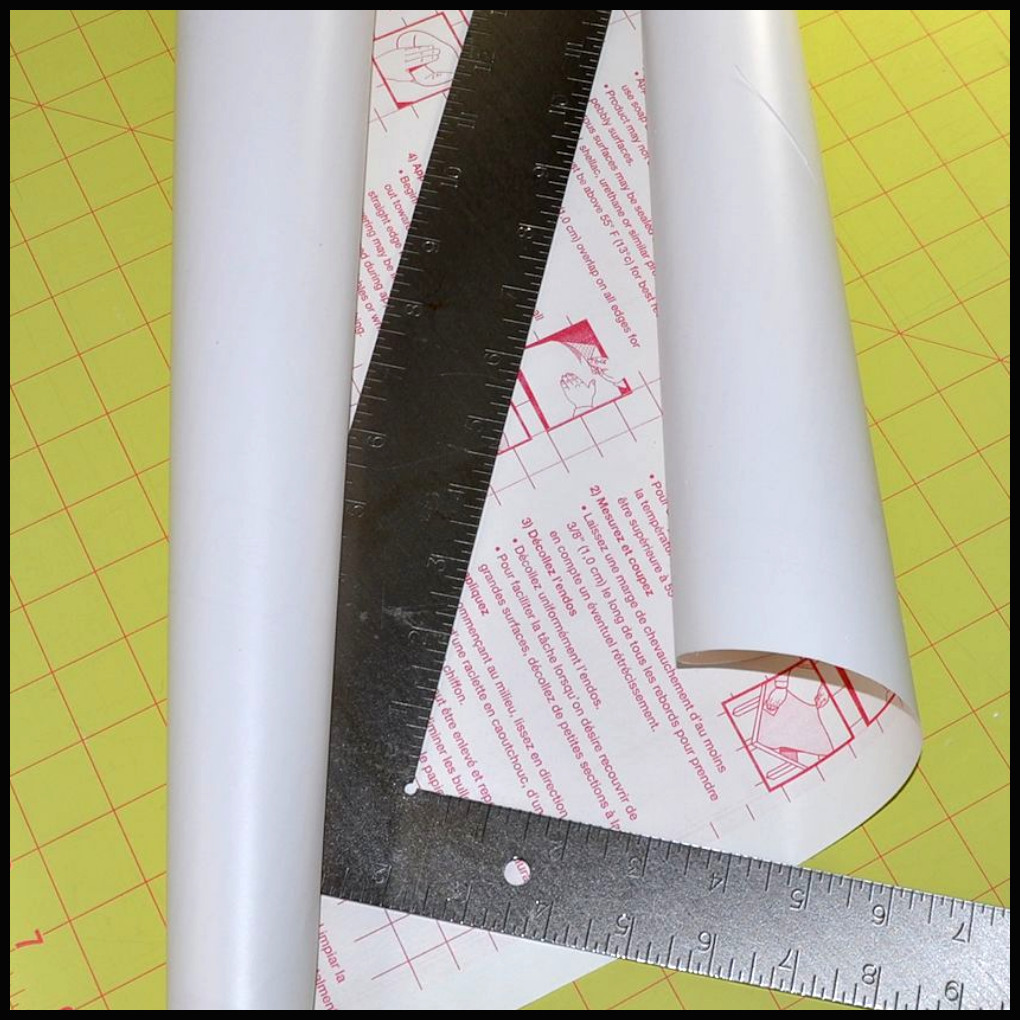
Ruler - L-Shaped
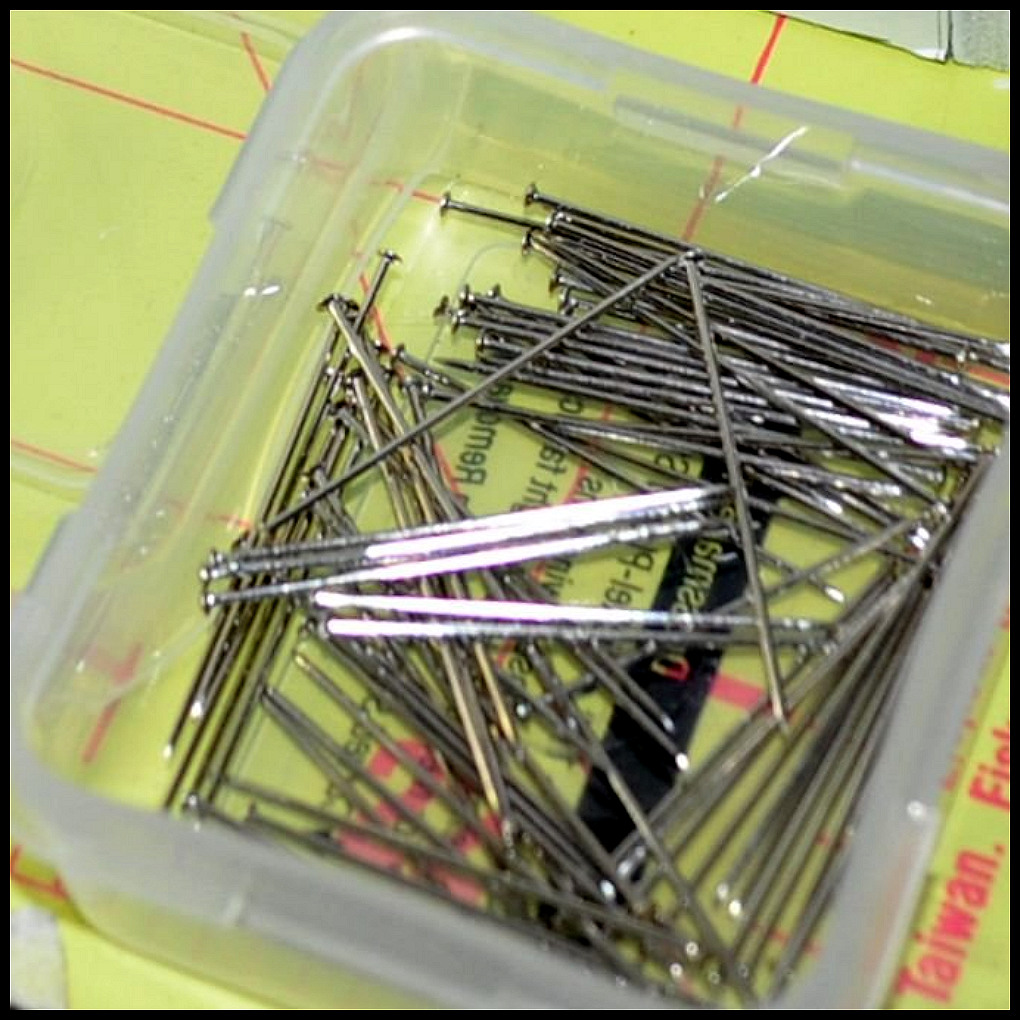
Sewing Pins - Flat Head
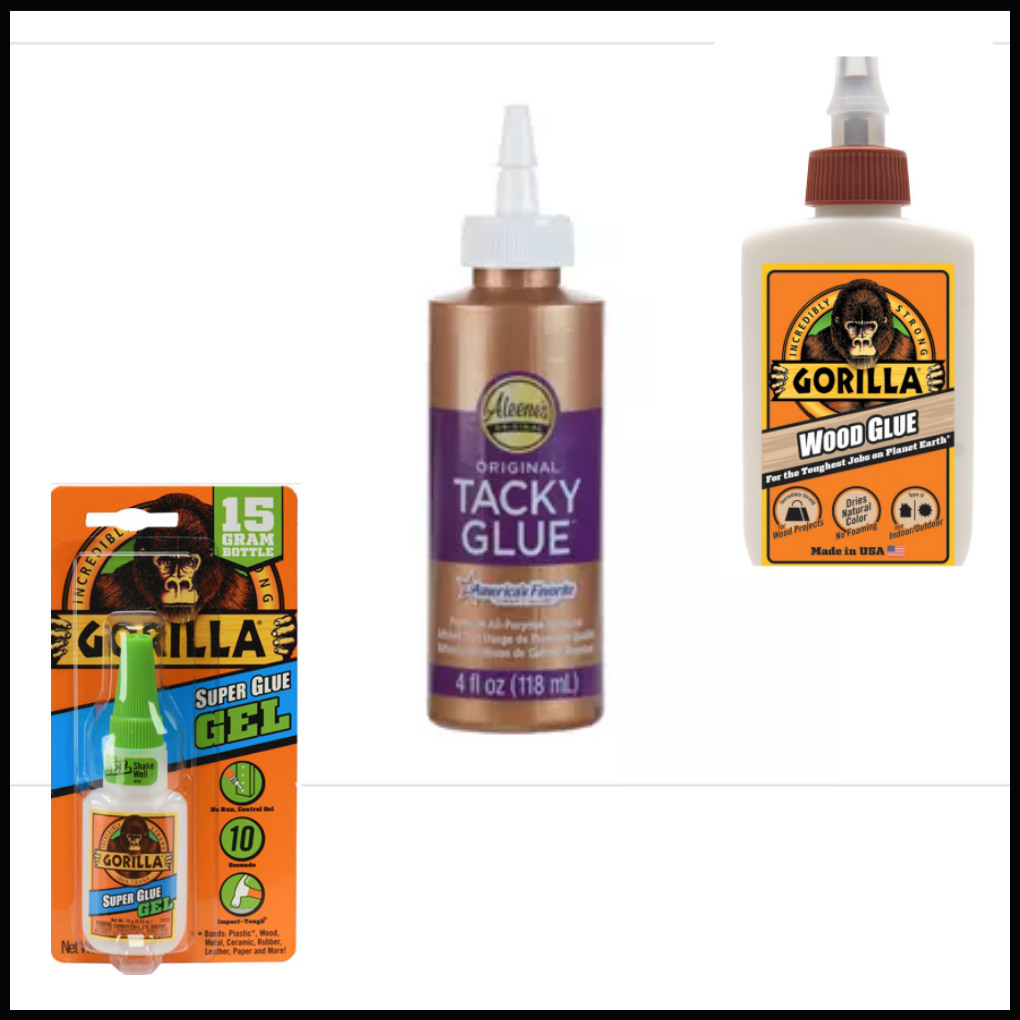
Glue
Bath/Kitchen Tiles
Acrylic Paint
KITCHEN #1
My first attempt at building a kitchen provided a lot of failures and a solid foundation for what to do for my next kitchen builds. During this build, I hadn’t discovered all the wonderful wood-grained contact paper, so wanting light wood cabinets I used balsa wood.
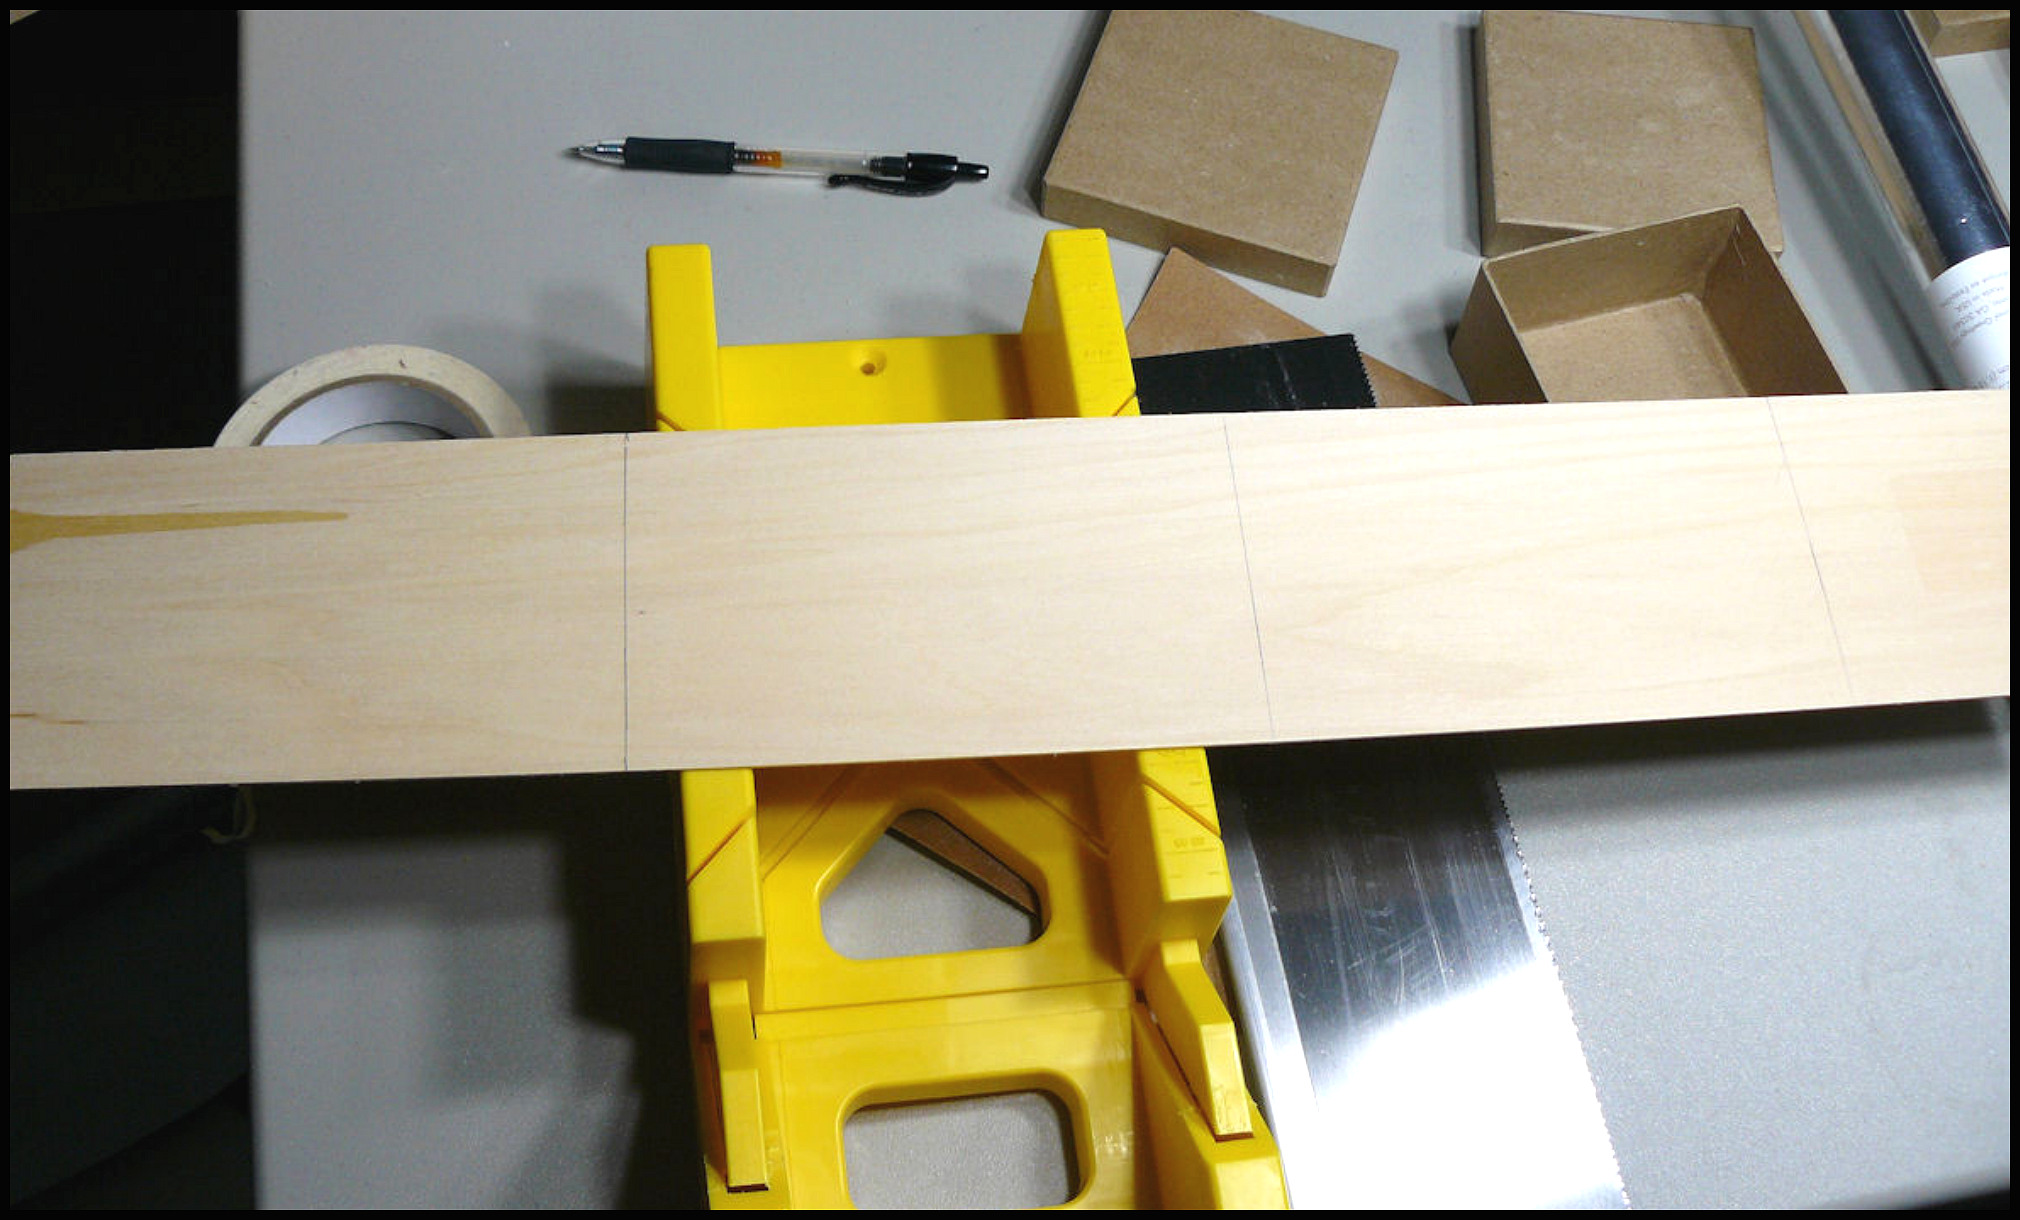
From the Home Depot hardware, I purchased a clamping miter box to saw large slats of thicker balsa wood into rectangles to create the cabinet doors and sides.
I didn’t have the space, or additional tools to glue these pieces together to make real wood cabinets. If you do, this is a cheap material to use, and easy to cut.
I taped mine to a cardboard doll box so I could take the entire thing down at after photographing it.
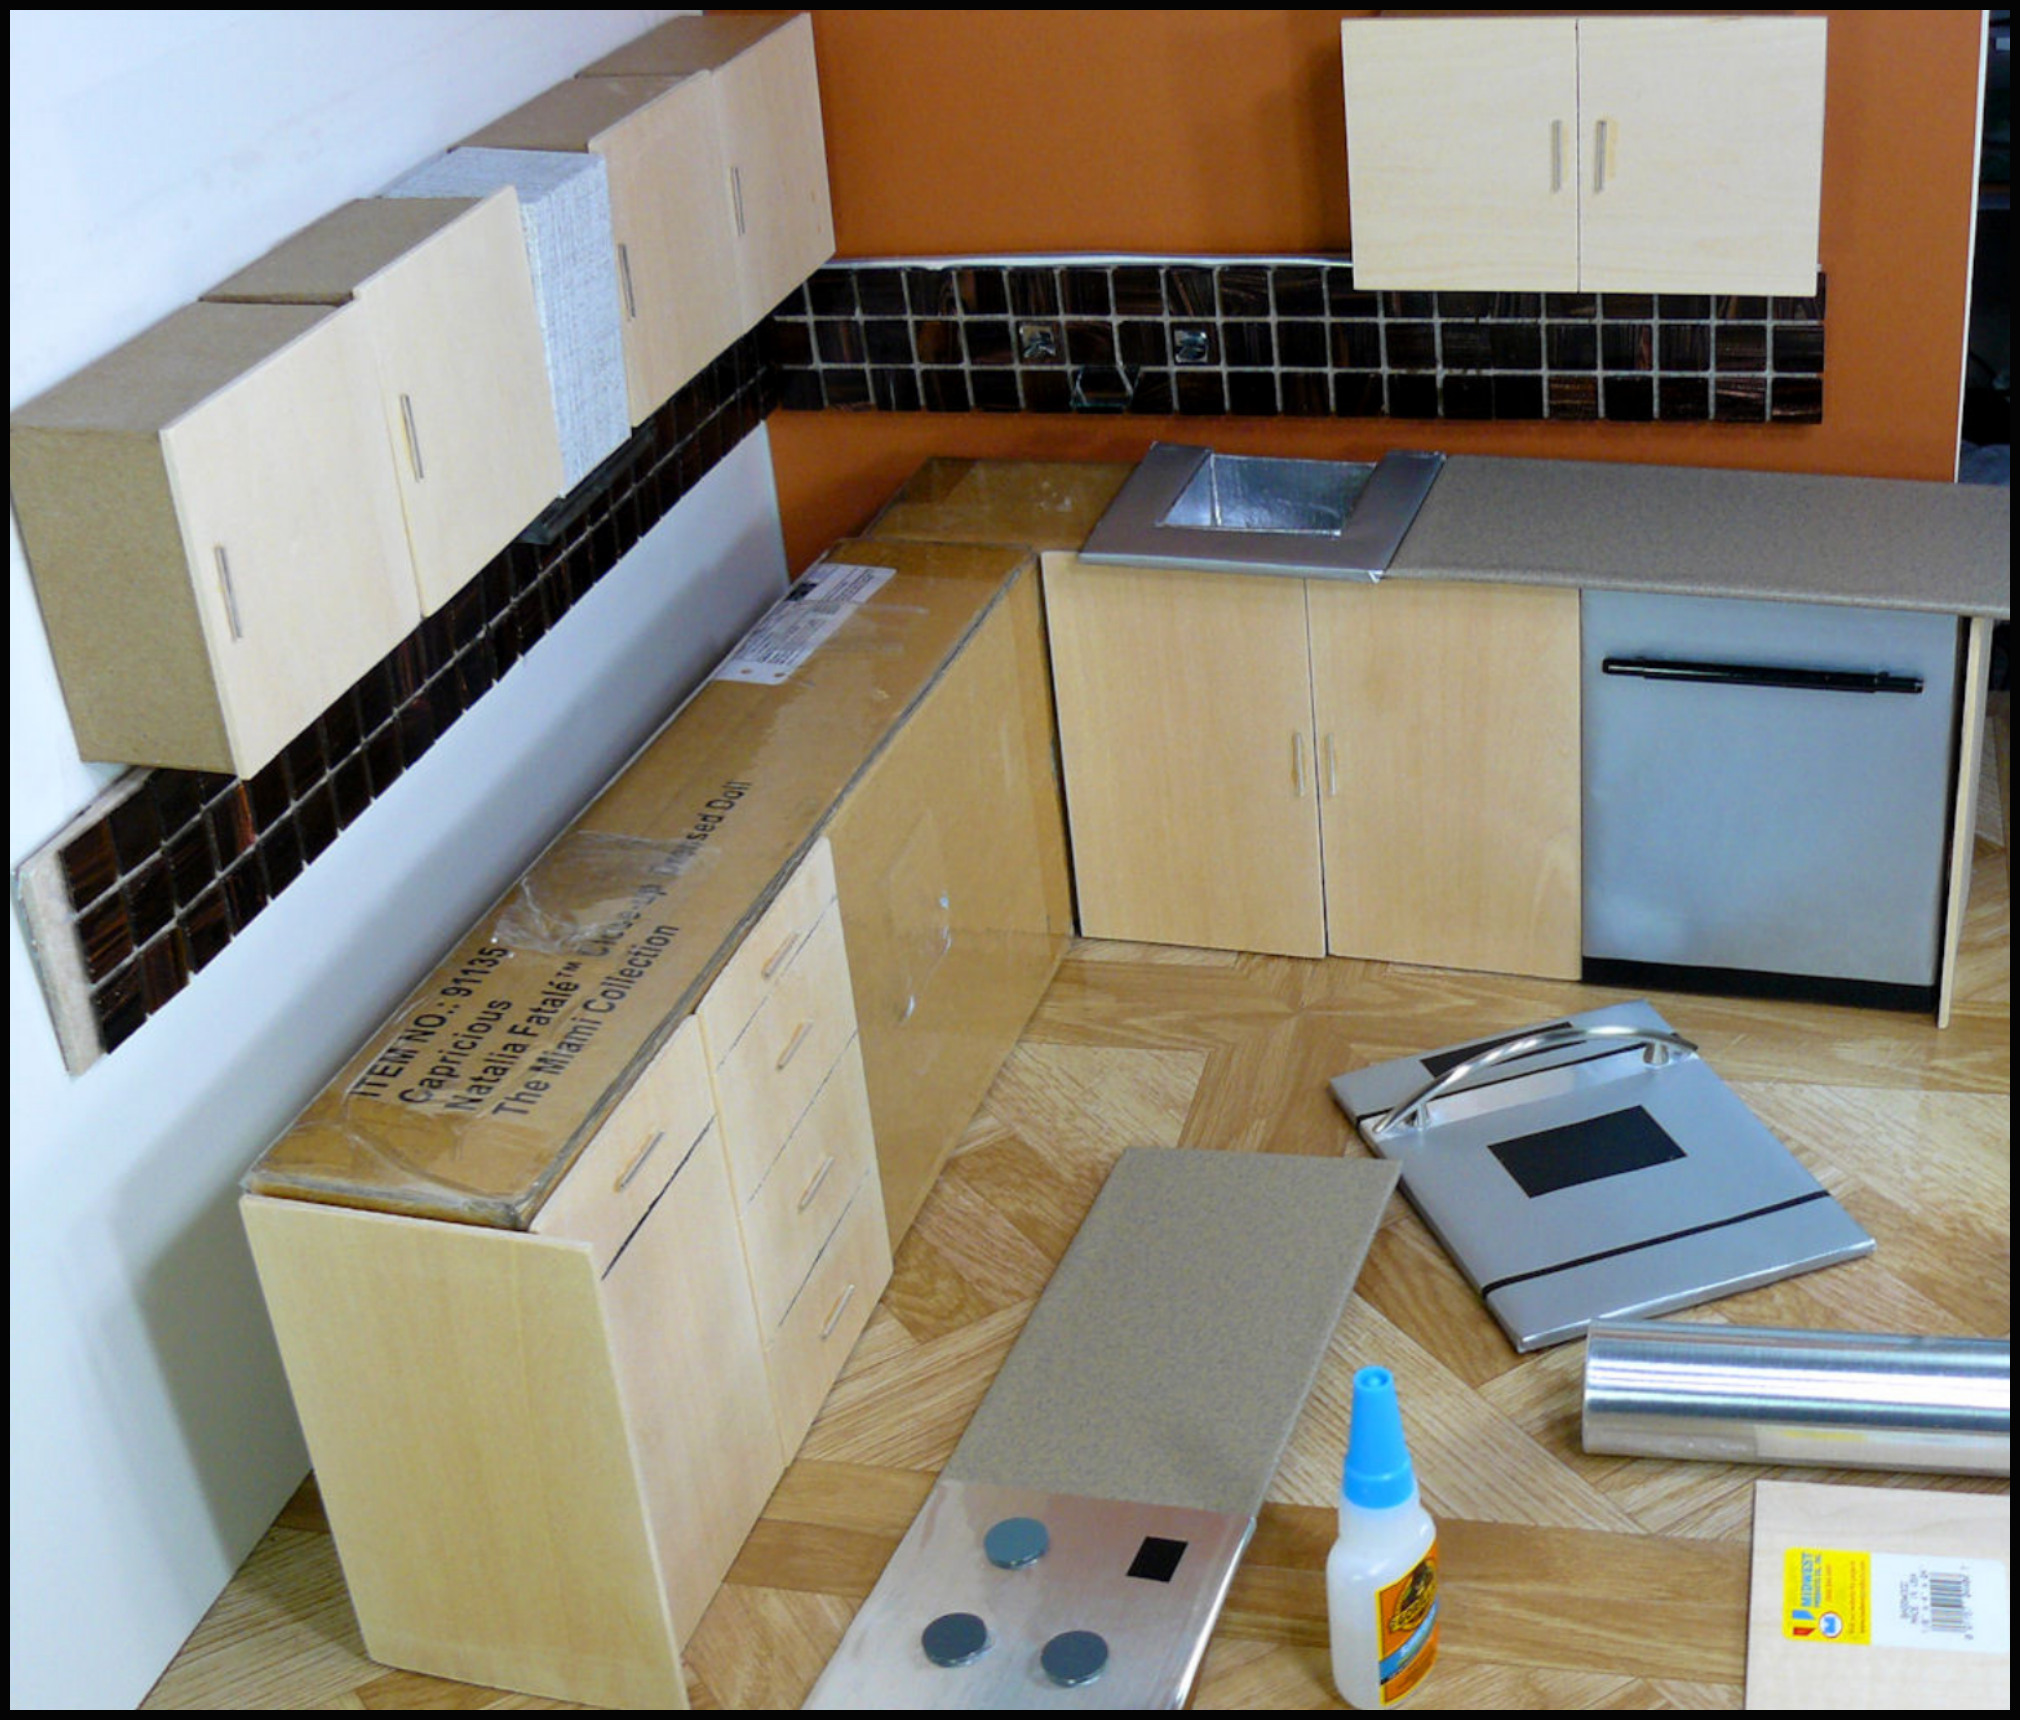
I used real bathroom tile on the walls, but glued to them to cut strips of foam board which made them visually too thick for this scale. Make sure to buy the flattest tile available to keep the 1/6 scale look, or use contact paper that looks like tile.
Thin jewelry bead stems were glued tot he wood to look like drawer pulls.
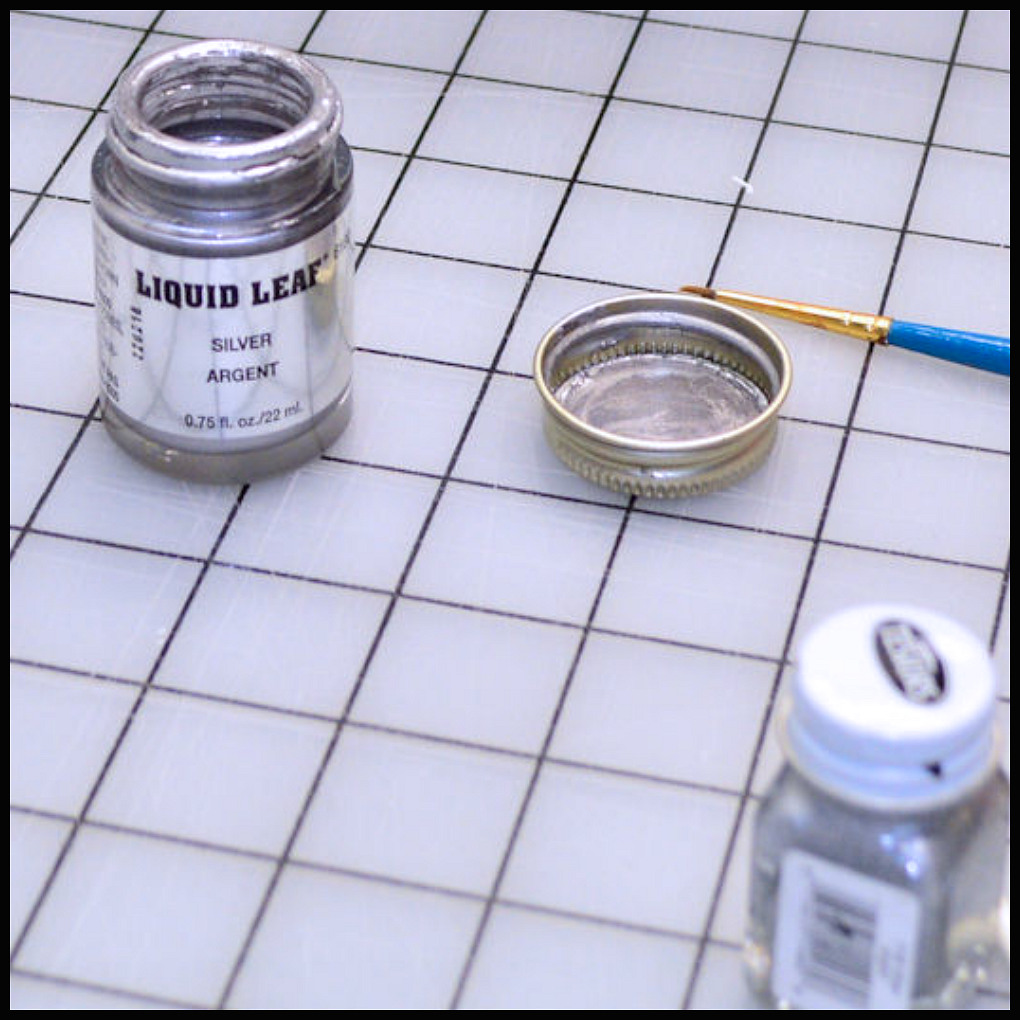
The sink was a cardboard box painted silver with leaf silver paint. It’s surrounded by a ‘U’ shaped piece of foam board wrapped in silver wrapping paper. The facet is a tiny mirror square shoved in-between the tiles to stay put. The hot/cold knobs are jewelry beads.
The foam board for the oven front is wrapped in silver wrapping paper. I now use silver contact paper for appliances, as it looks more like stainless steel human-sized appliances. The handle is a kitchen drawer pull.
The stovetop has five tiny circle mirrors as the burners and black contact paper has been cut in small squares, rectangles and strips to make the stove look like a a human one.
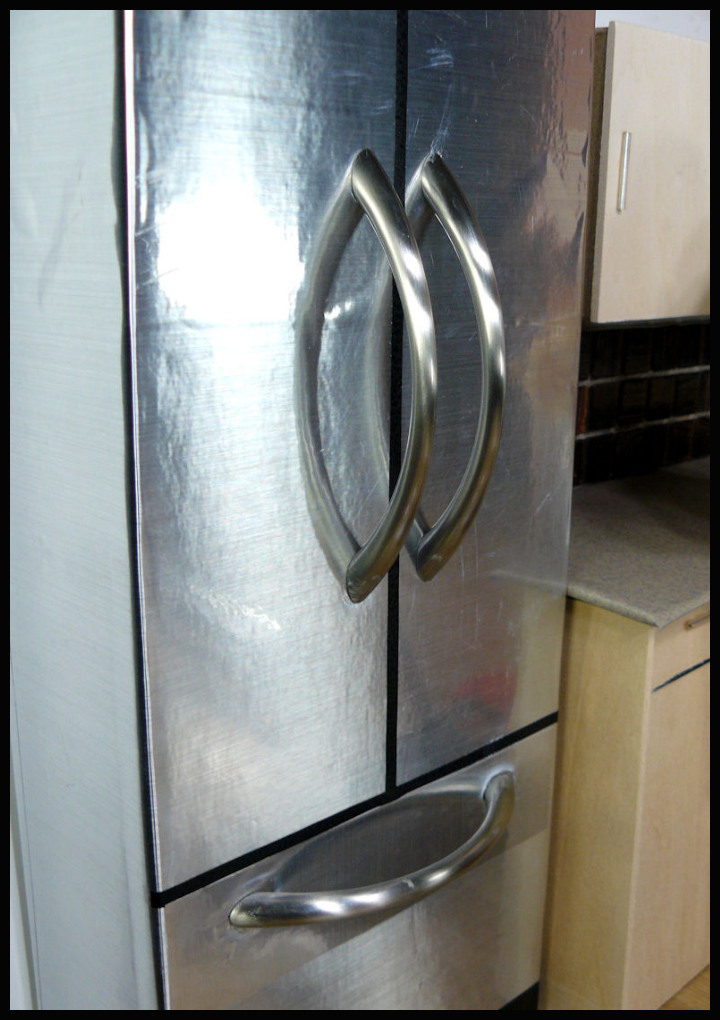
The refrigerator is a doll box I covered in silver contact paper and black strips of contact paper. There are three drawer pulls glued onto it that continuually fell off since they weren’t dug into the cardboard and weigh too much. Find pulls that have a stem sticking out each end that can be shoved into the board they’re being applied to.
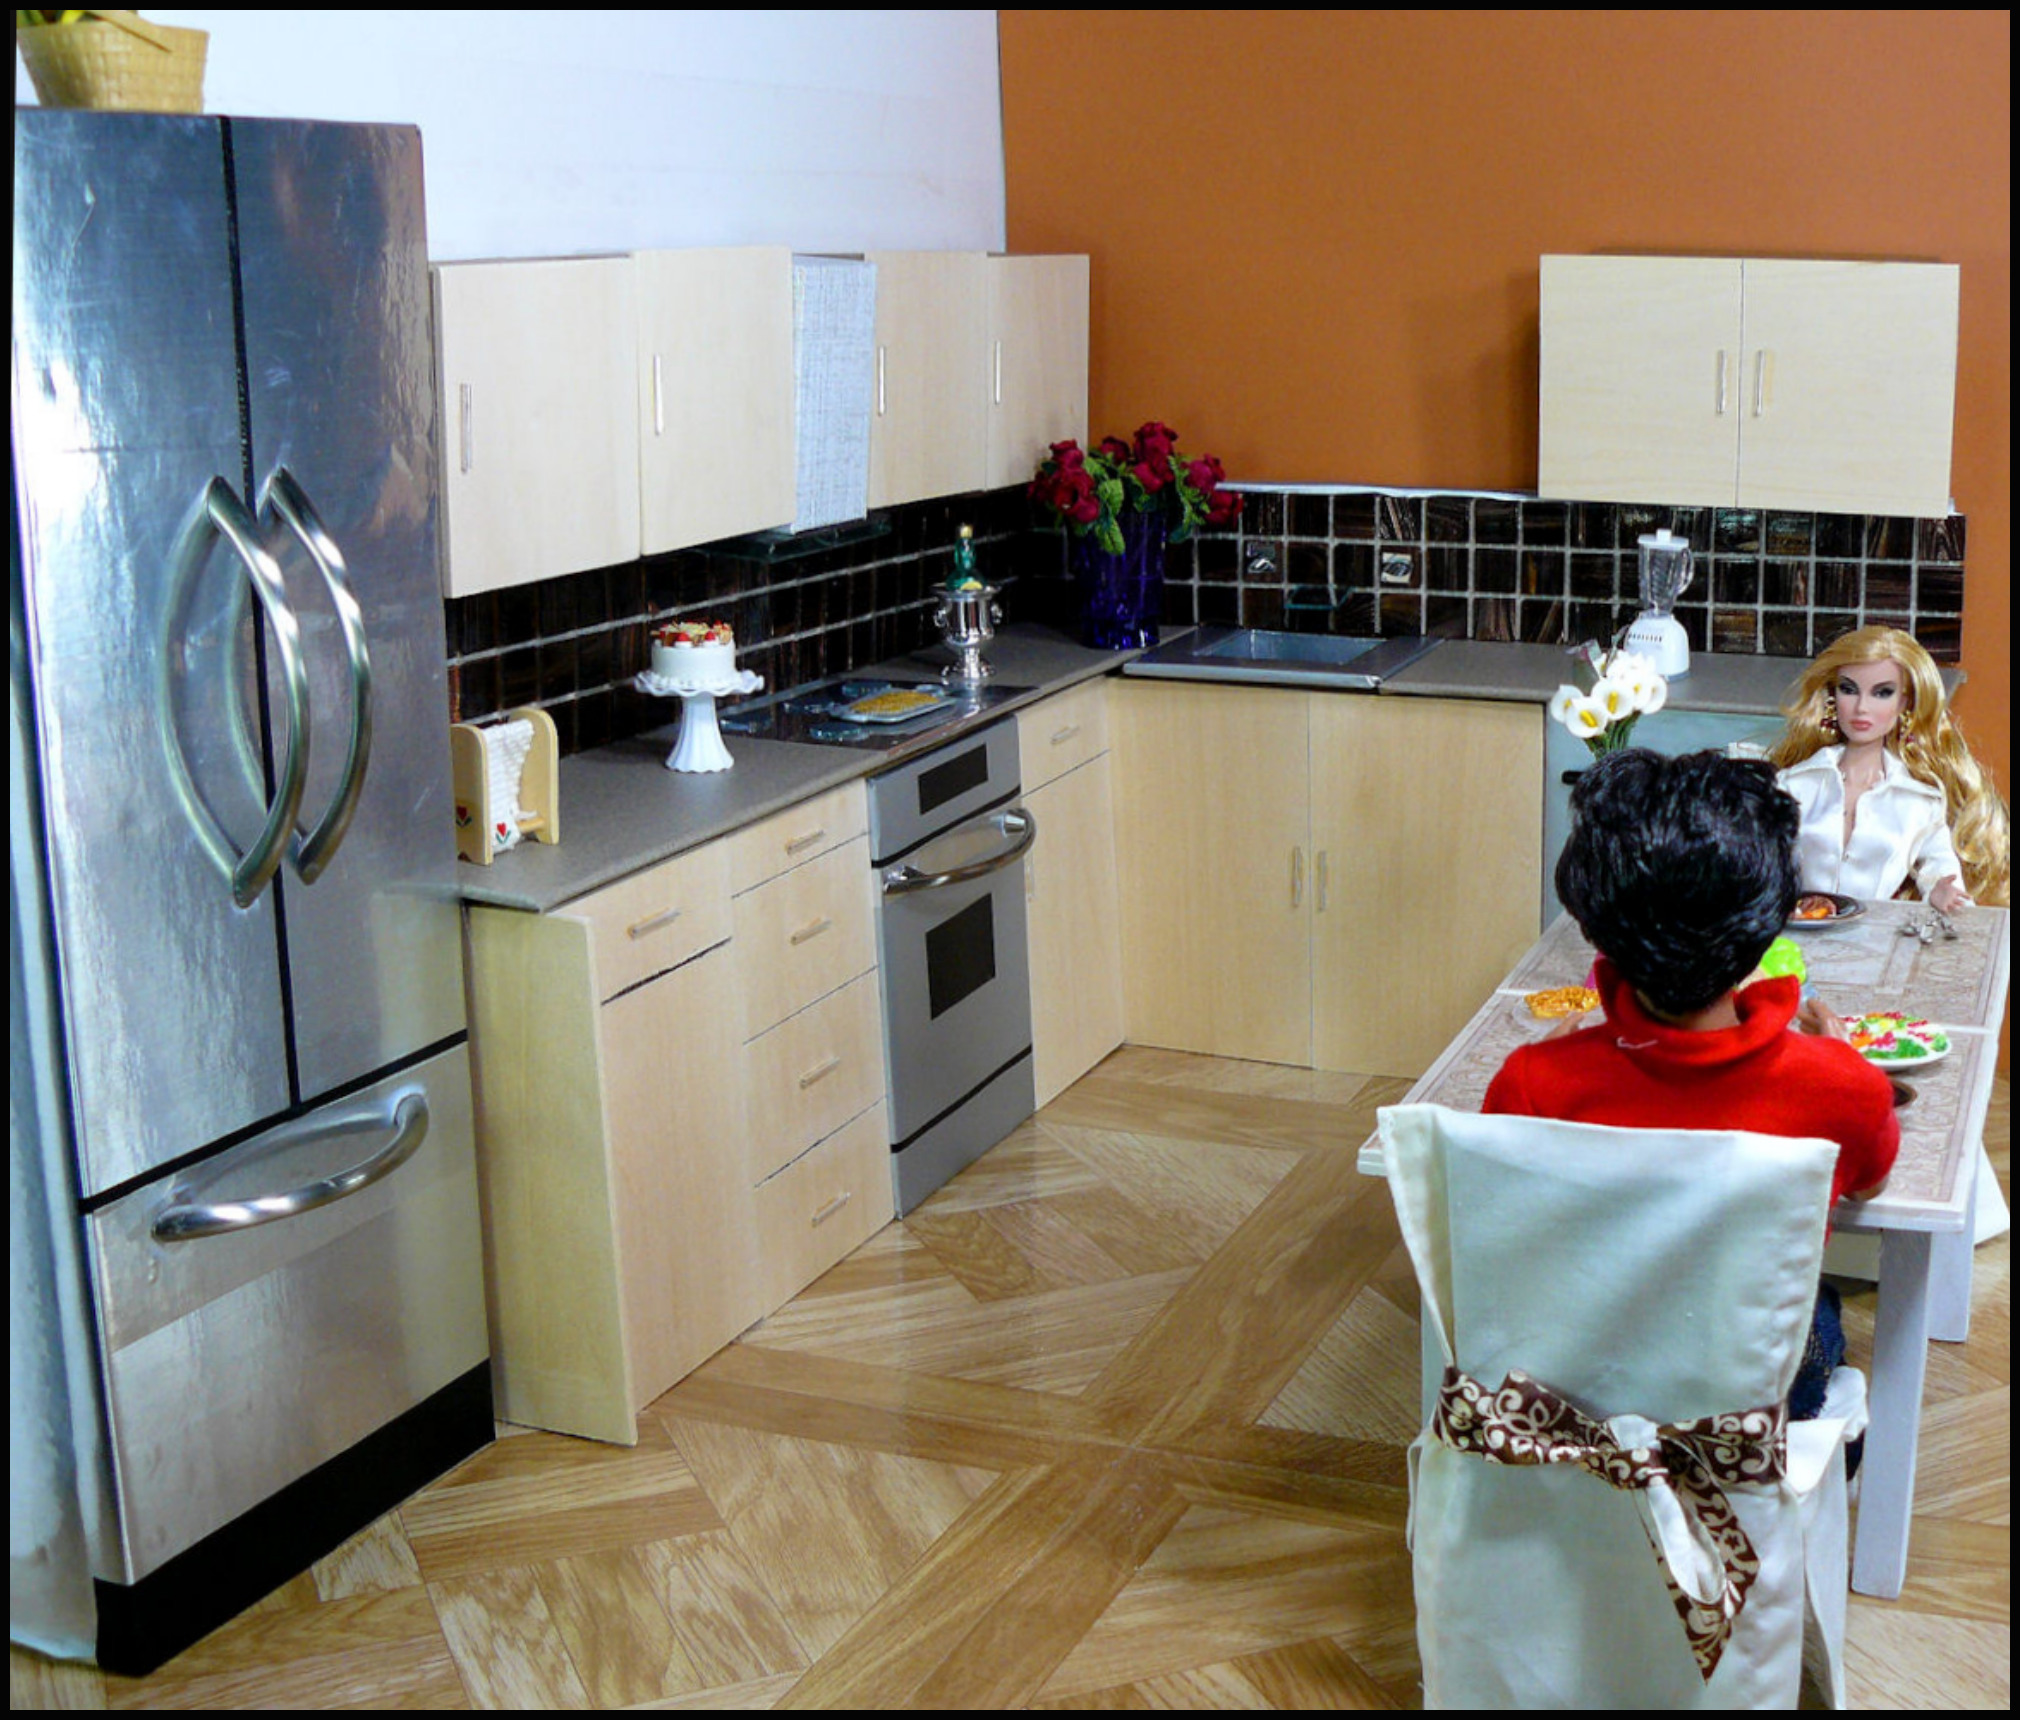
This kitchen looks sophomoric and the cabinets look cheap, but it taught me a lot about how to make my next kitchen.
I’ve learned all my diorama building skills by trial and error. It’s the best way to determine what can be done and what works best for you.
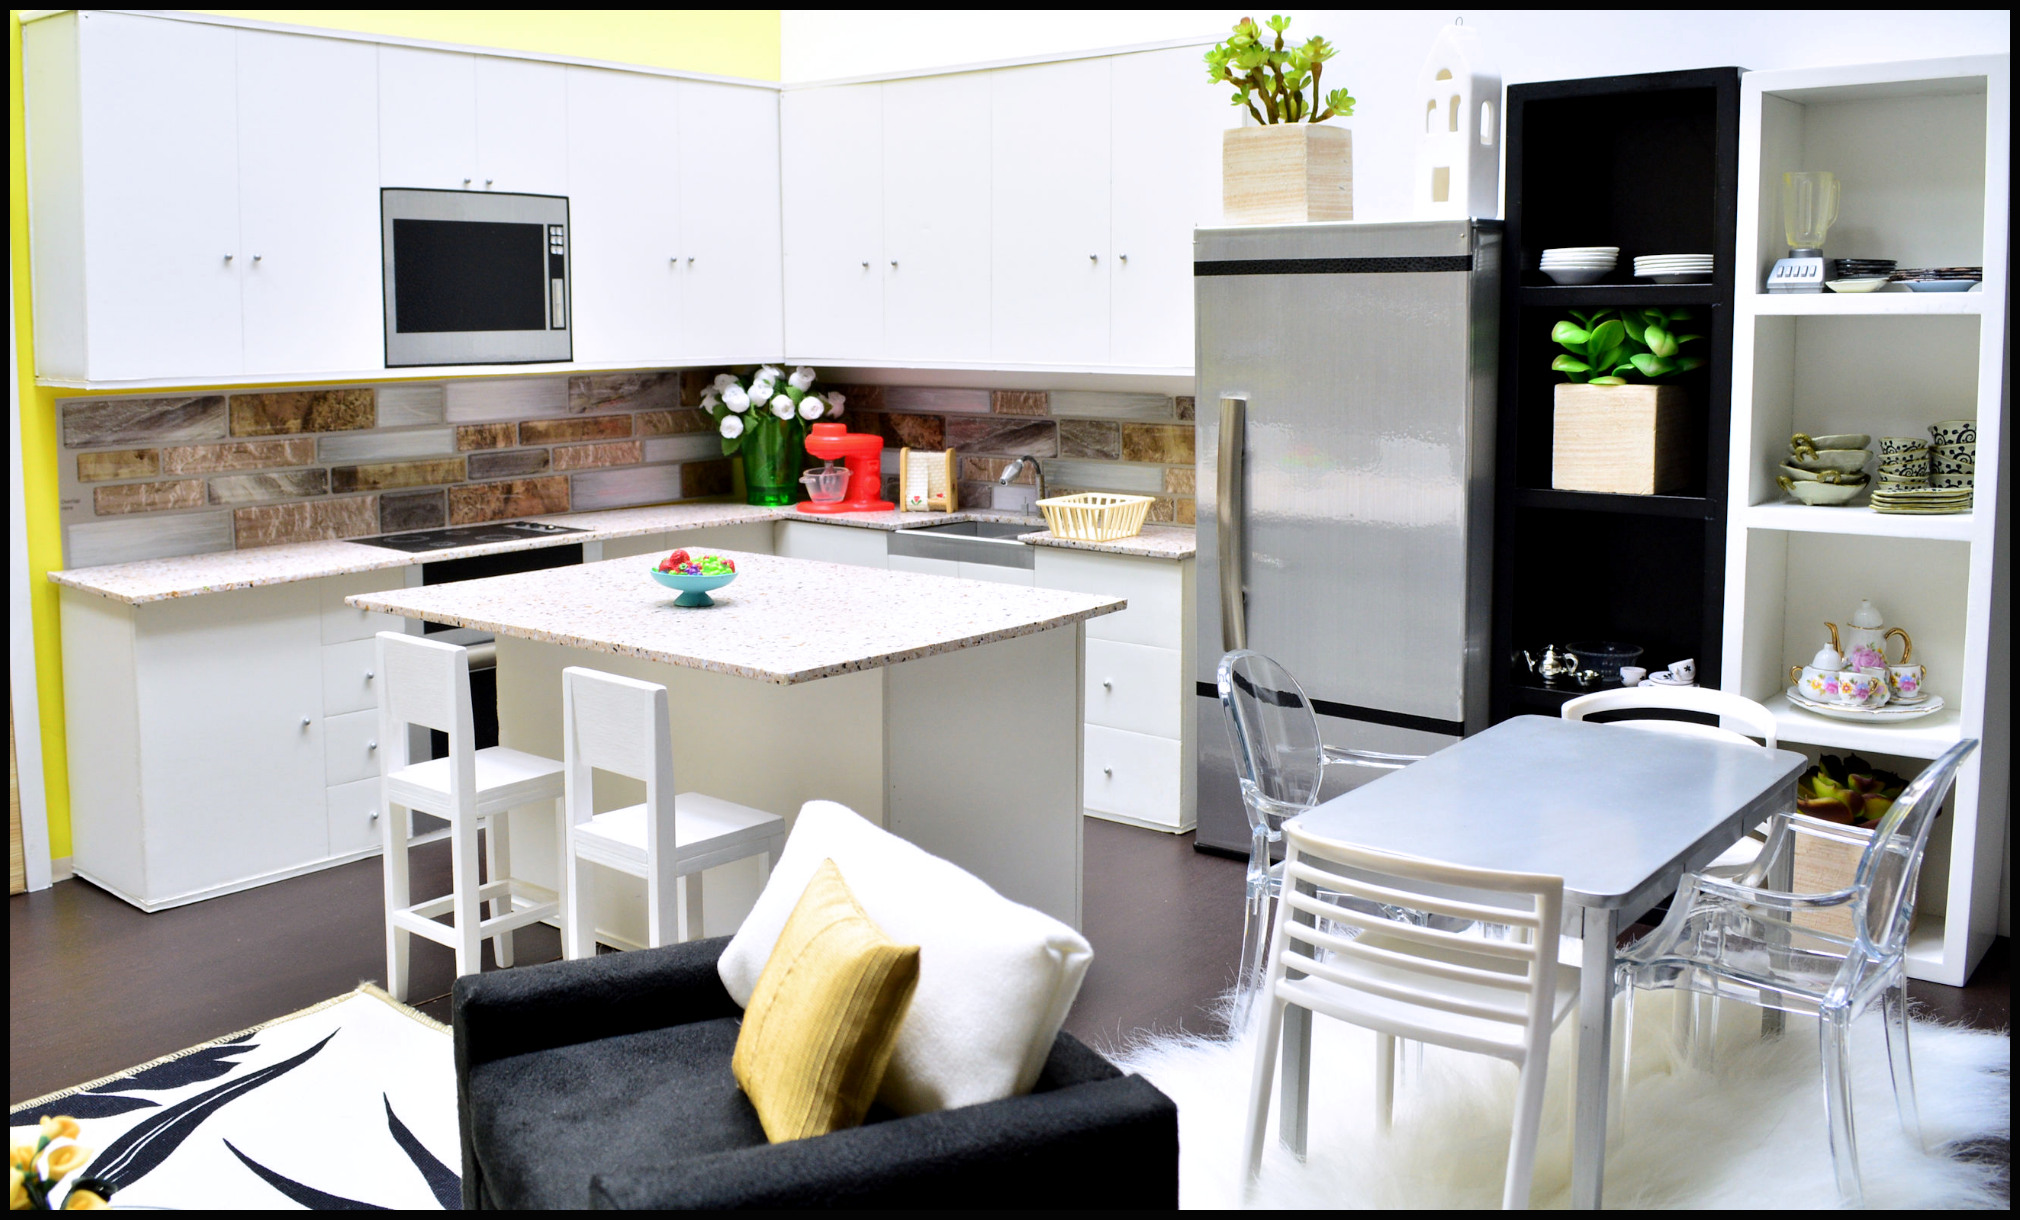
KITCHEN #2
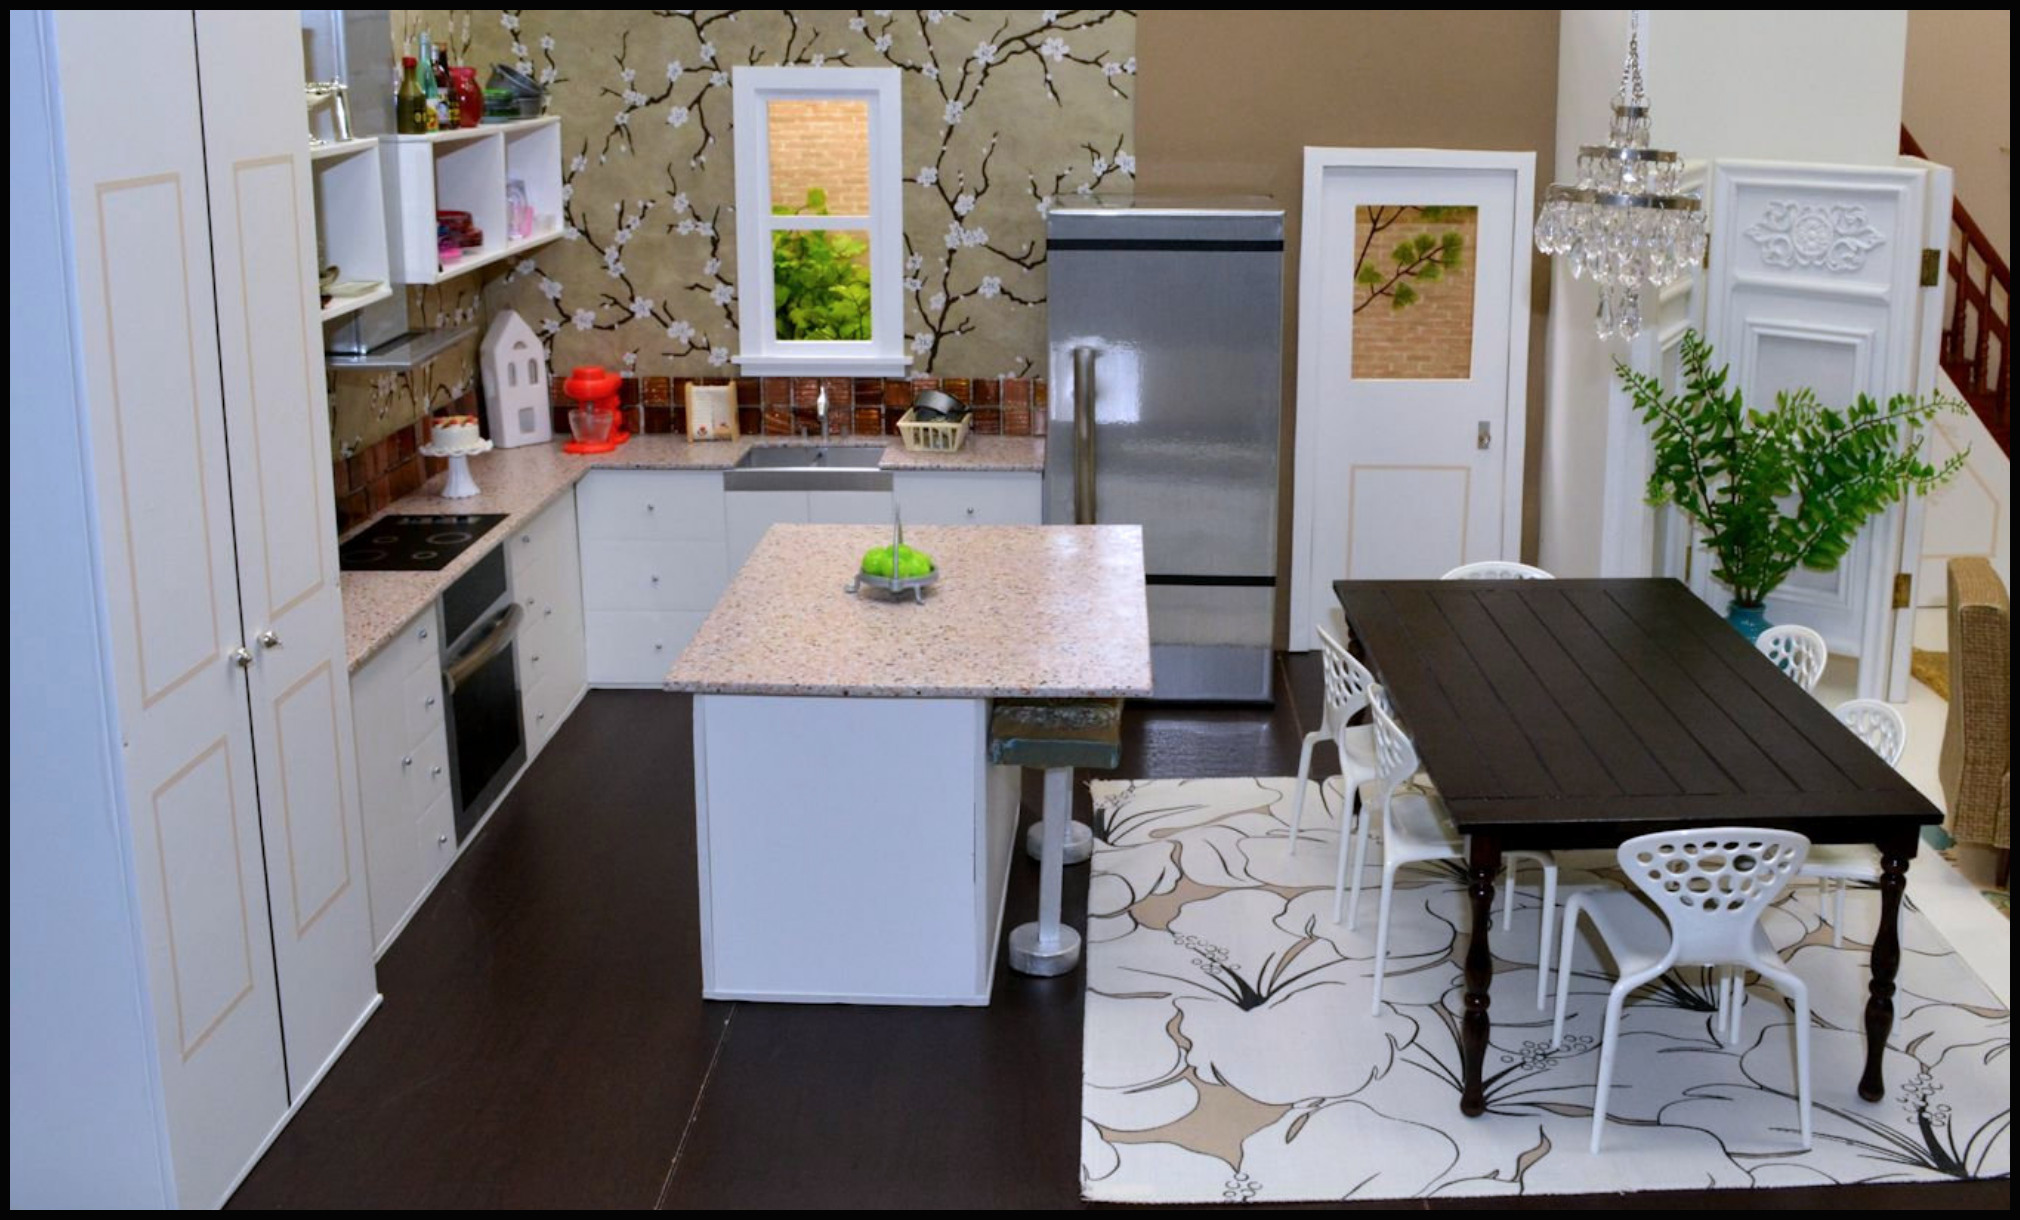
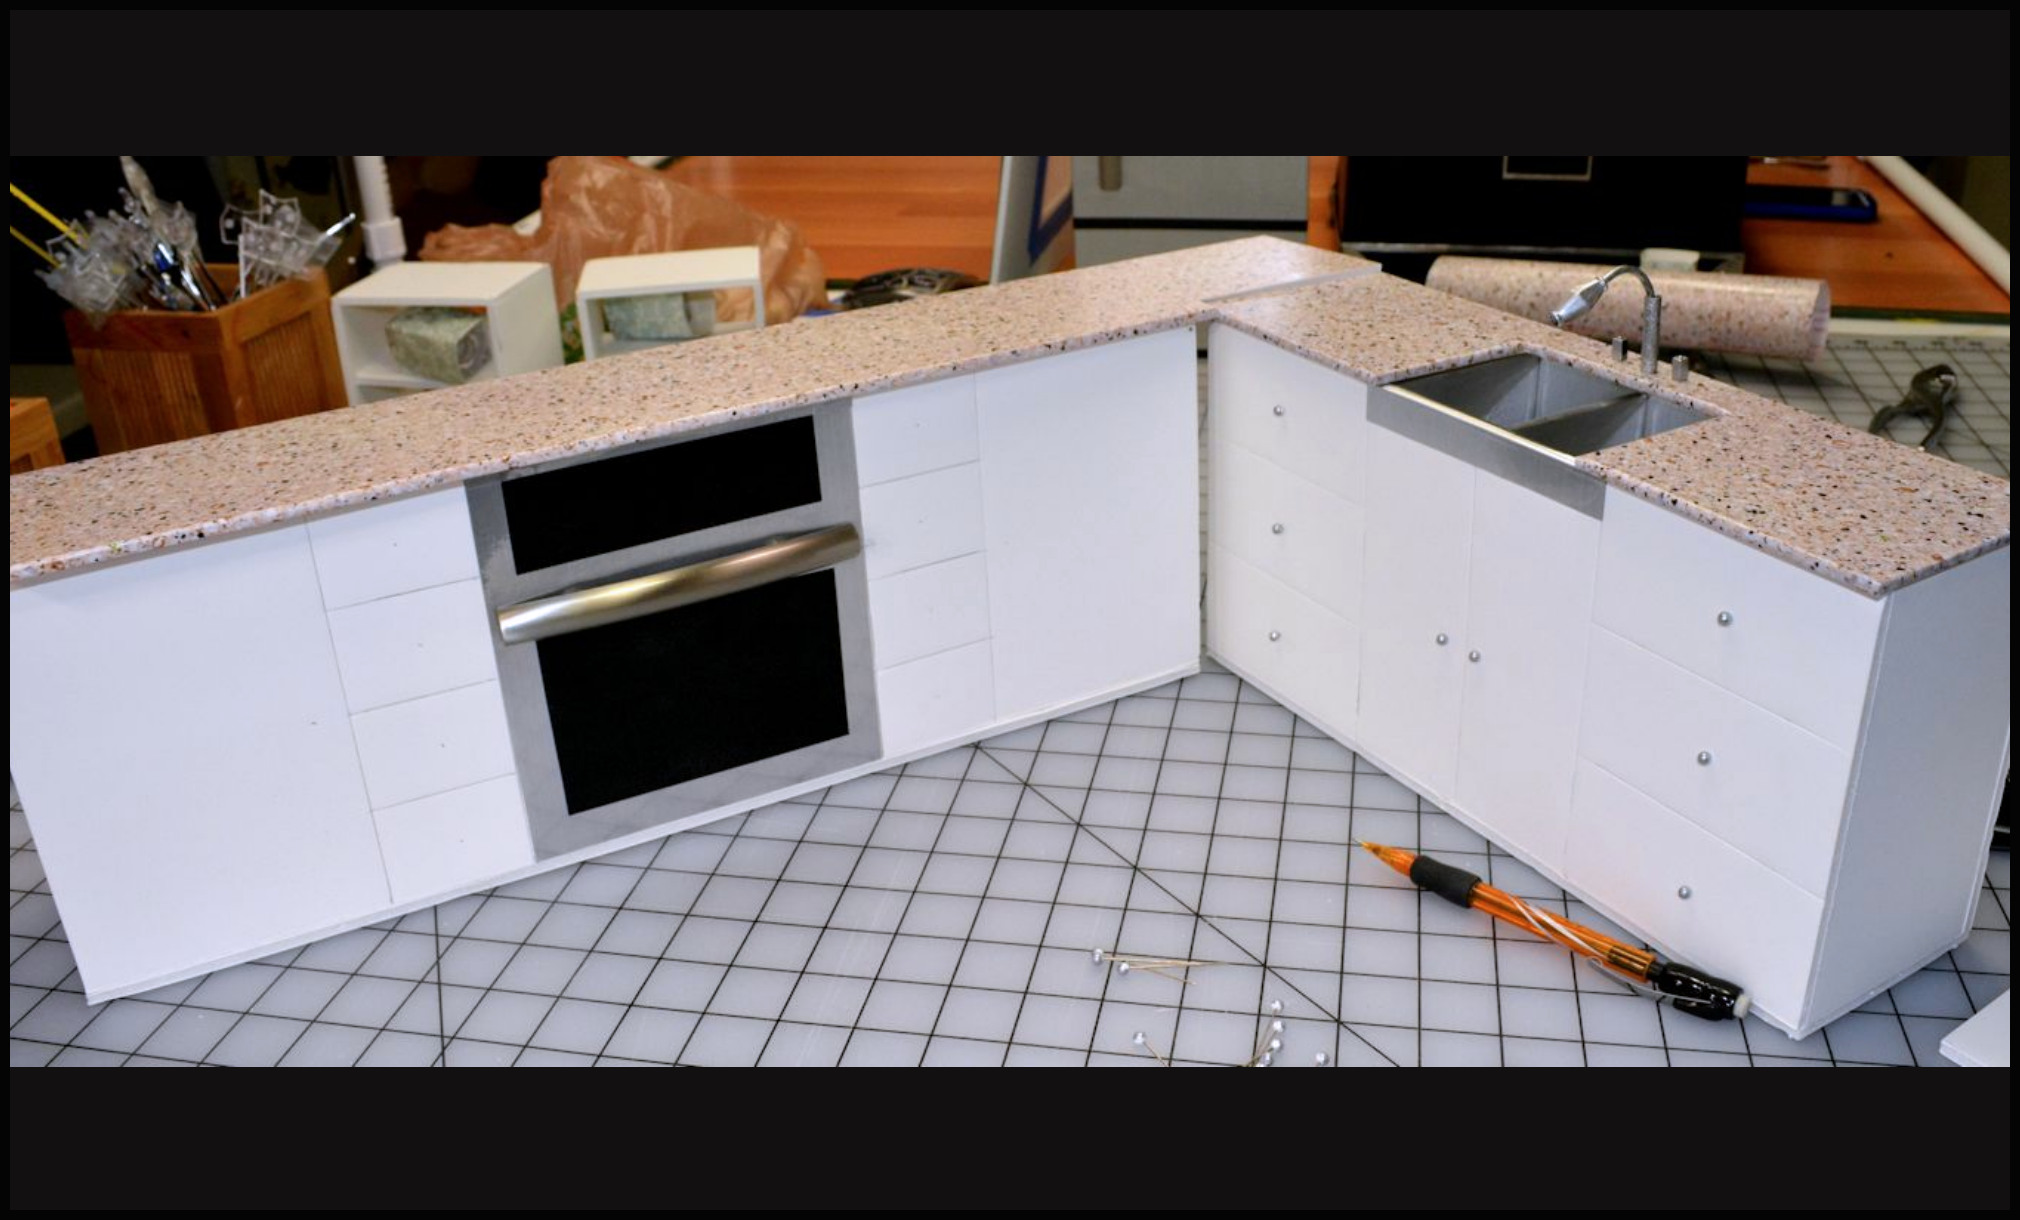
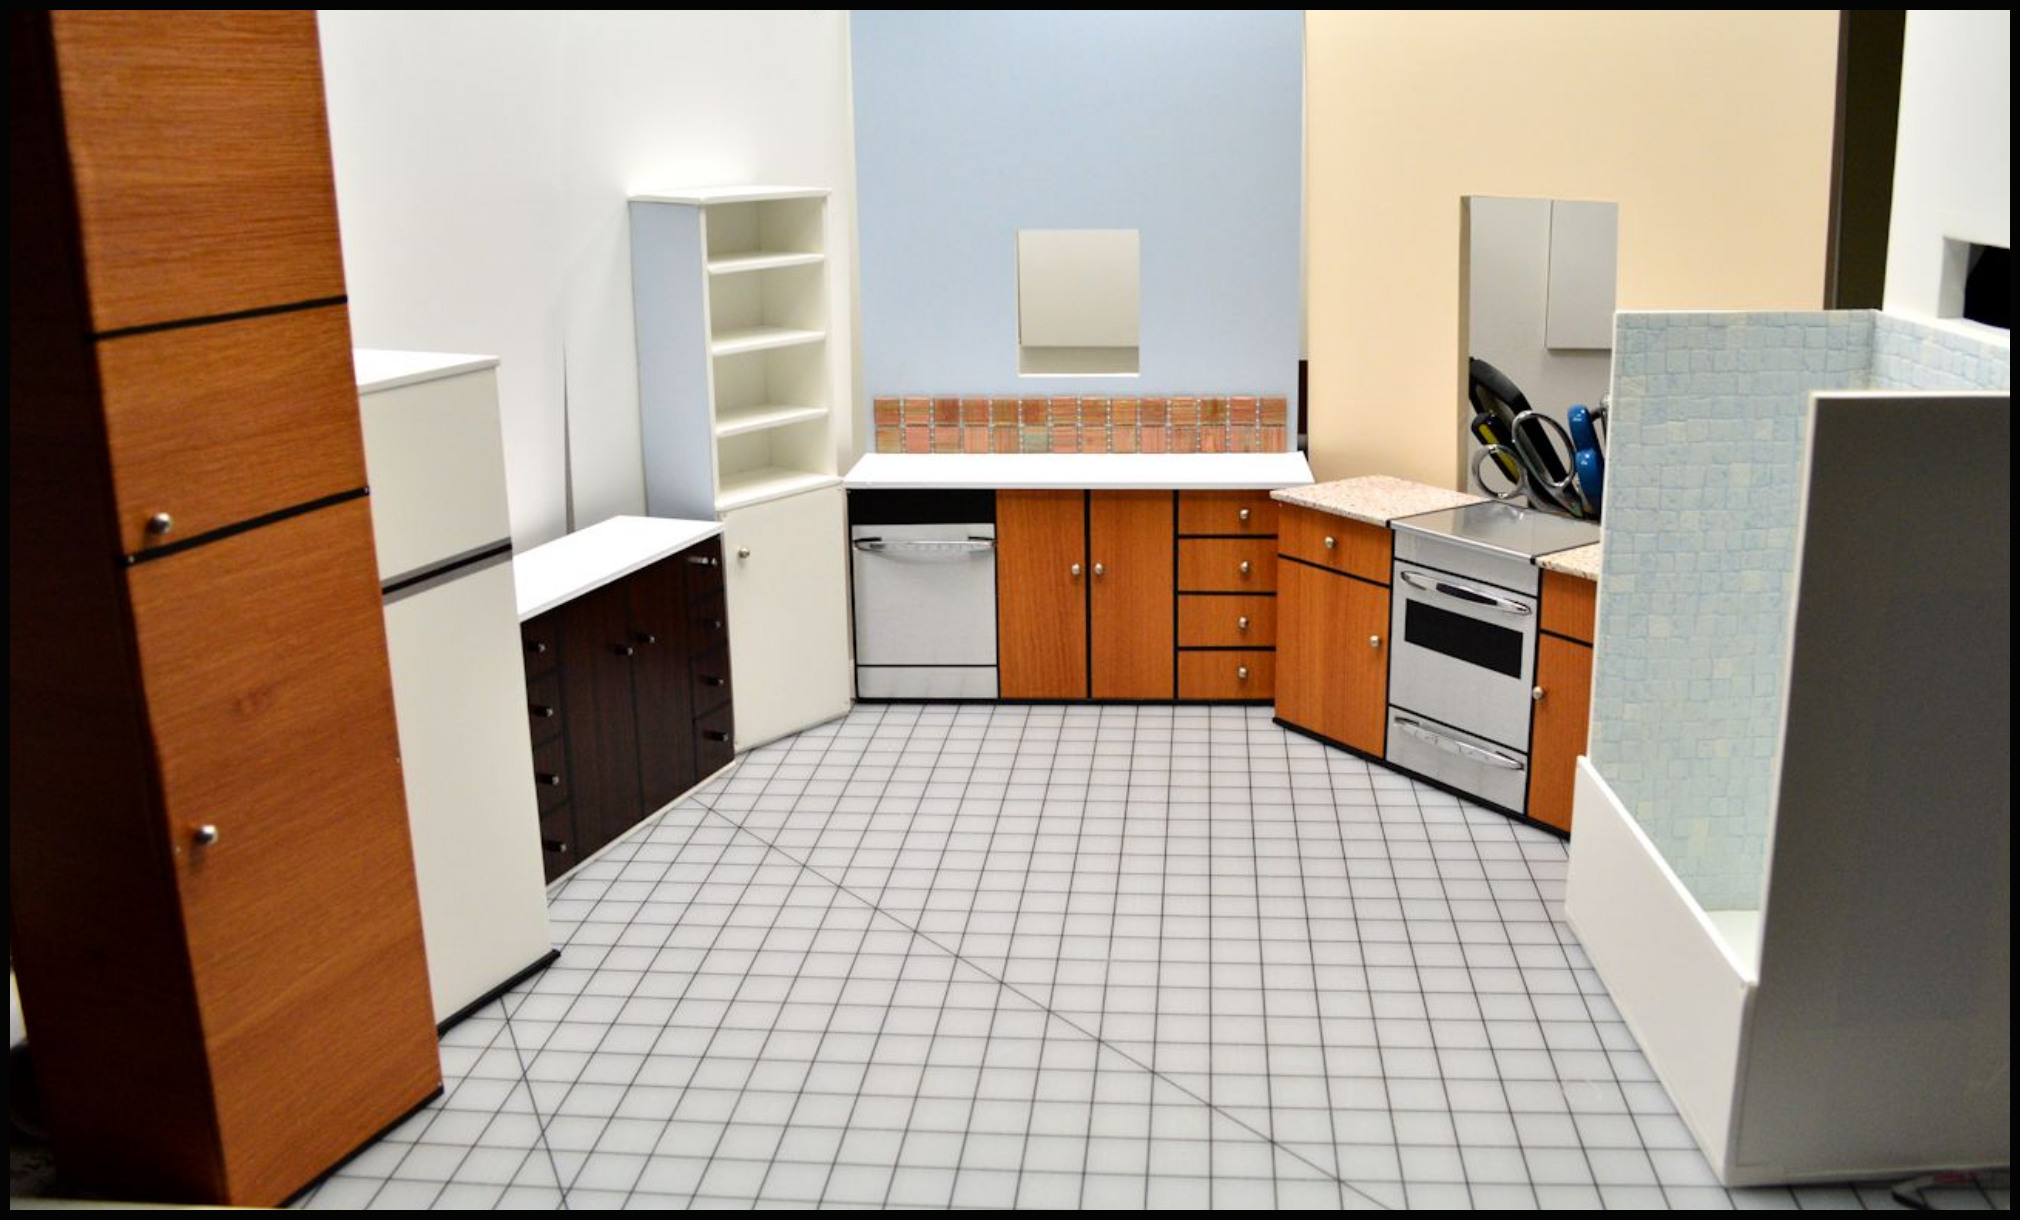
The second kitchen I made was completely constructed of white 1/4″ foam board. I wanted a white kitchen and decided not to cover the foam board with any contact paper.
Two connecting counters, a pantry closet, a new Refridgerator and an island were built.
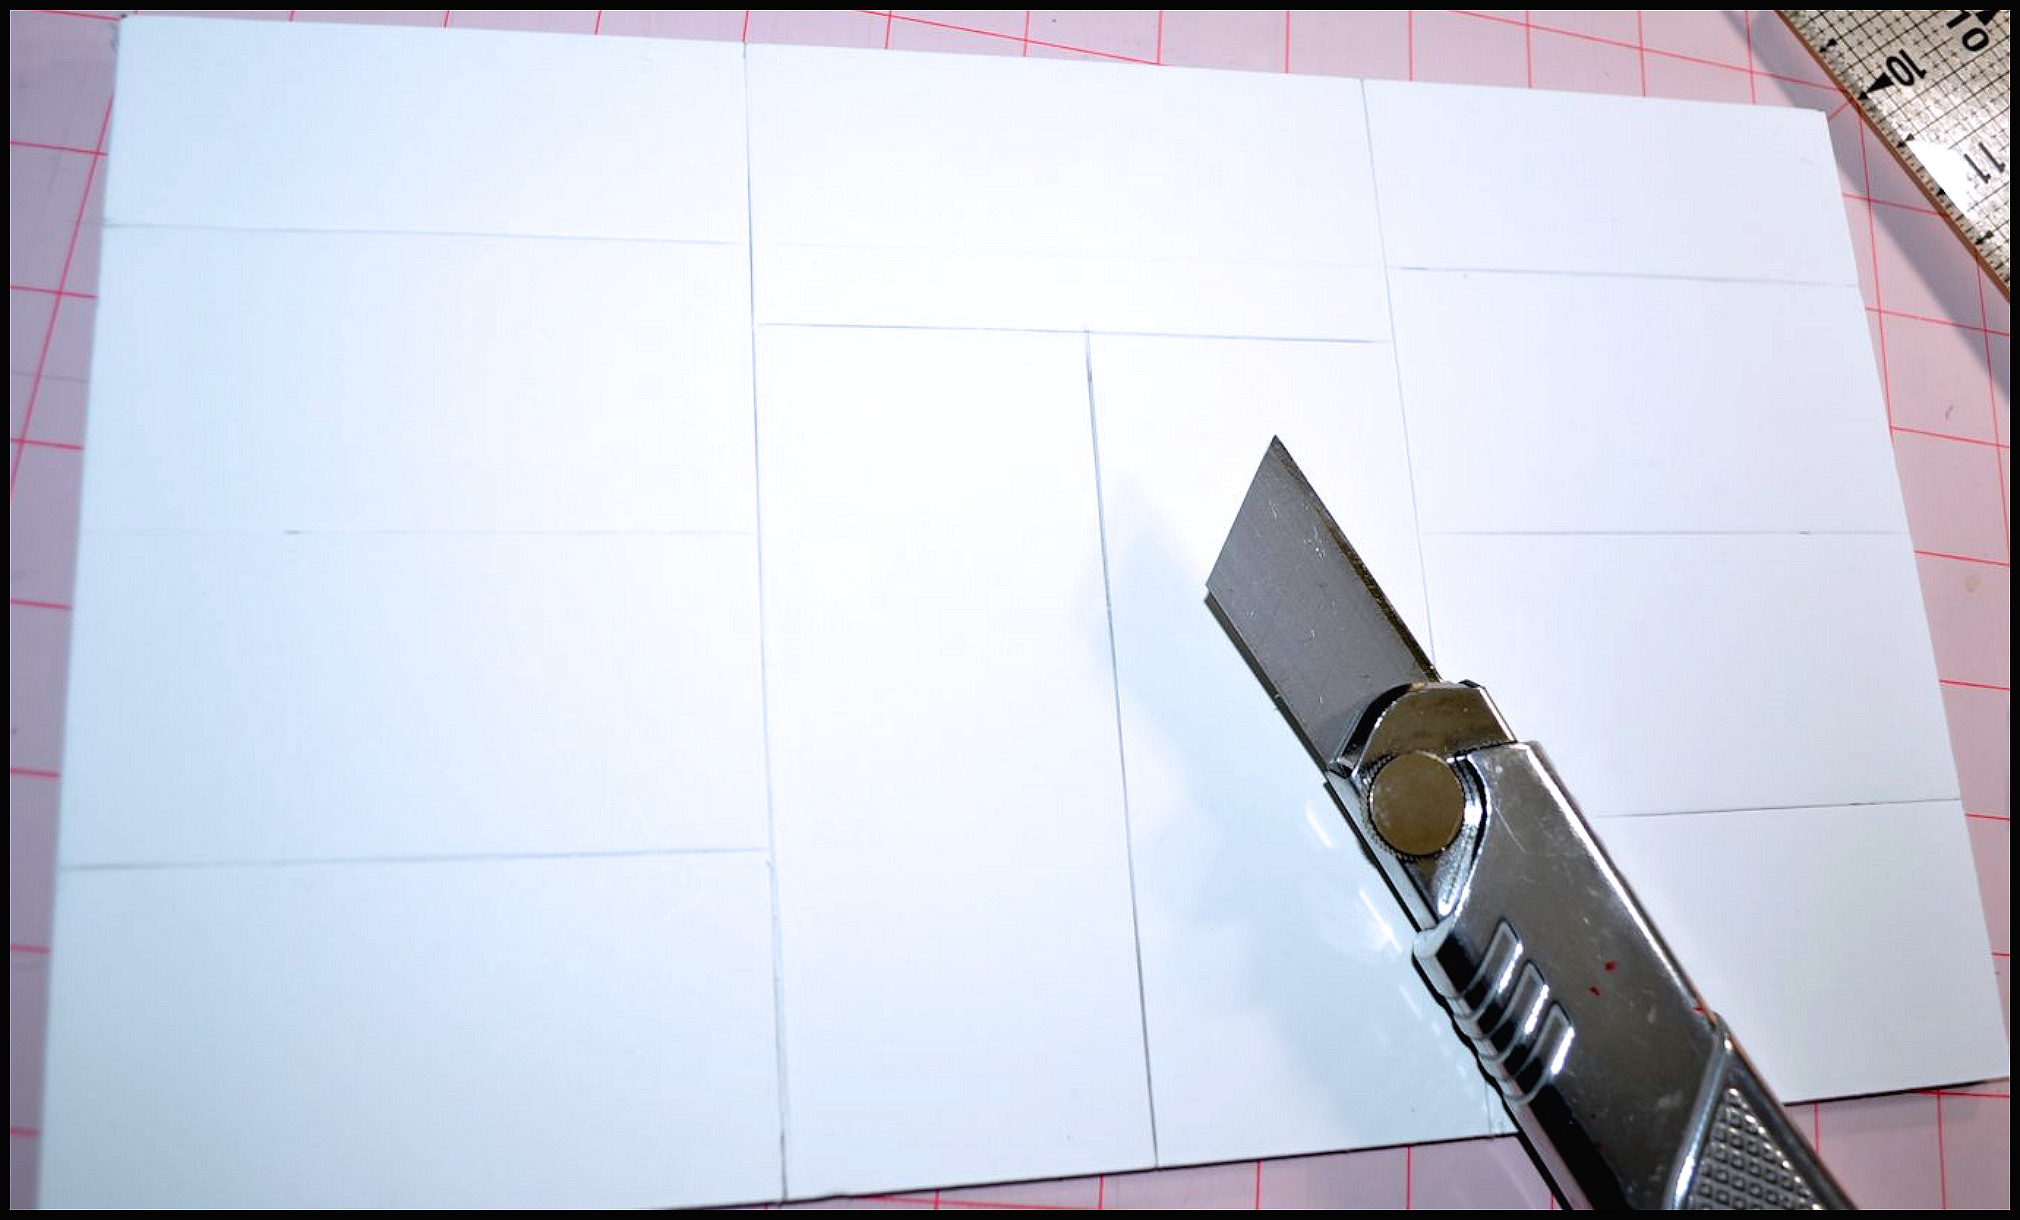
The cabinet doors or drawers would not be opening, so lines to separate them were cut into the board to give it a more 3-D look.
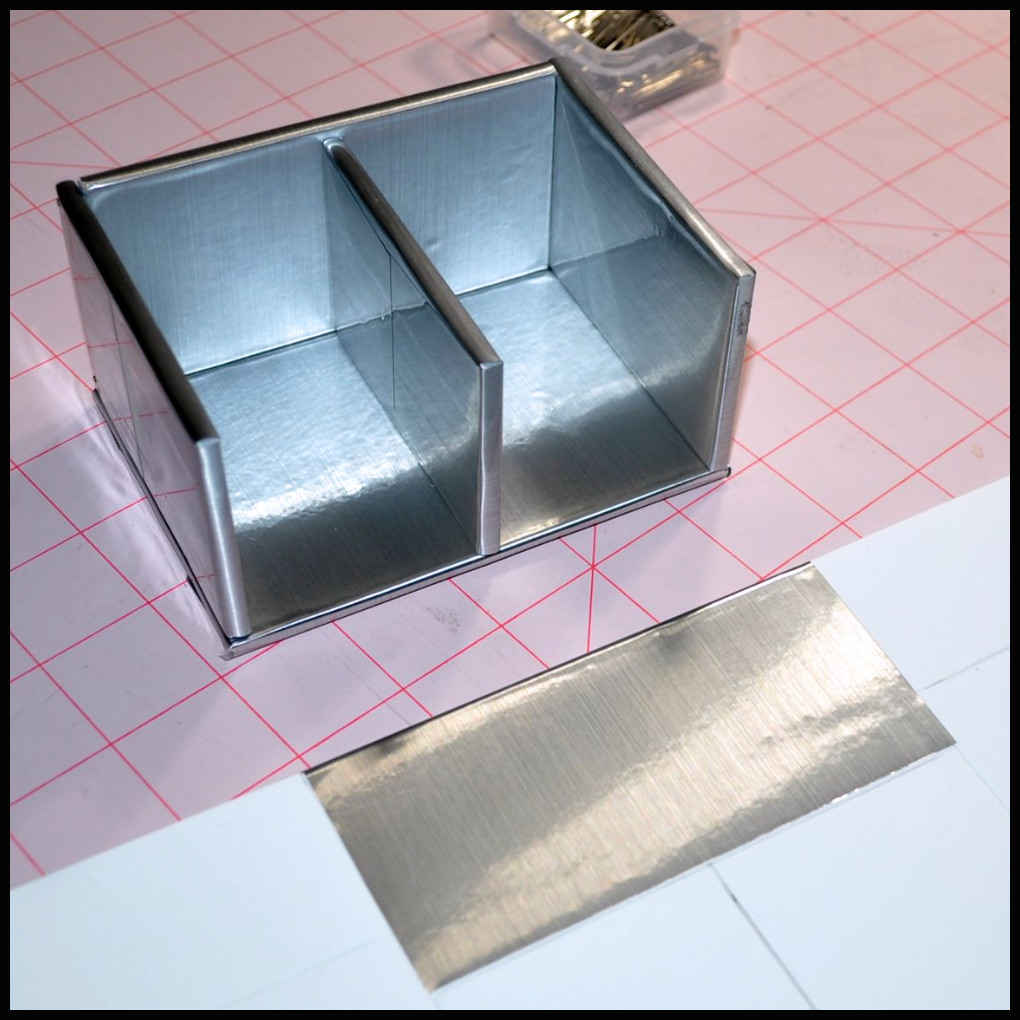
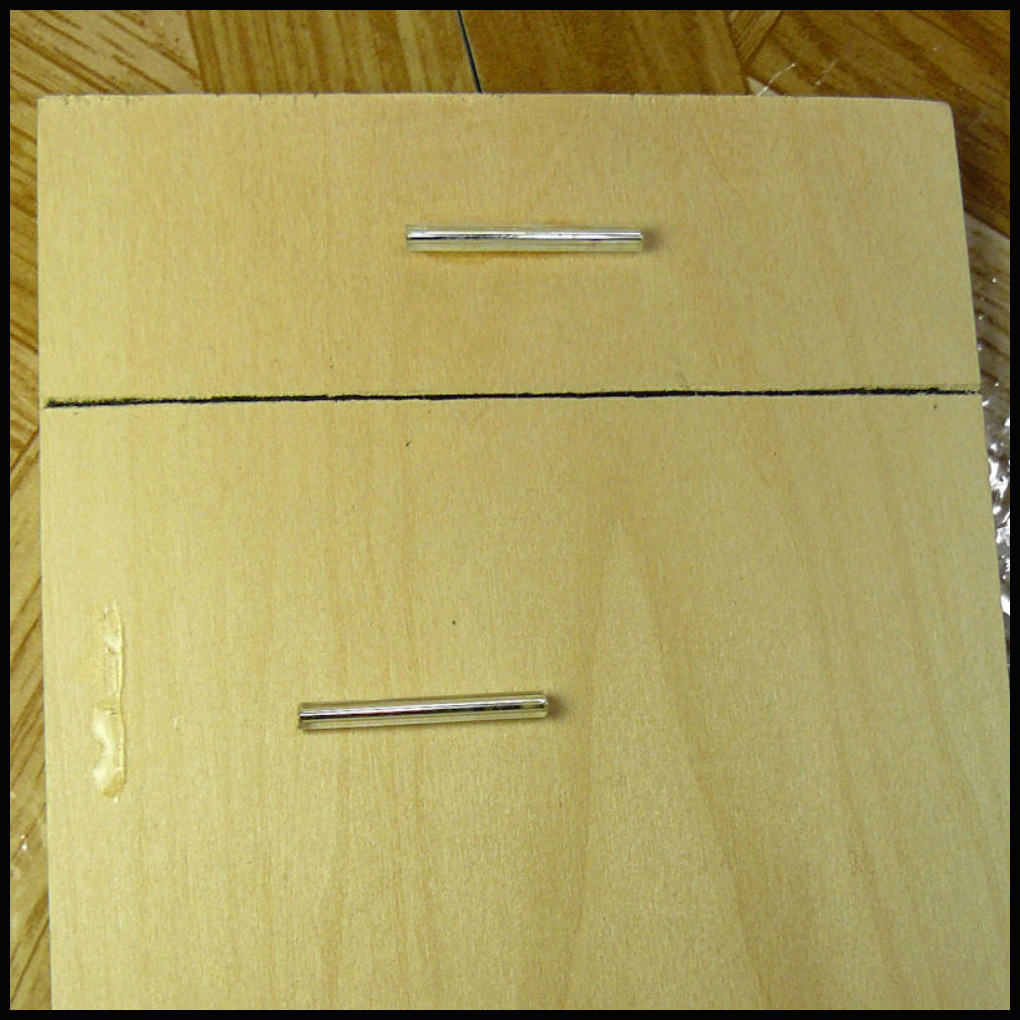
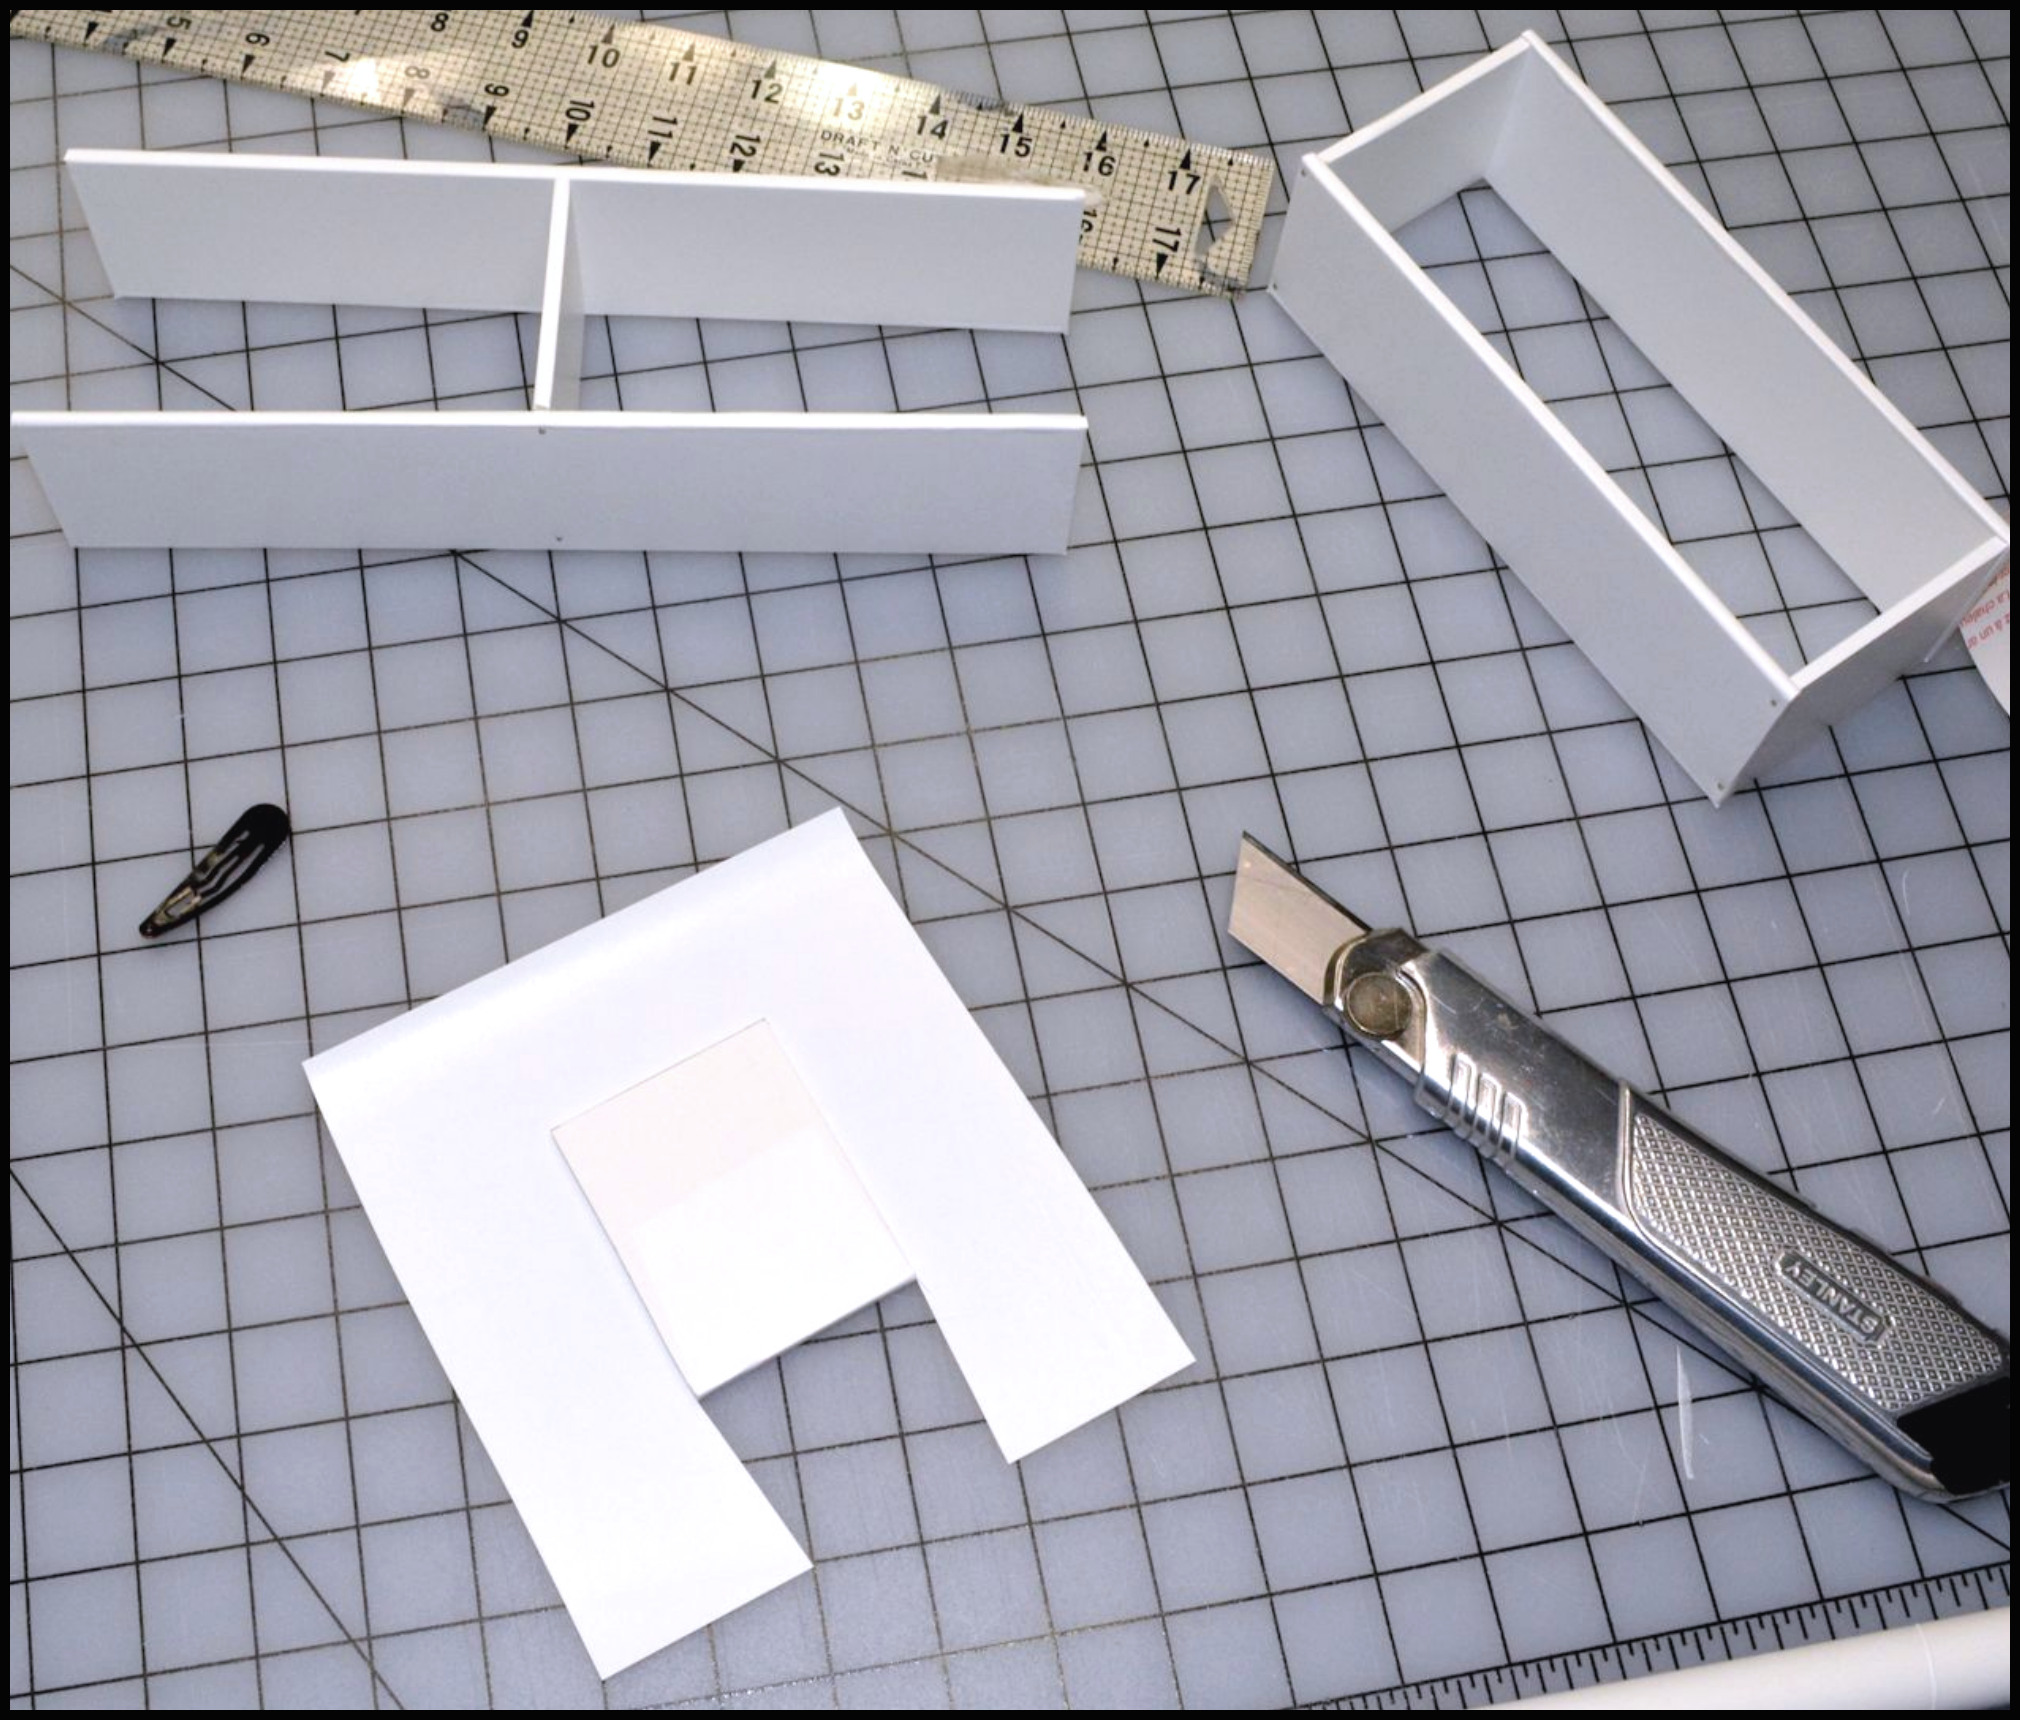
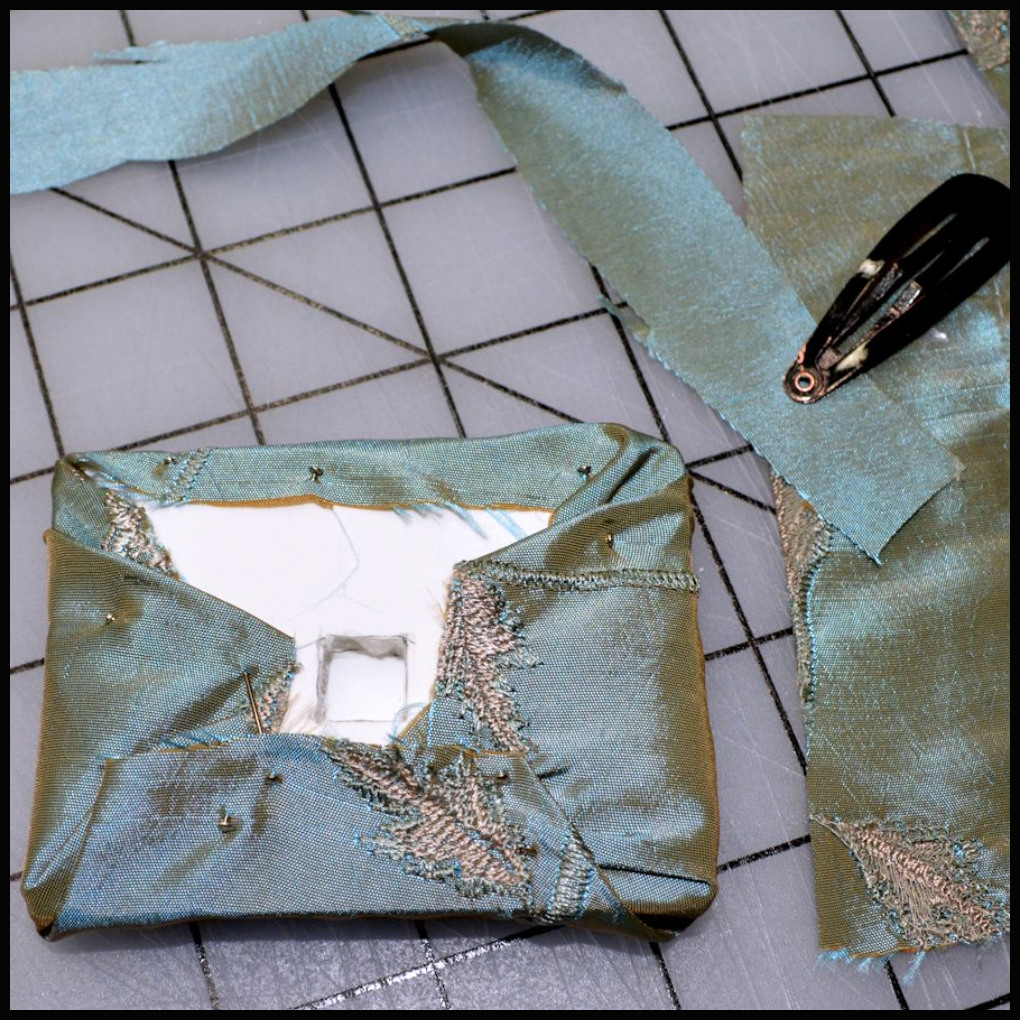
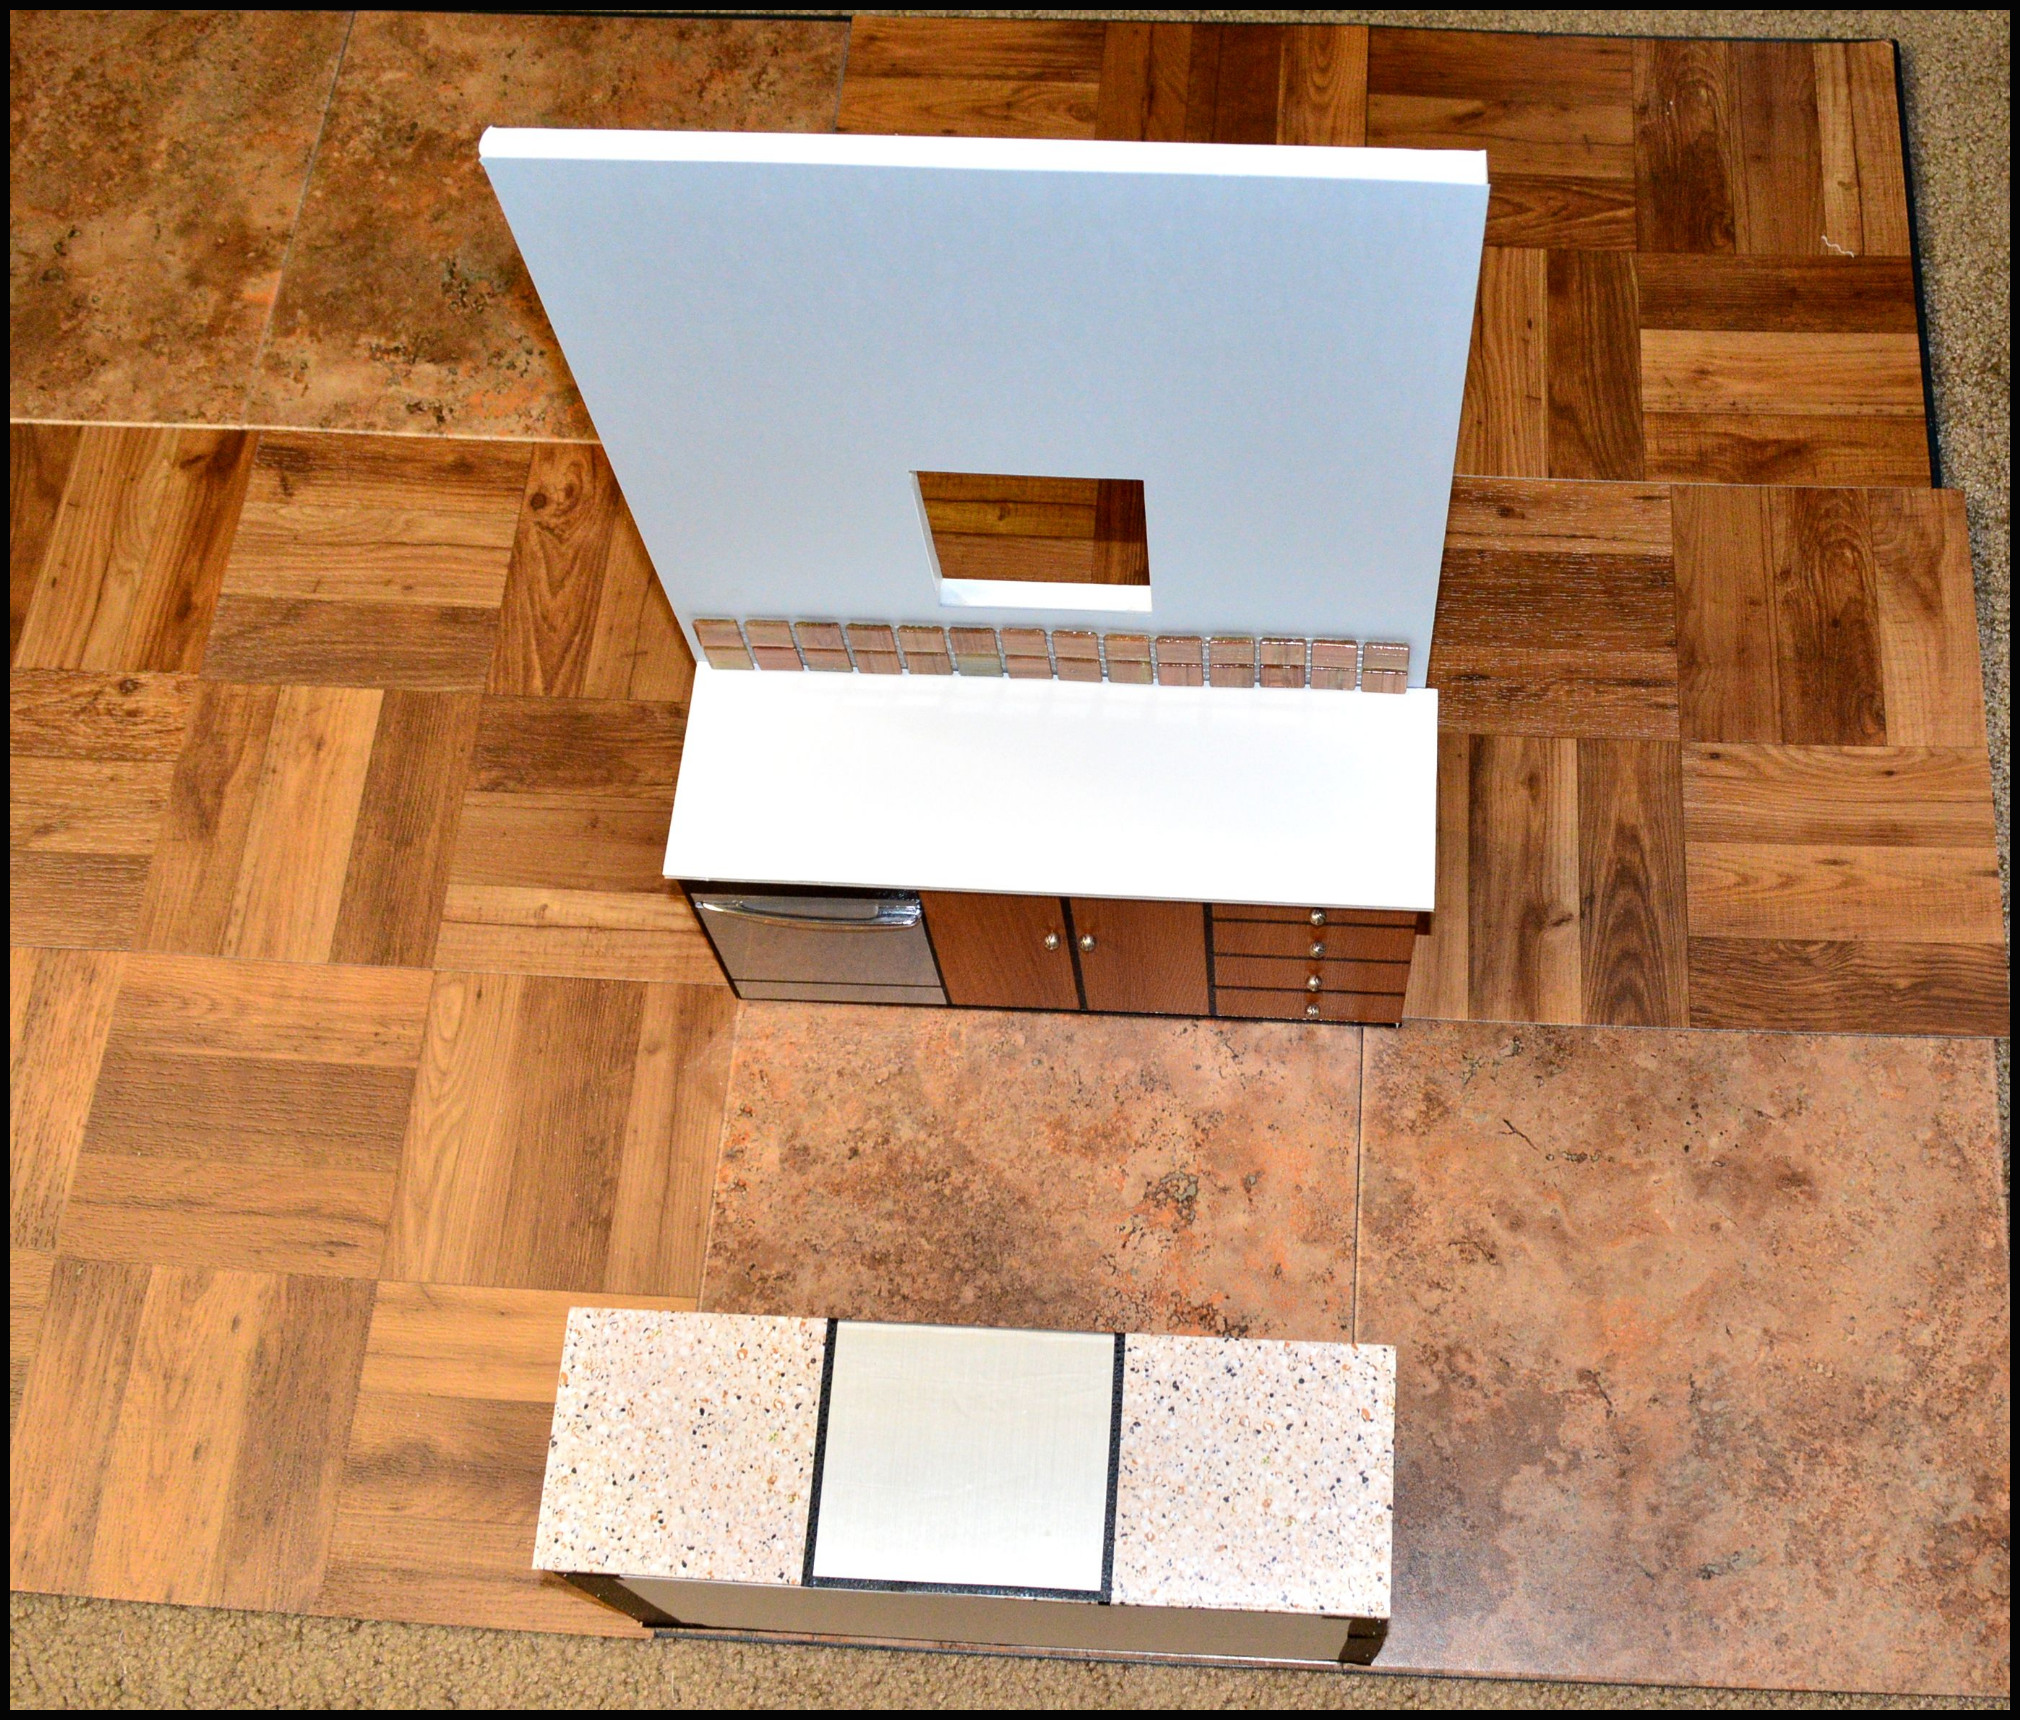
I still find sinks as the most challenging part of a kitchen. I constructed this double sink out of wrapped pieces of foam board glued and pinned together. I then pinned it to the back wall of the cabinet unit. The front wall of it has a piece of silver contact paper the same length of the sink to make it resemble an industrial farmhouse sink.
Here’s the sink pinned to the back of the cabinet before the front is attached.
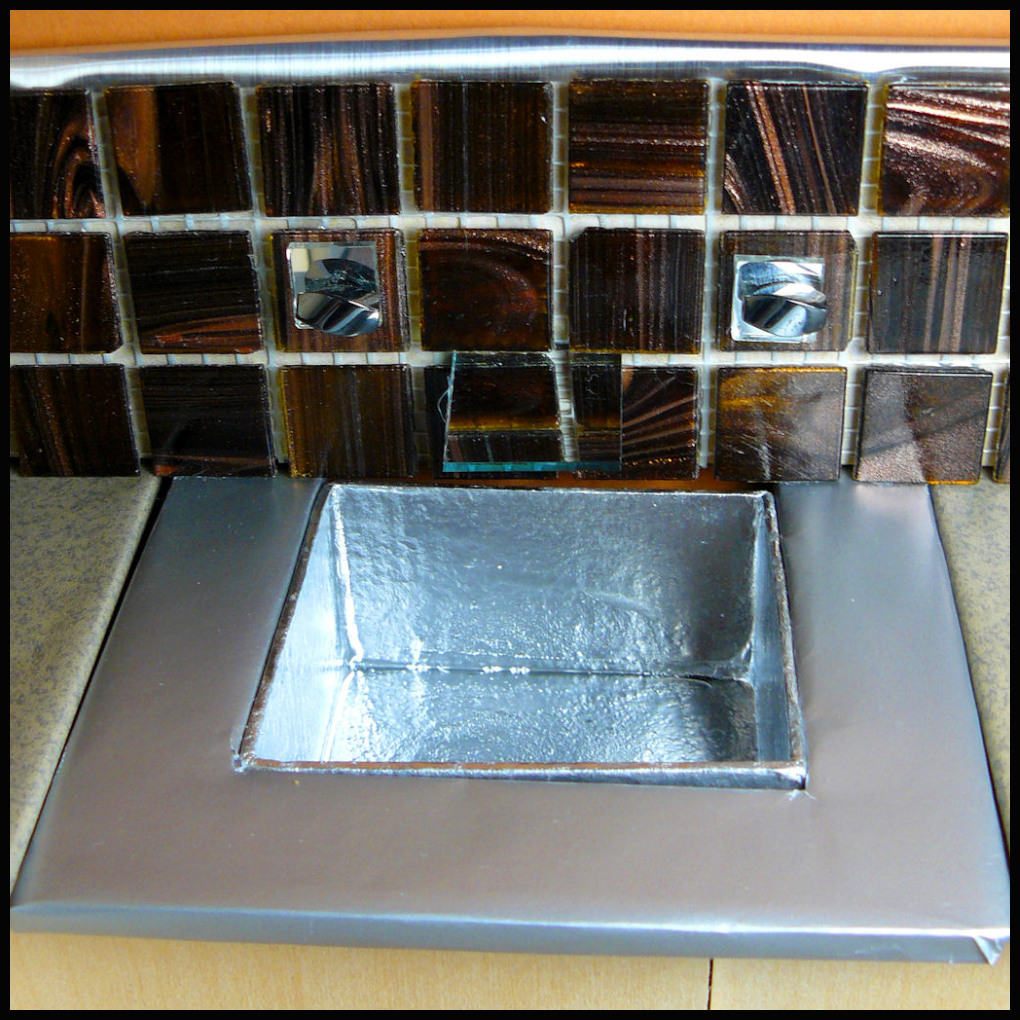
Here’s the front of the counter attached, completing the sink.
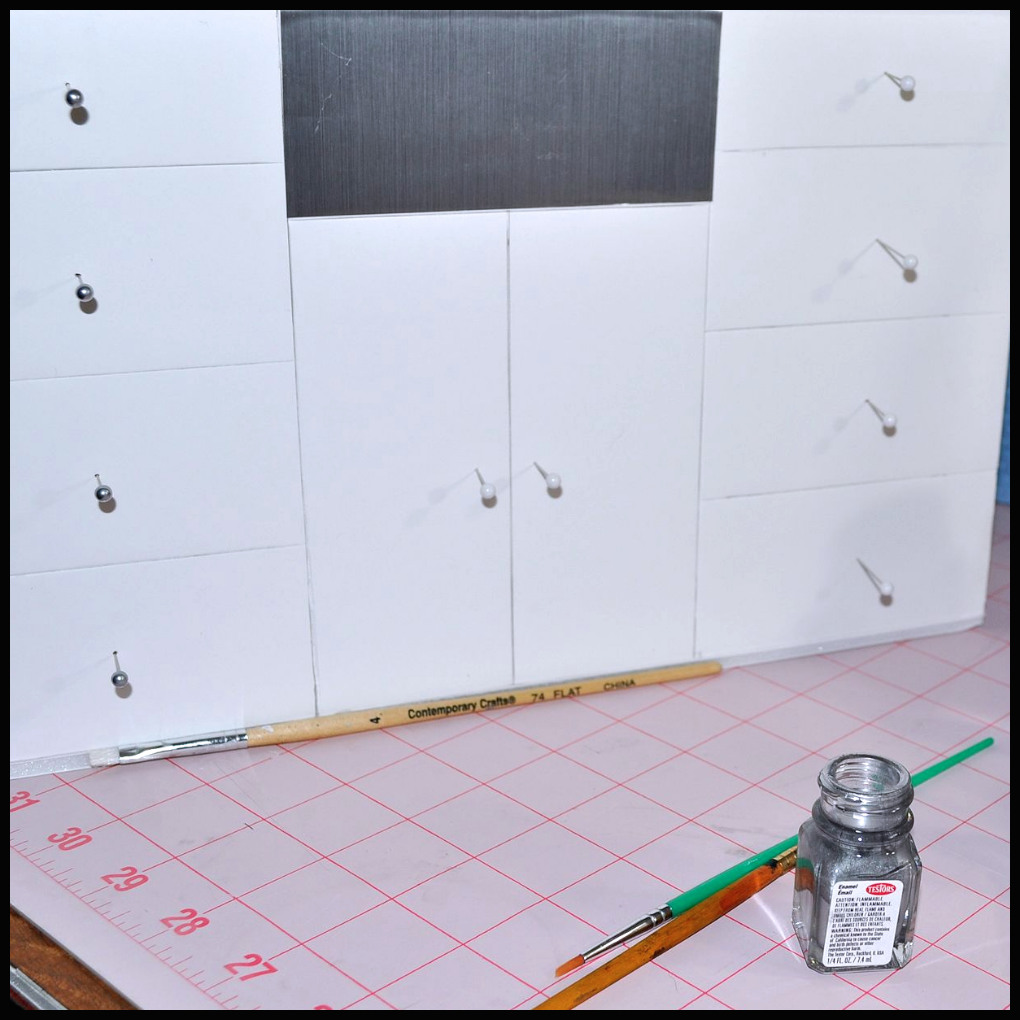
The cabinet pulls are white ball sewing pins. I wanted them to look more metallic, so I painted them white with leaf silver paint.
If they’re pulled out from the board, they’re easy to paint and leave overnight to dry.
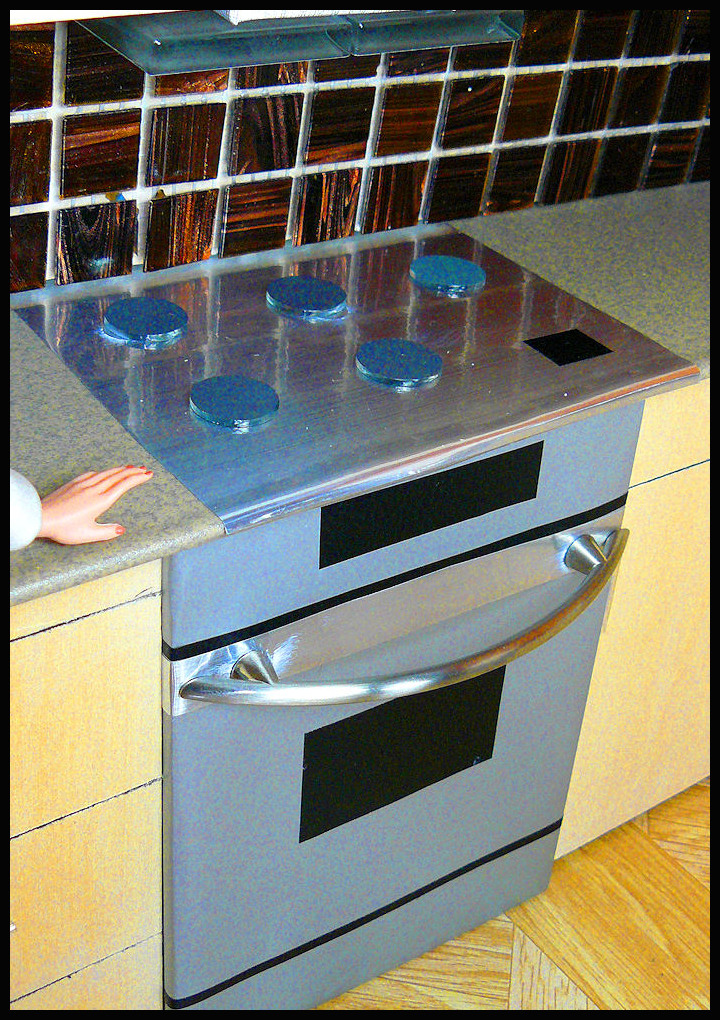
Besides the sink well itself, the faucet and hot/cold knobs are also a severe challenge to make correctly.
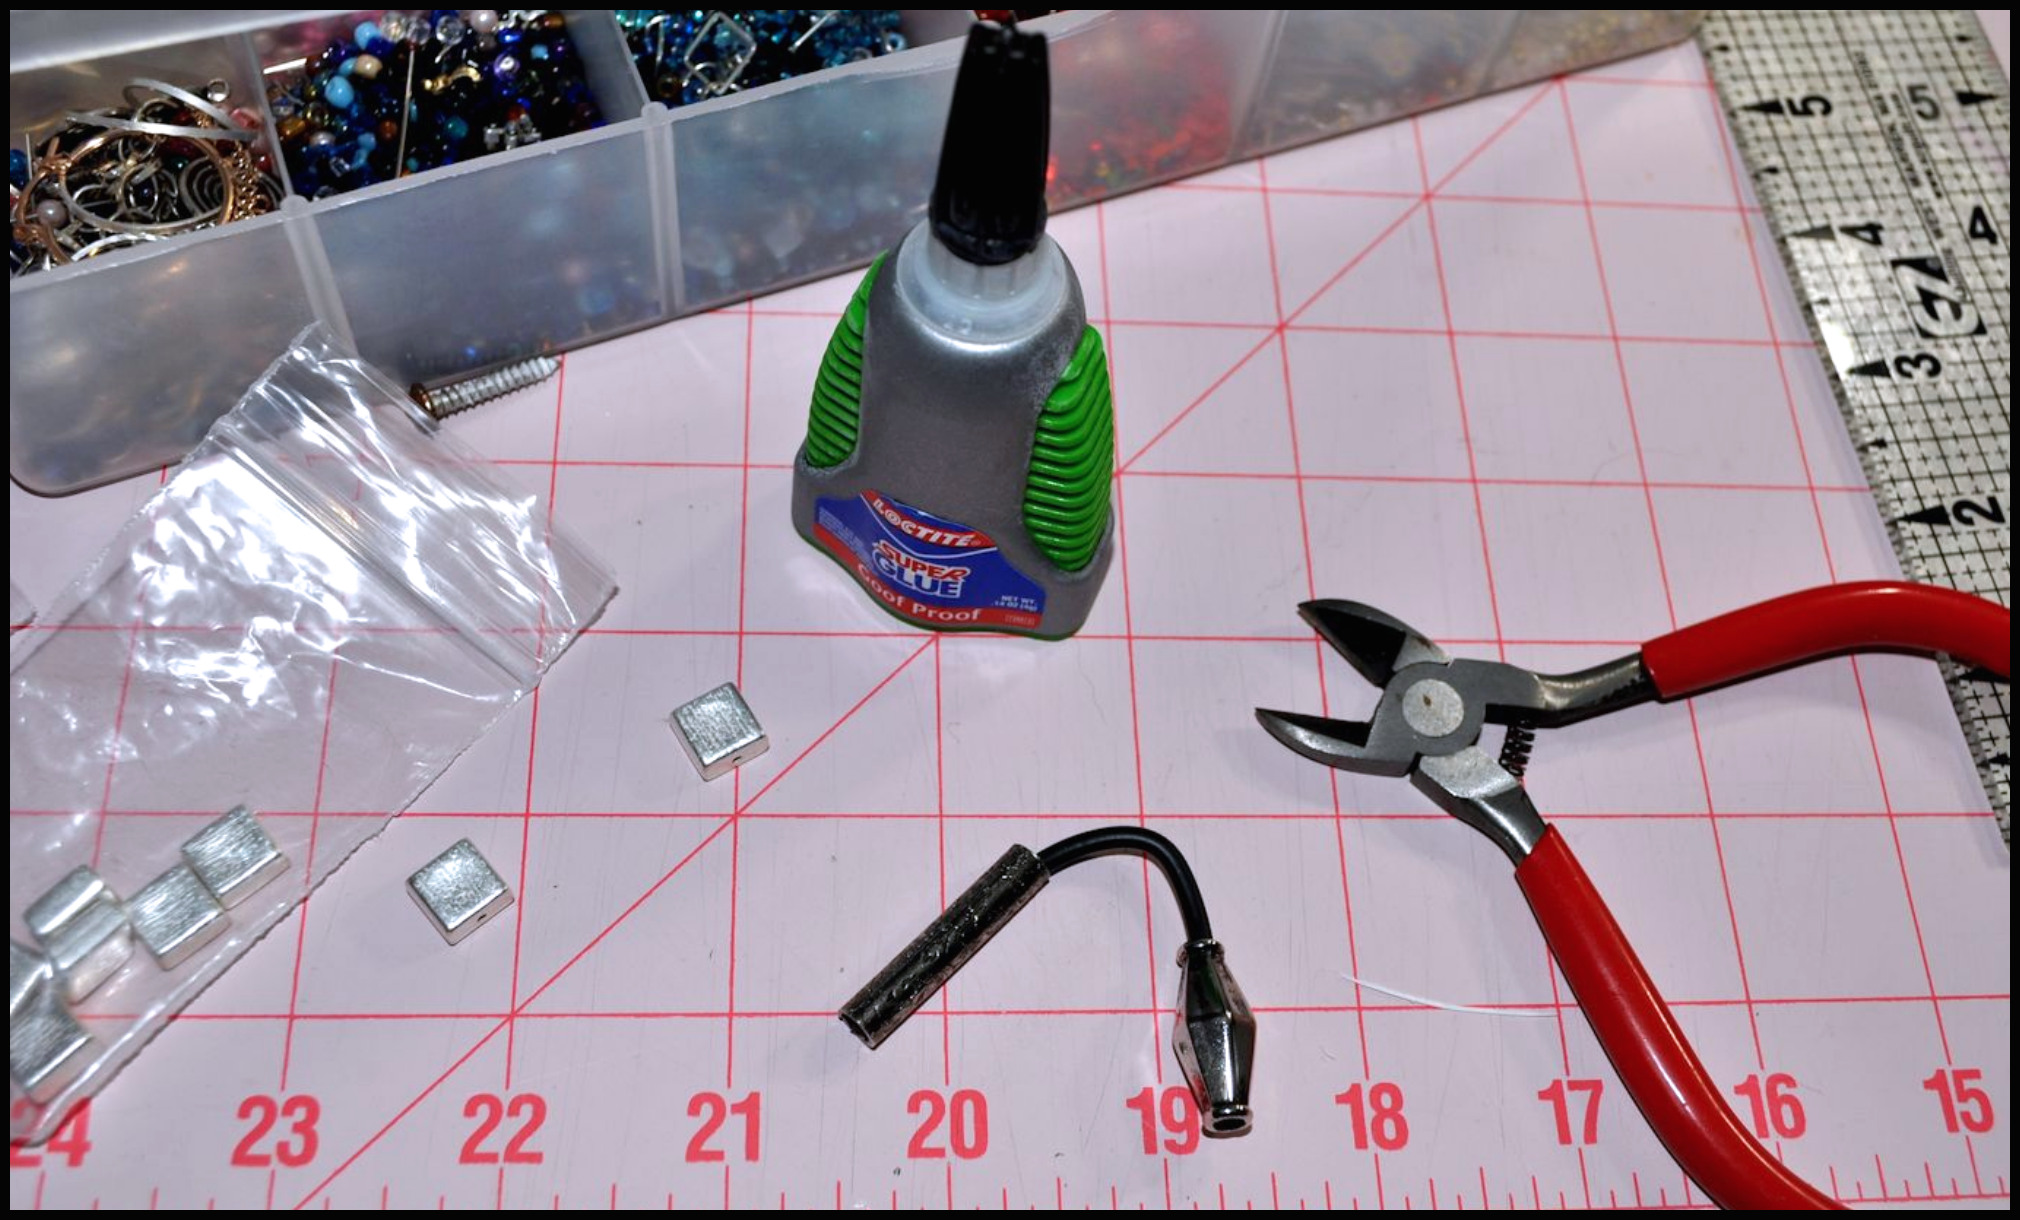
For the faucet, I cut a three-inch piece of earbud cord from a set that no longer worked. I wanted something bendable in cylinder format. Then I painted the cord silver with the same gold leaf paint. One has a long cylinder jewelry piece to look like the base of the facet. The faucet head is from another jewelry bead, both super glued to each end.
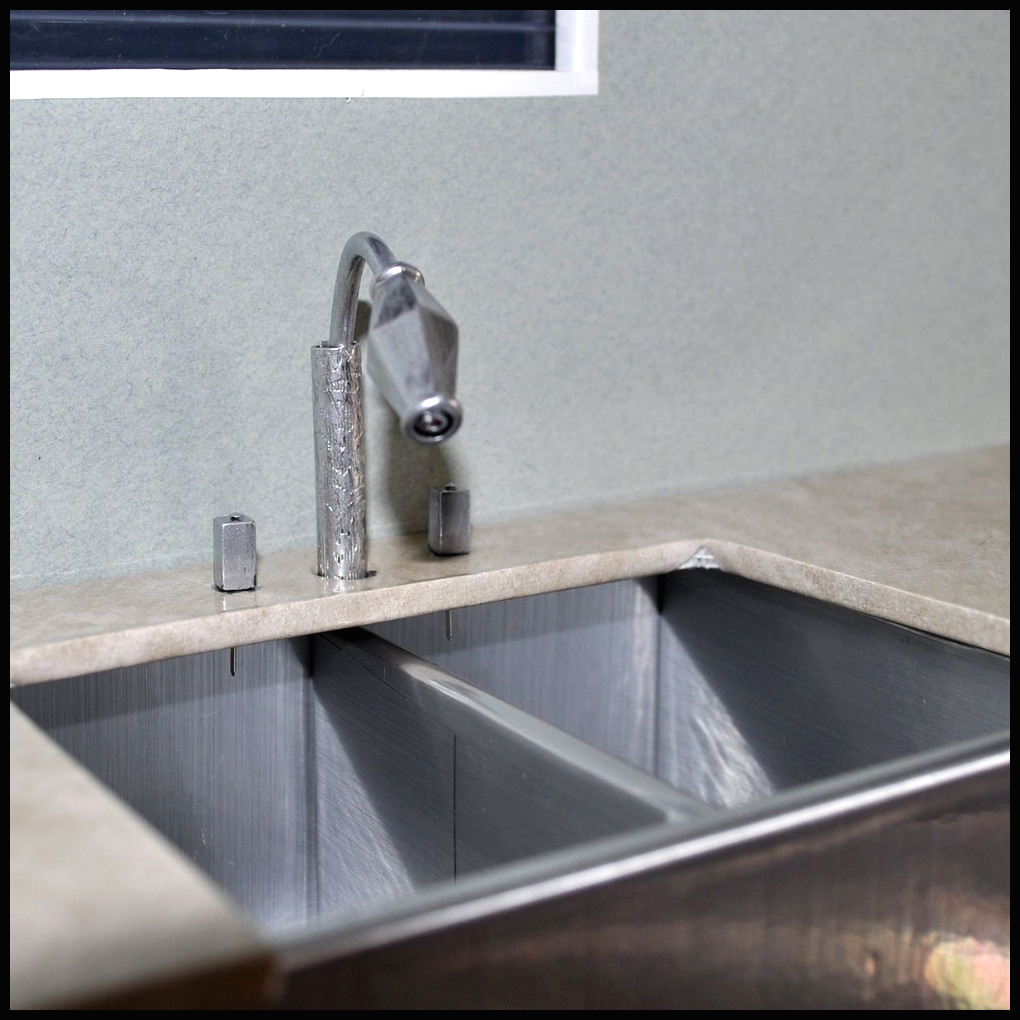
The hot and color knobs are more jewelry beads pinned to the foam board top counter.
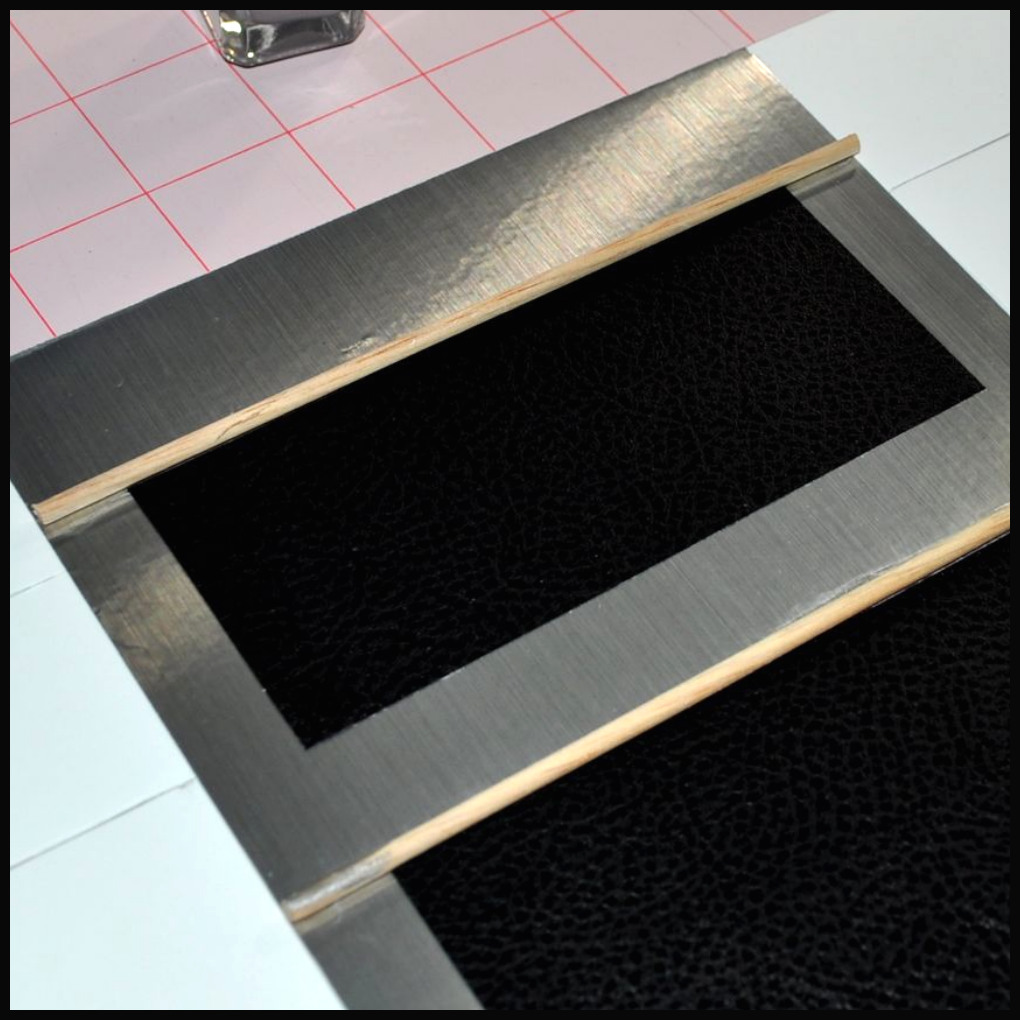
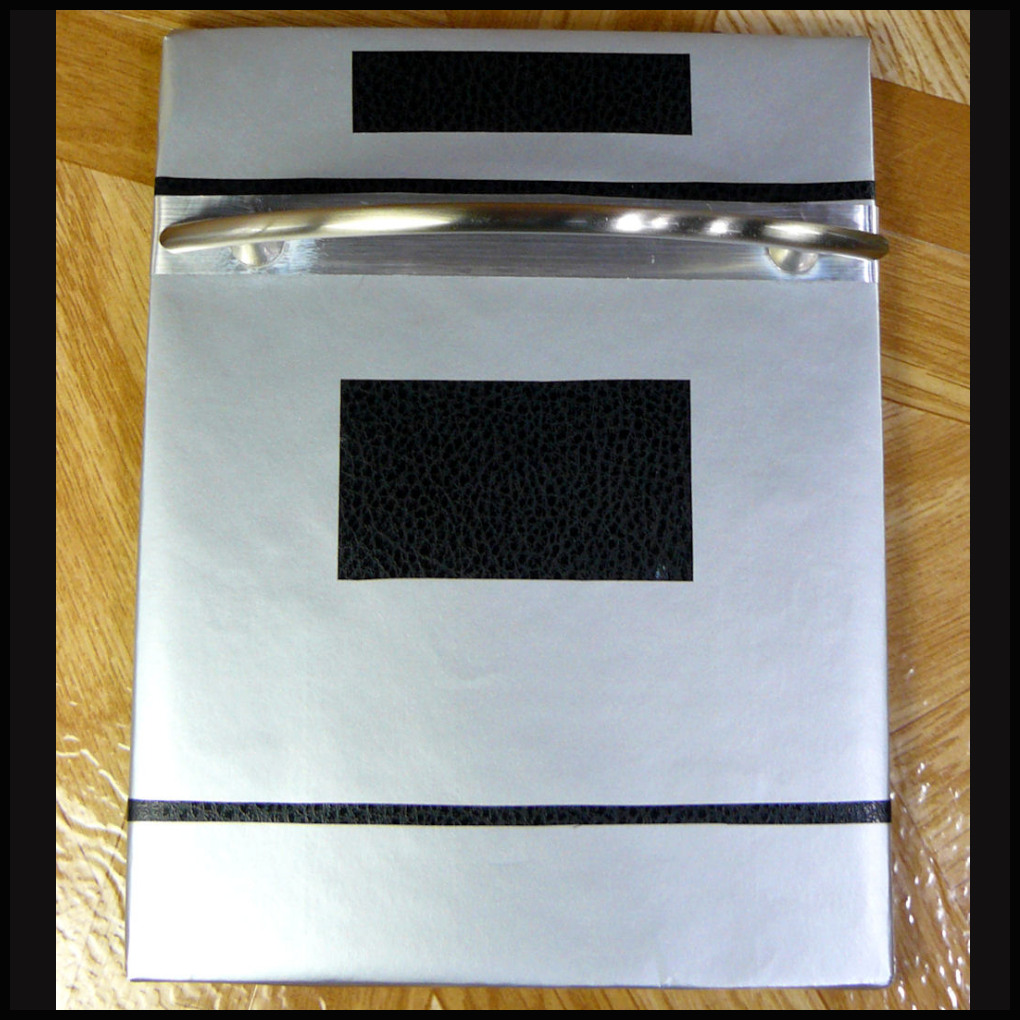
The oven front is silver contact paper with black contact paper. The
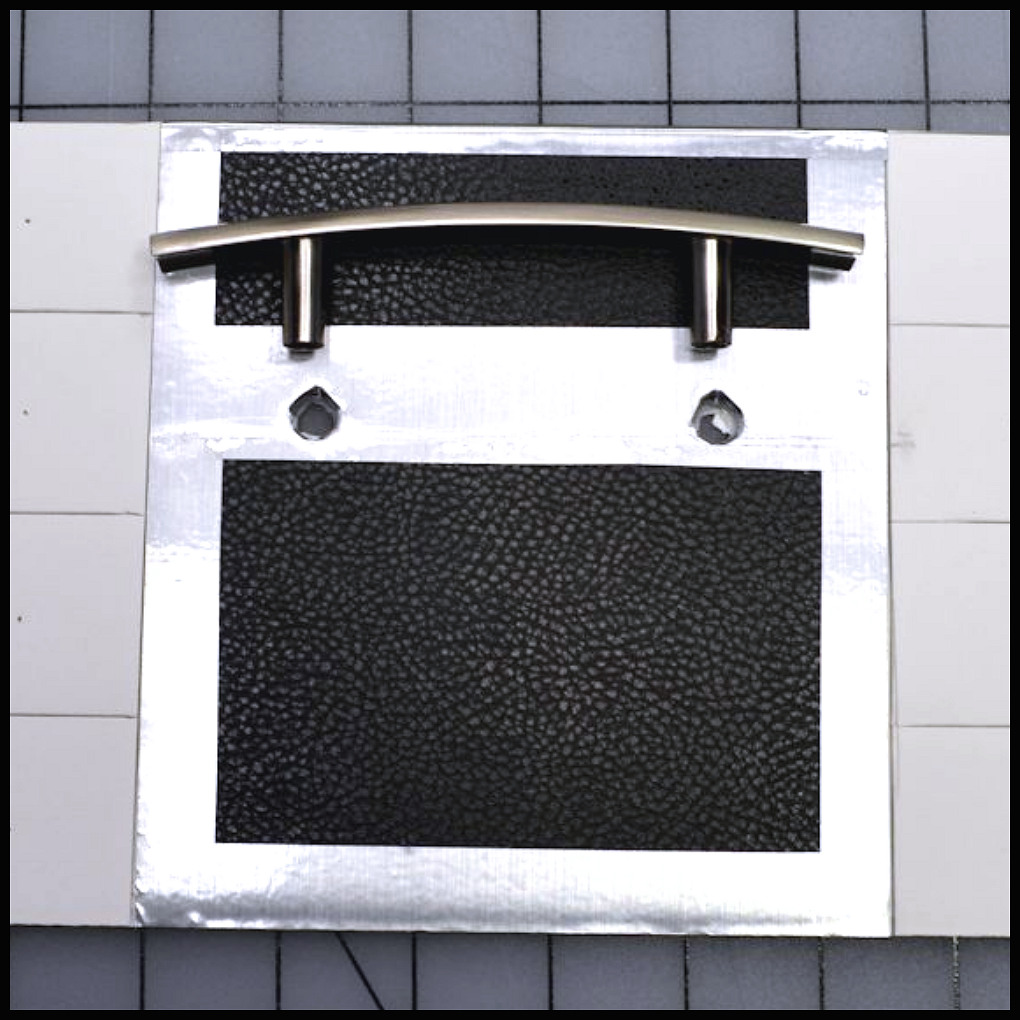
I mentioned earlier that drawer pulls need to have stems to push into the foam board to make them more secure. Super glue can be put into the holes in the foam board before the drawer pull is pushed into the holes.
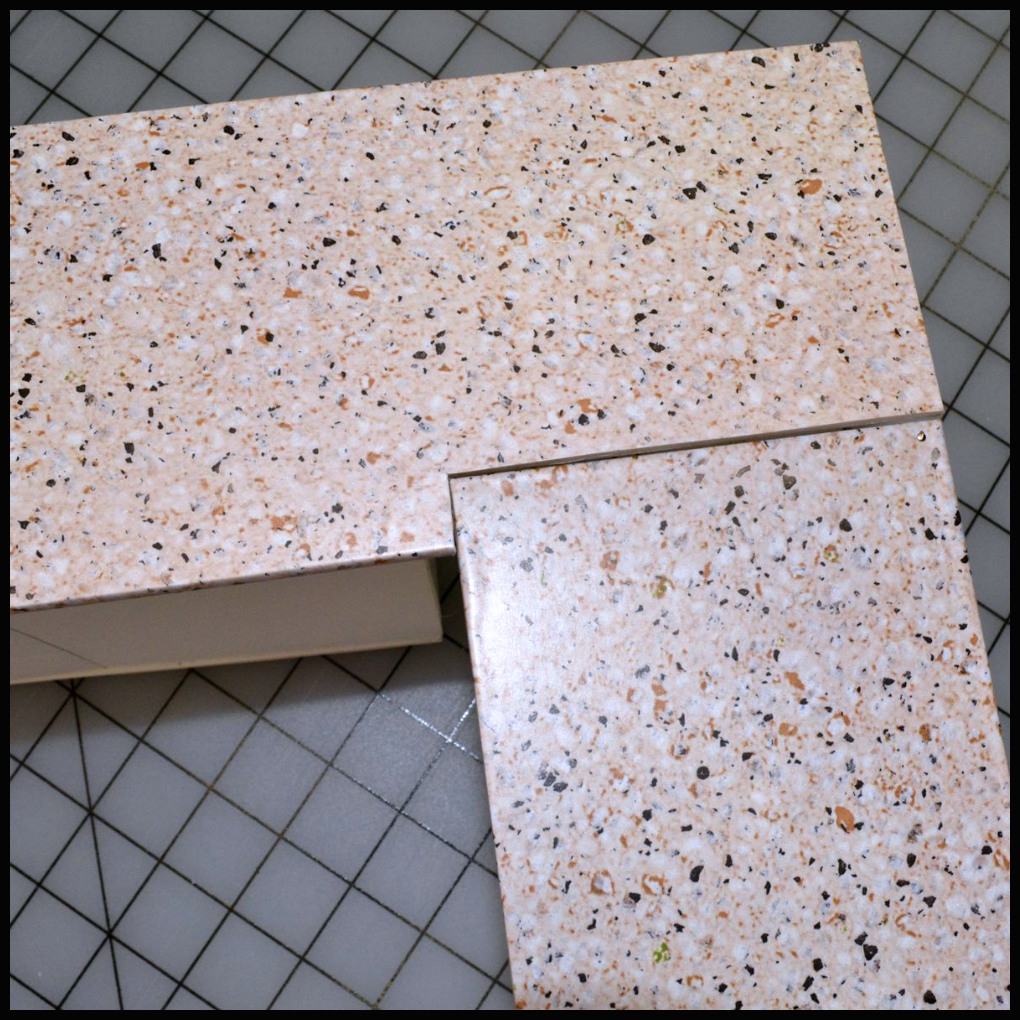
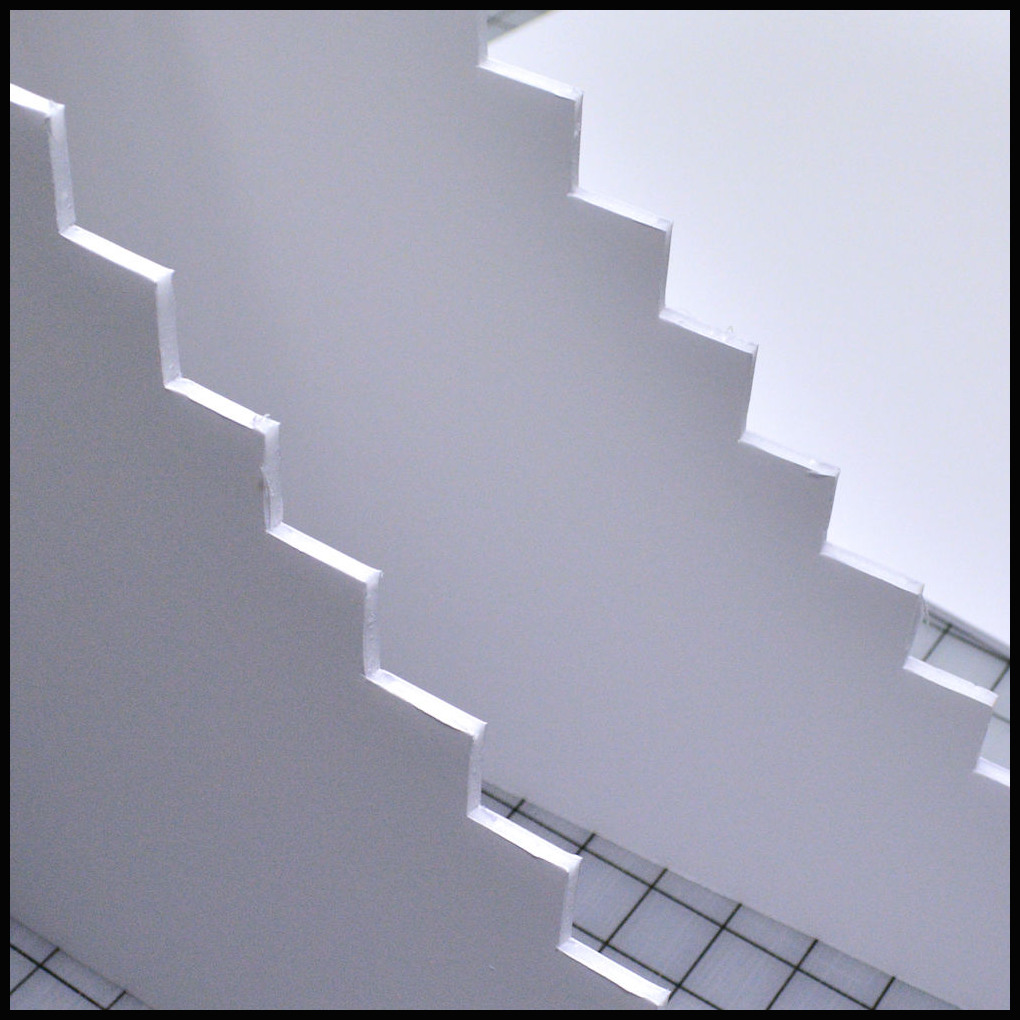
The countertops are foam board wrapped in marble contact paper. I’ve cut a ledge out of one so I can fit them together and pin them with flat-head sewing pins that go in diagonally. I don’t glue them because I want to be able to unpin and reuse this kitchen in the future and the ‘L’ shape won’t store well.
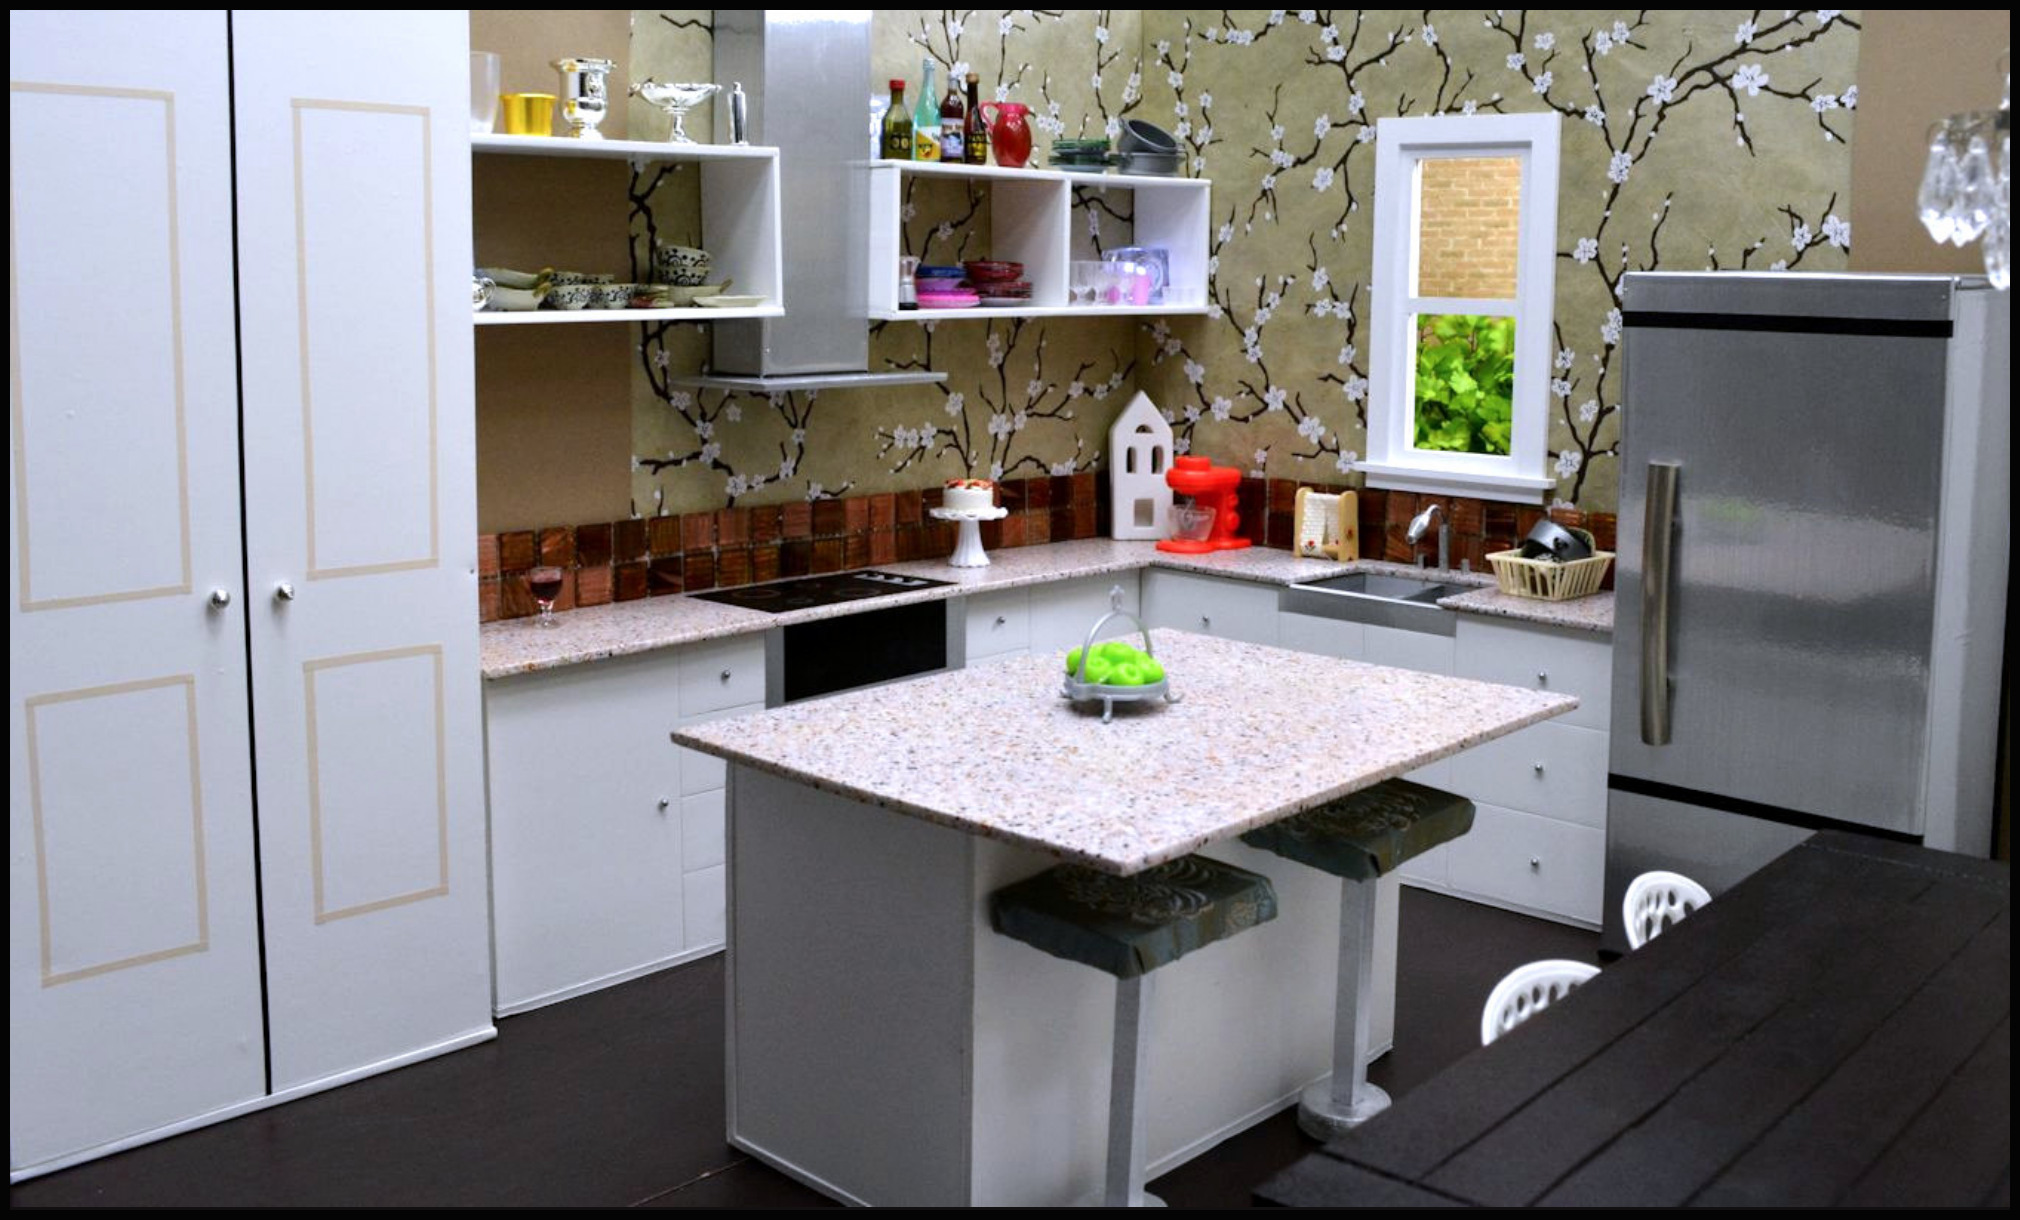
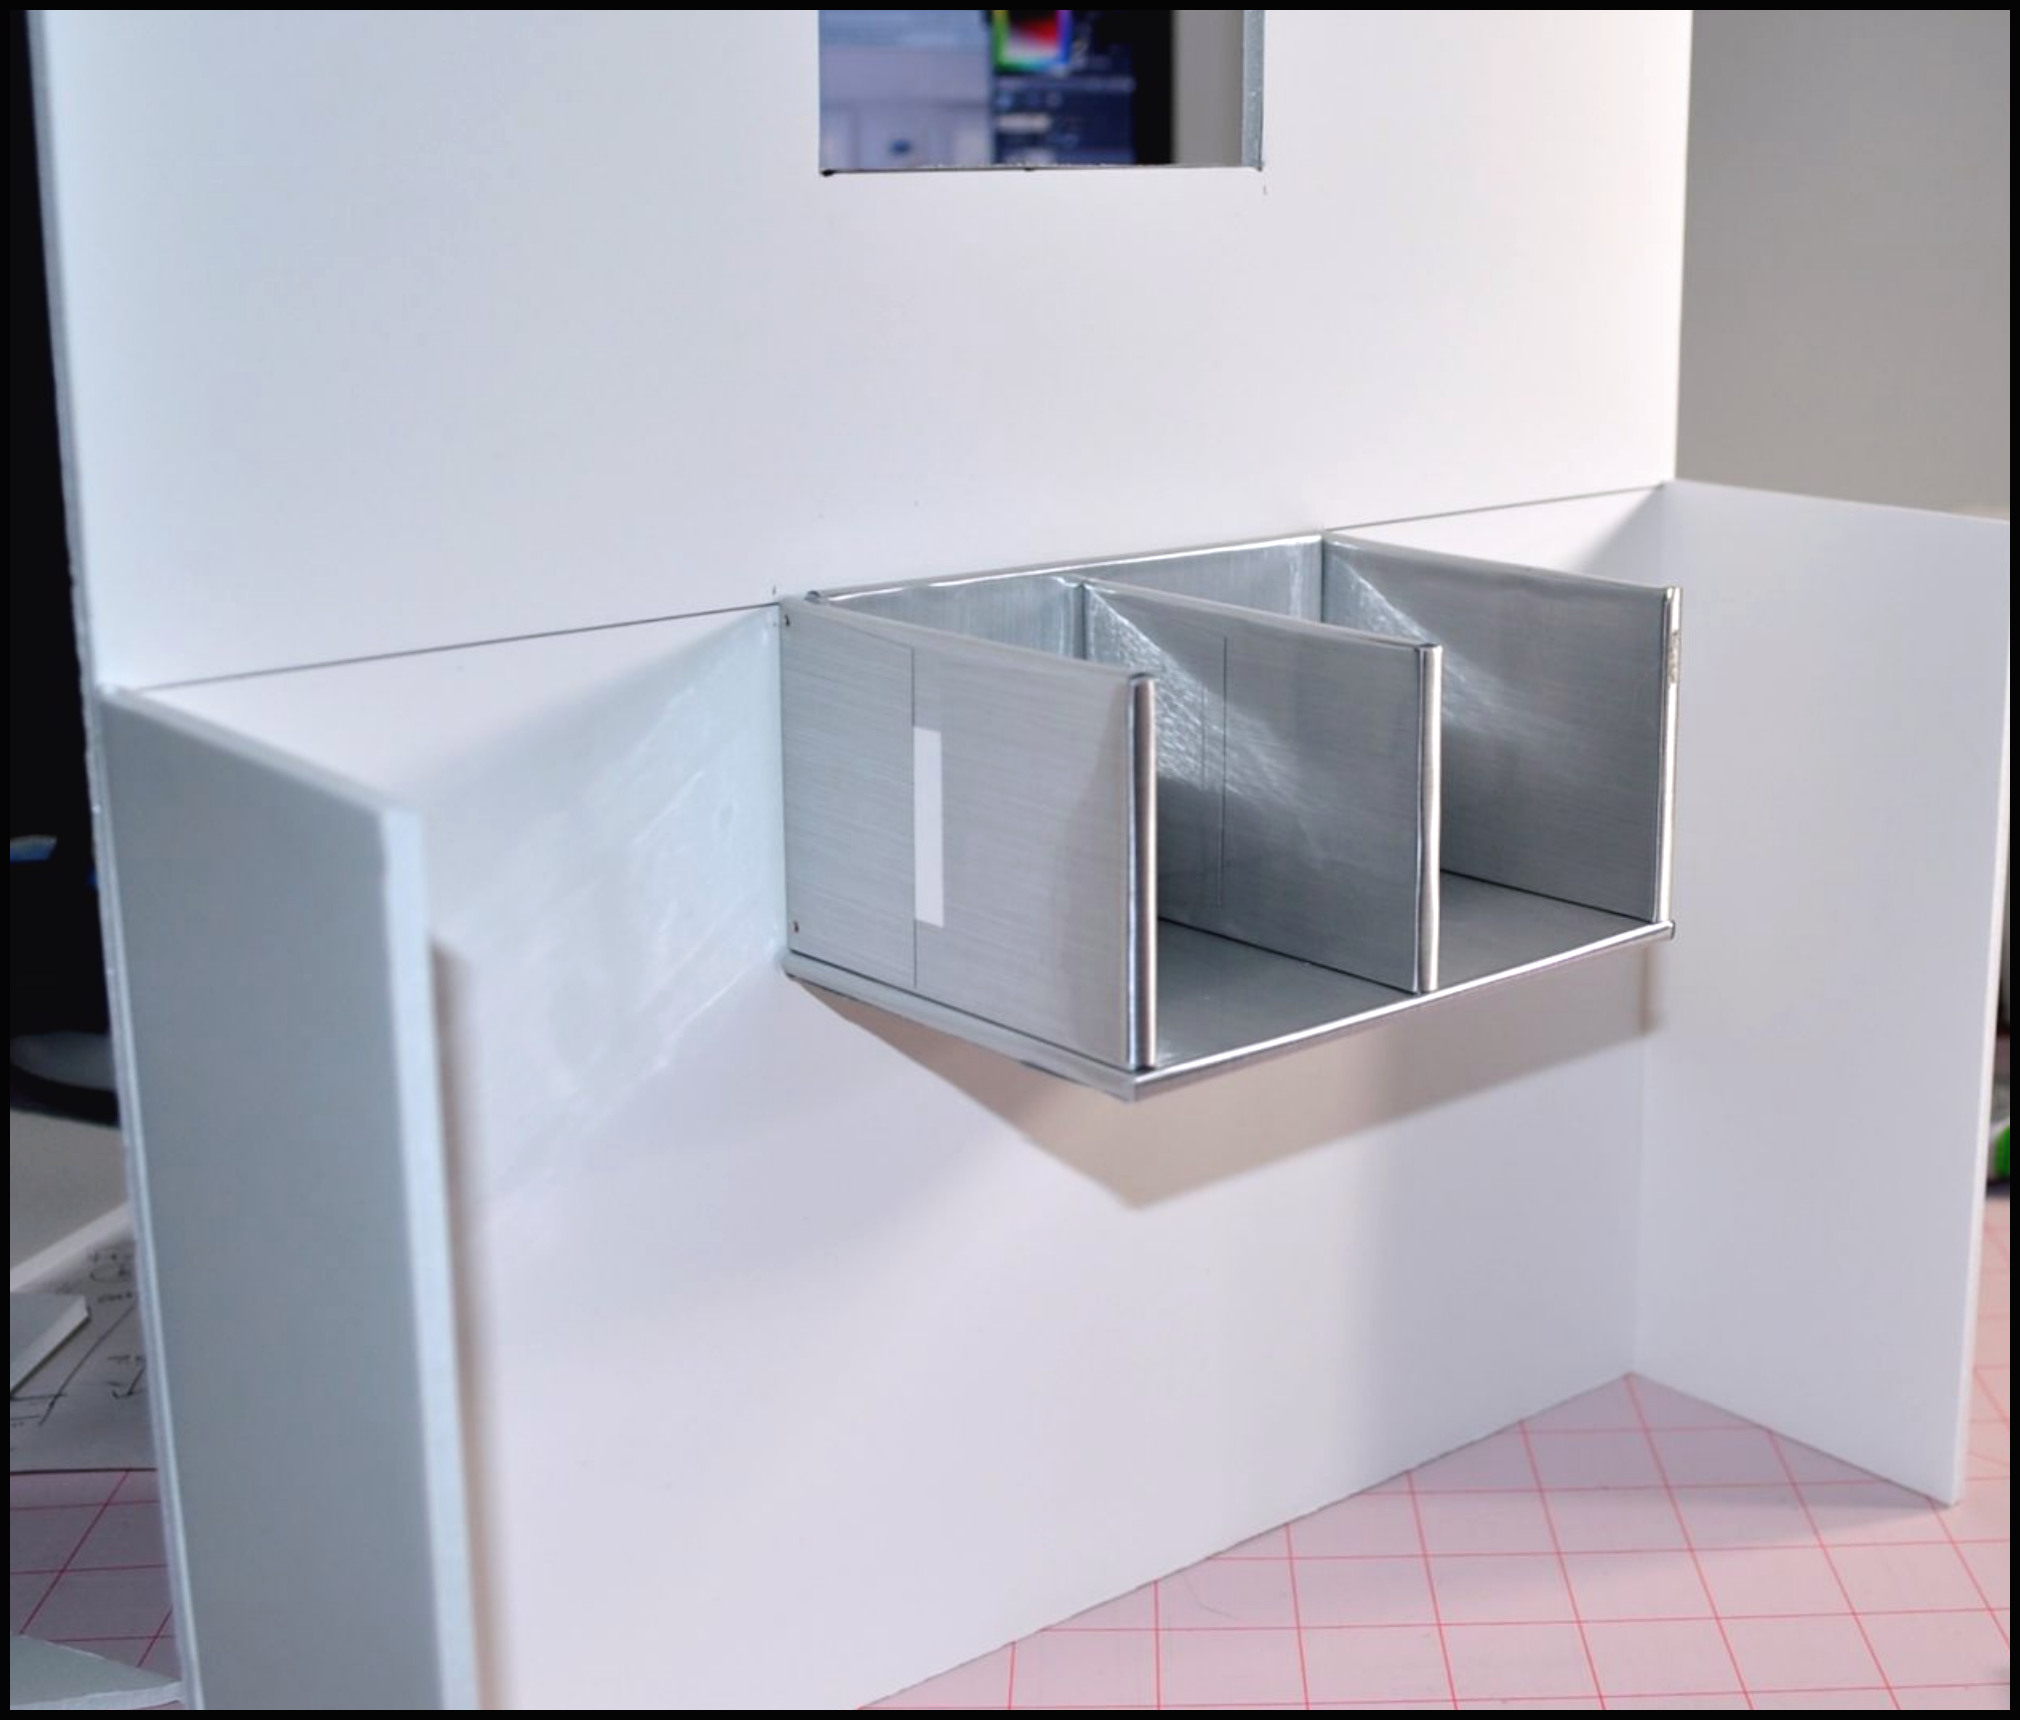
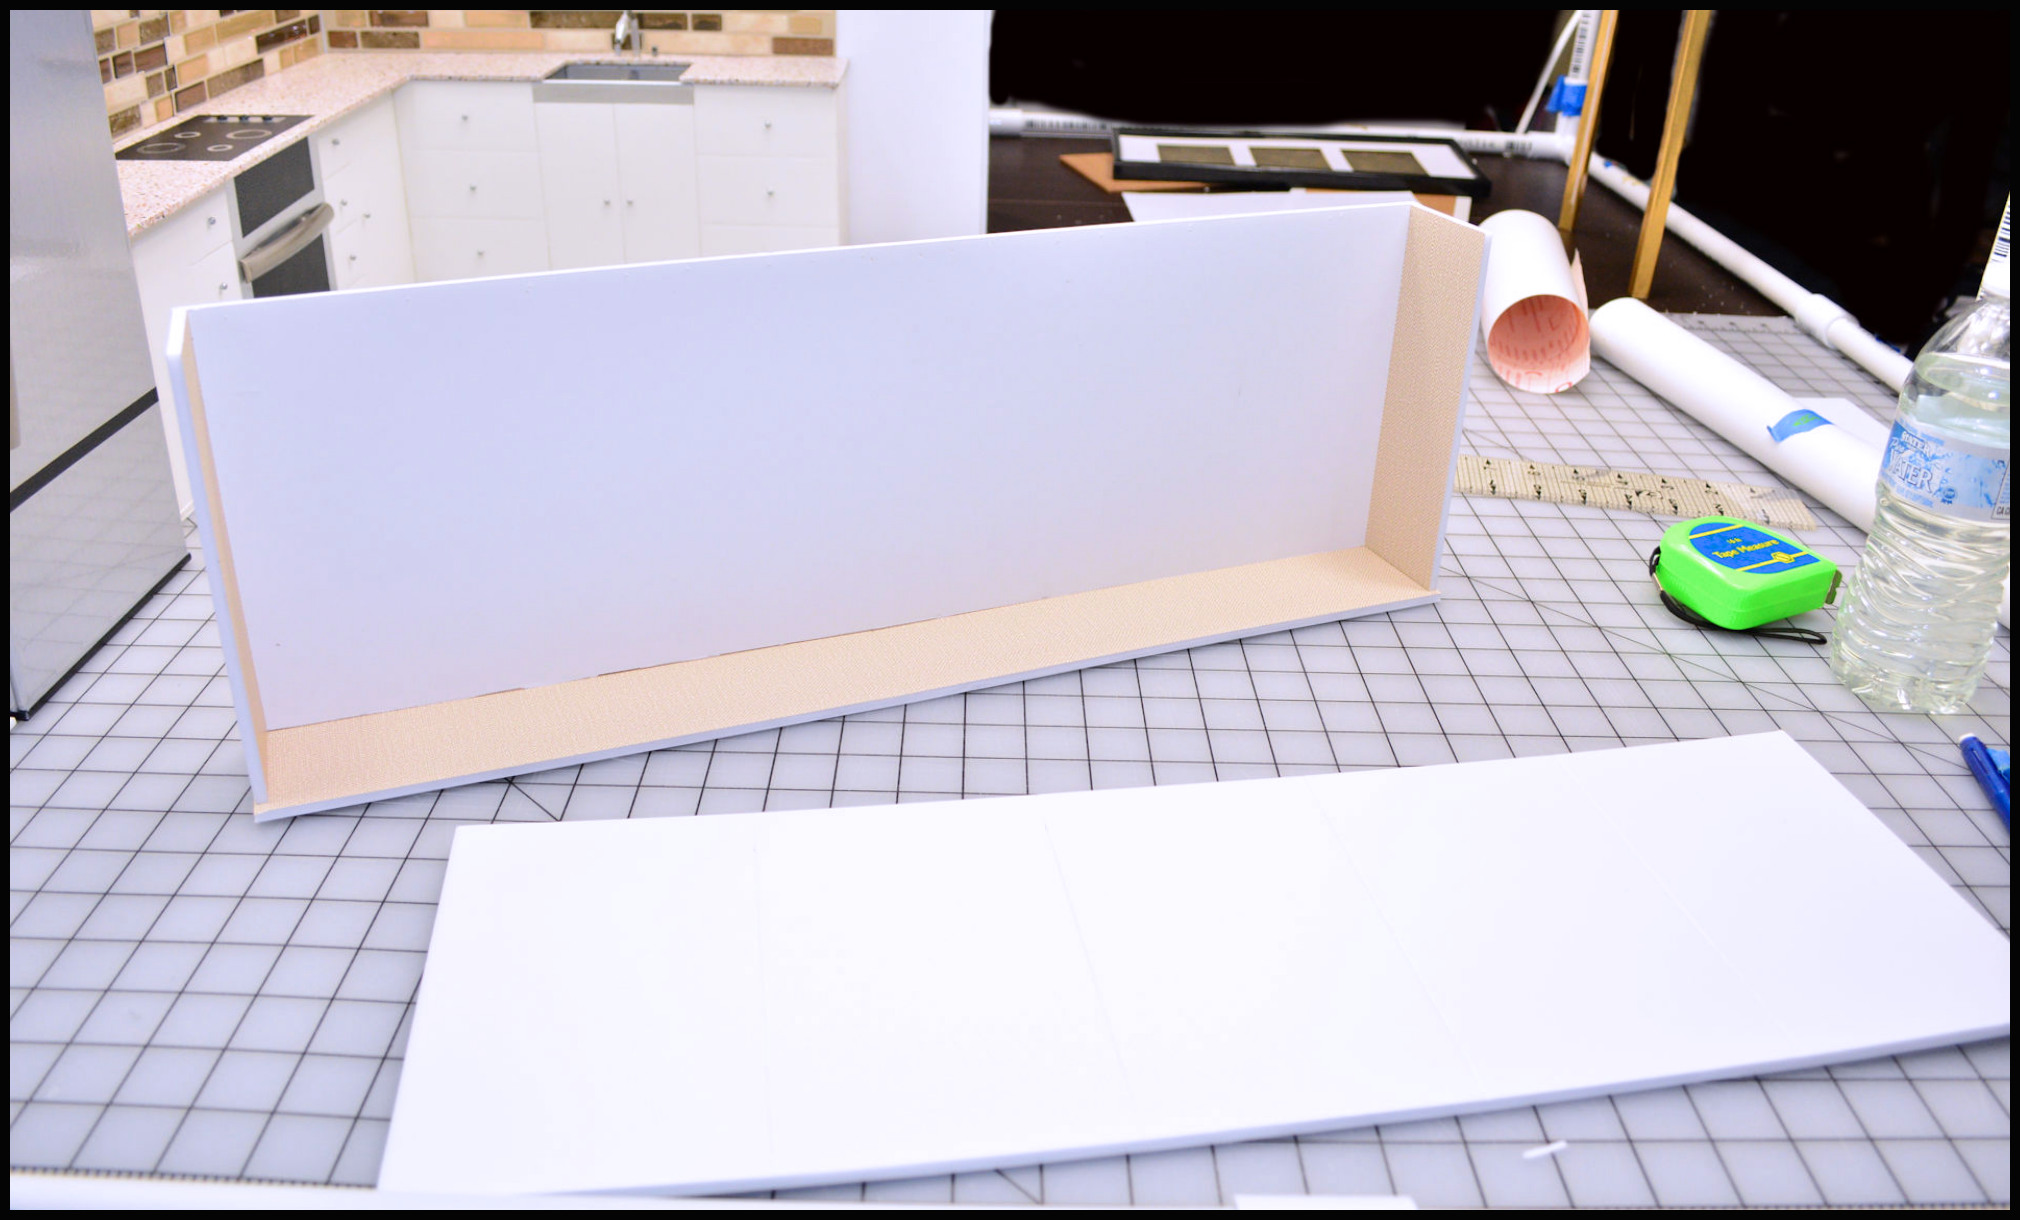
Due to time constraints, I only made bottom counters. Since I need some kind of cabinets on the wall, I create open cabinets without doors from pinned pieces of foam board.
I wrapped these in white contact paper but later regretted it. There’s always a backside that has the flaps of miss-matched contact paper, and these needed to look good on all sides. Just cut foam board works for a project like this.

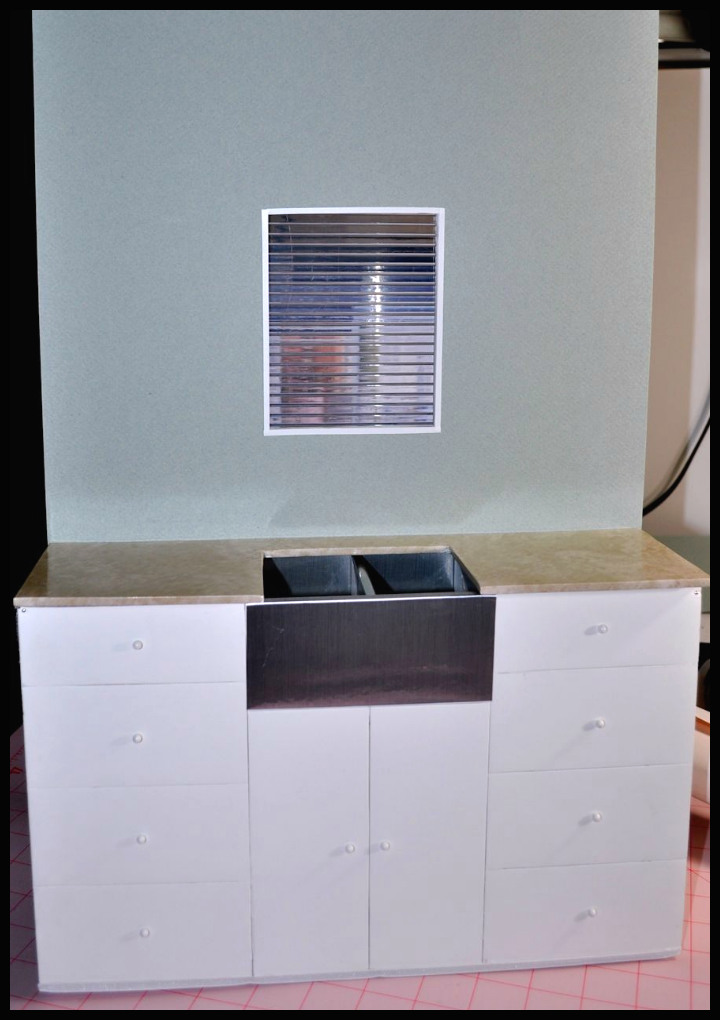
This is what the cabinets look like on a wall. The overhead vent description is below.
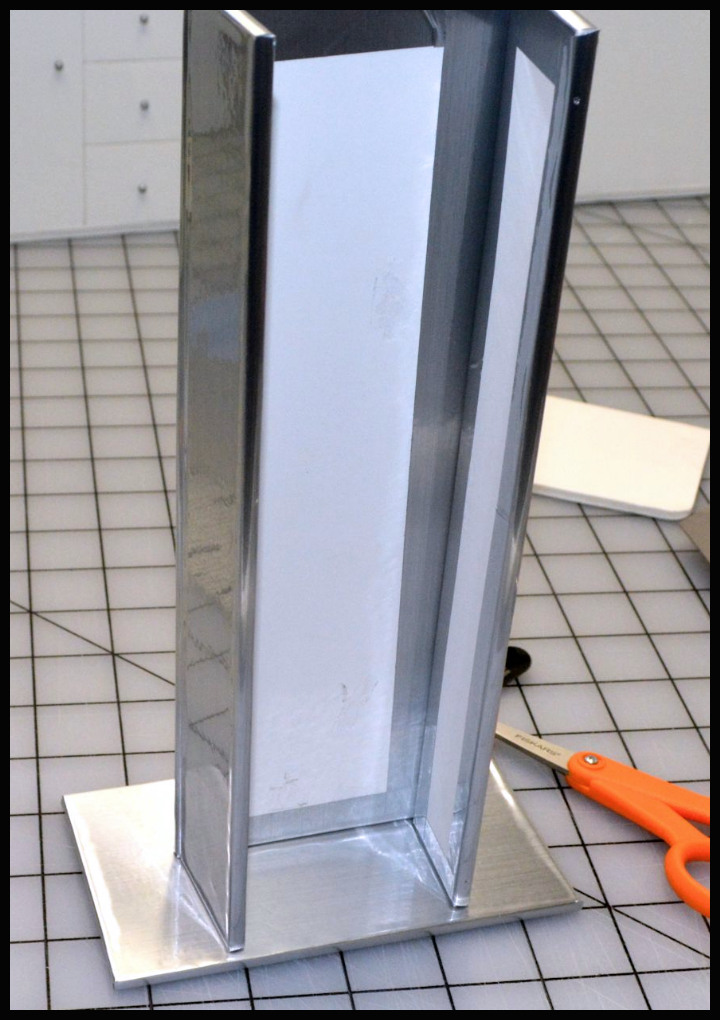
Long strips of 1/4″ foam board are cut, and glued & pinned together to a rectangular base. All the pieces are wrapped in silver contact paper first.
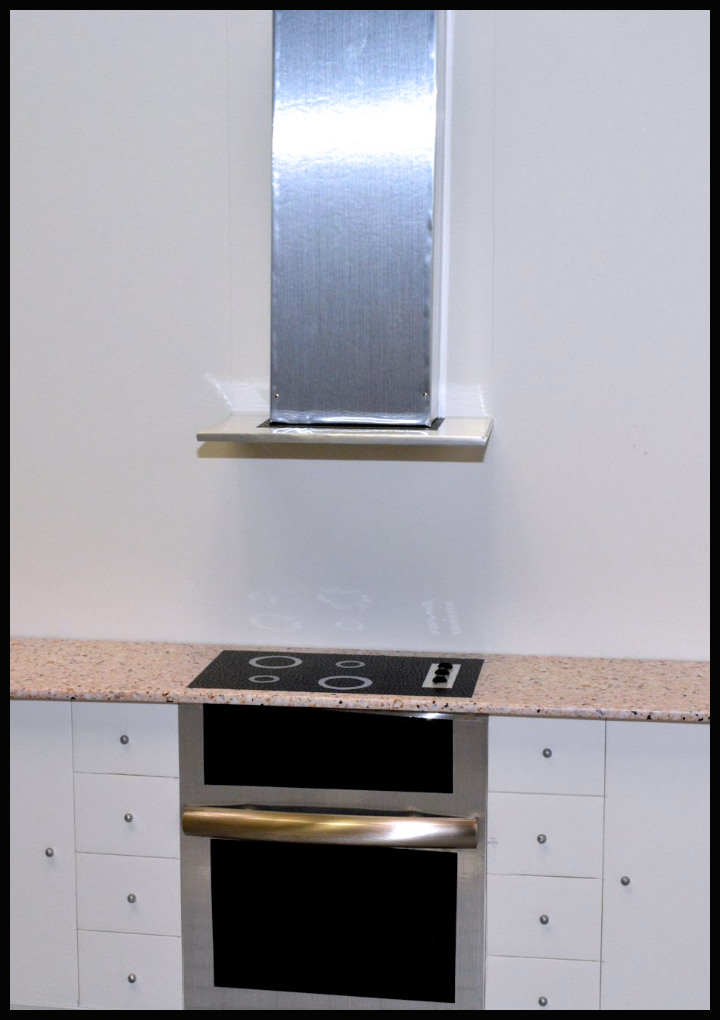
The vent unit is then easily pinned to any wall with sewing pins behind the wall going up any part of the back wall edge.
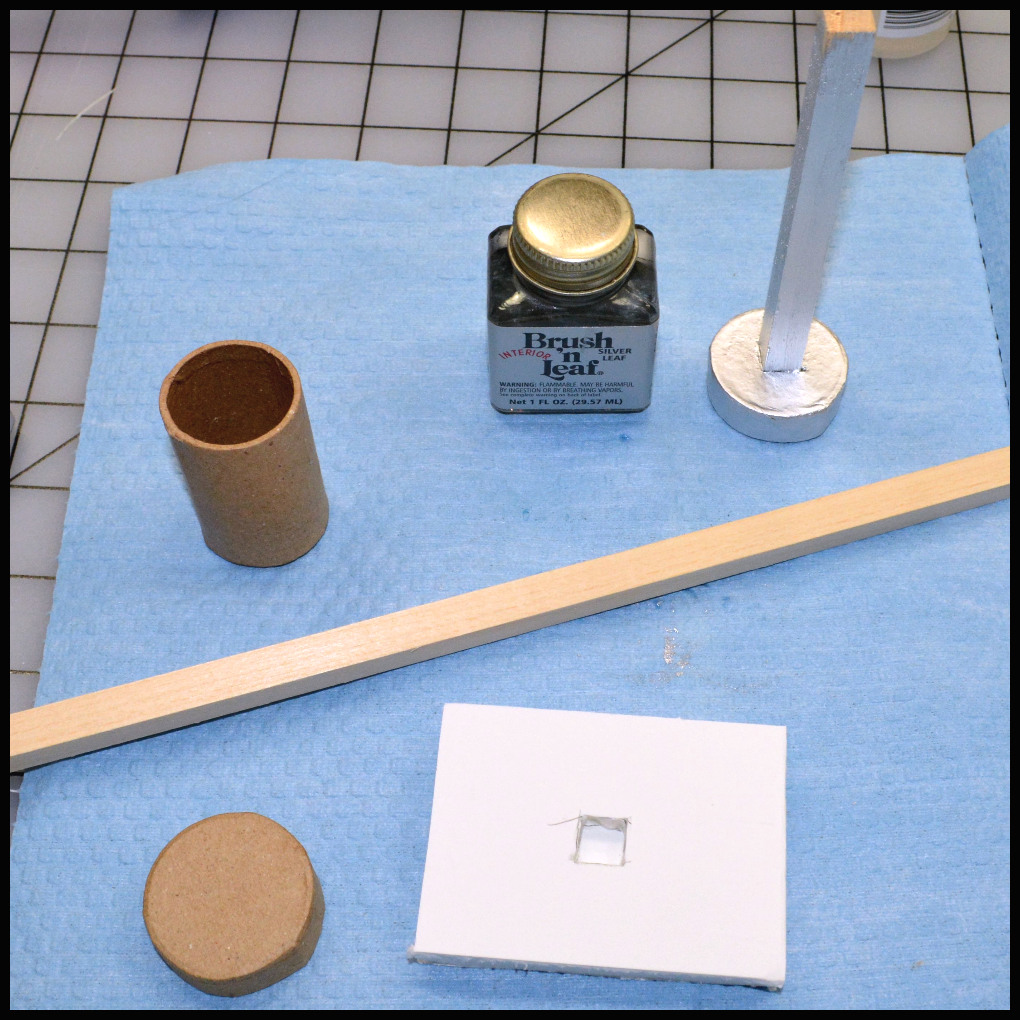
A failed attempt to make barstools was two square-shaped dowels were cut do the right height of a higher chair (sat a doll down on a regular chair, then measured another 3/4″ above that seat height). I took the cardboard tops to two cyllindar containers and painted them with silver Brush & Leaf paint. I also painted the dowel to match.
I cut a rectangular 1/2″ thicker foam board piece. Then put the dowel against it, drew the outline and then cut into the foam and pushed the dowel into it to make an indentation. I covered the foam board piece with material to make it look like a cushion, then glued the dowel to the bottom.
They turned out to be wobbly and unsuitable for dolls to sit on. I buy pre-made barstools at this point and haven’t attempted barstools on my own again yet.
The island is another rectangular box made of foam board. On the front face is a dishwasher made with the same silver & black contact paper + handle pull. The back face is covered by a longer counter to make it look like a bartop.
The new refrigerator is a foam board rectangular box with each wall individually wrapped before it’s pinned and glued together. The drawer pull is pushed as far into the two holes made as far as possible and looks more realistic this way.
KITCHEN #2 UPGRADED
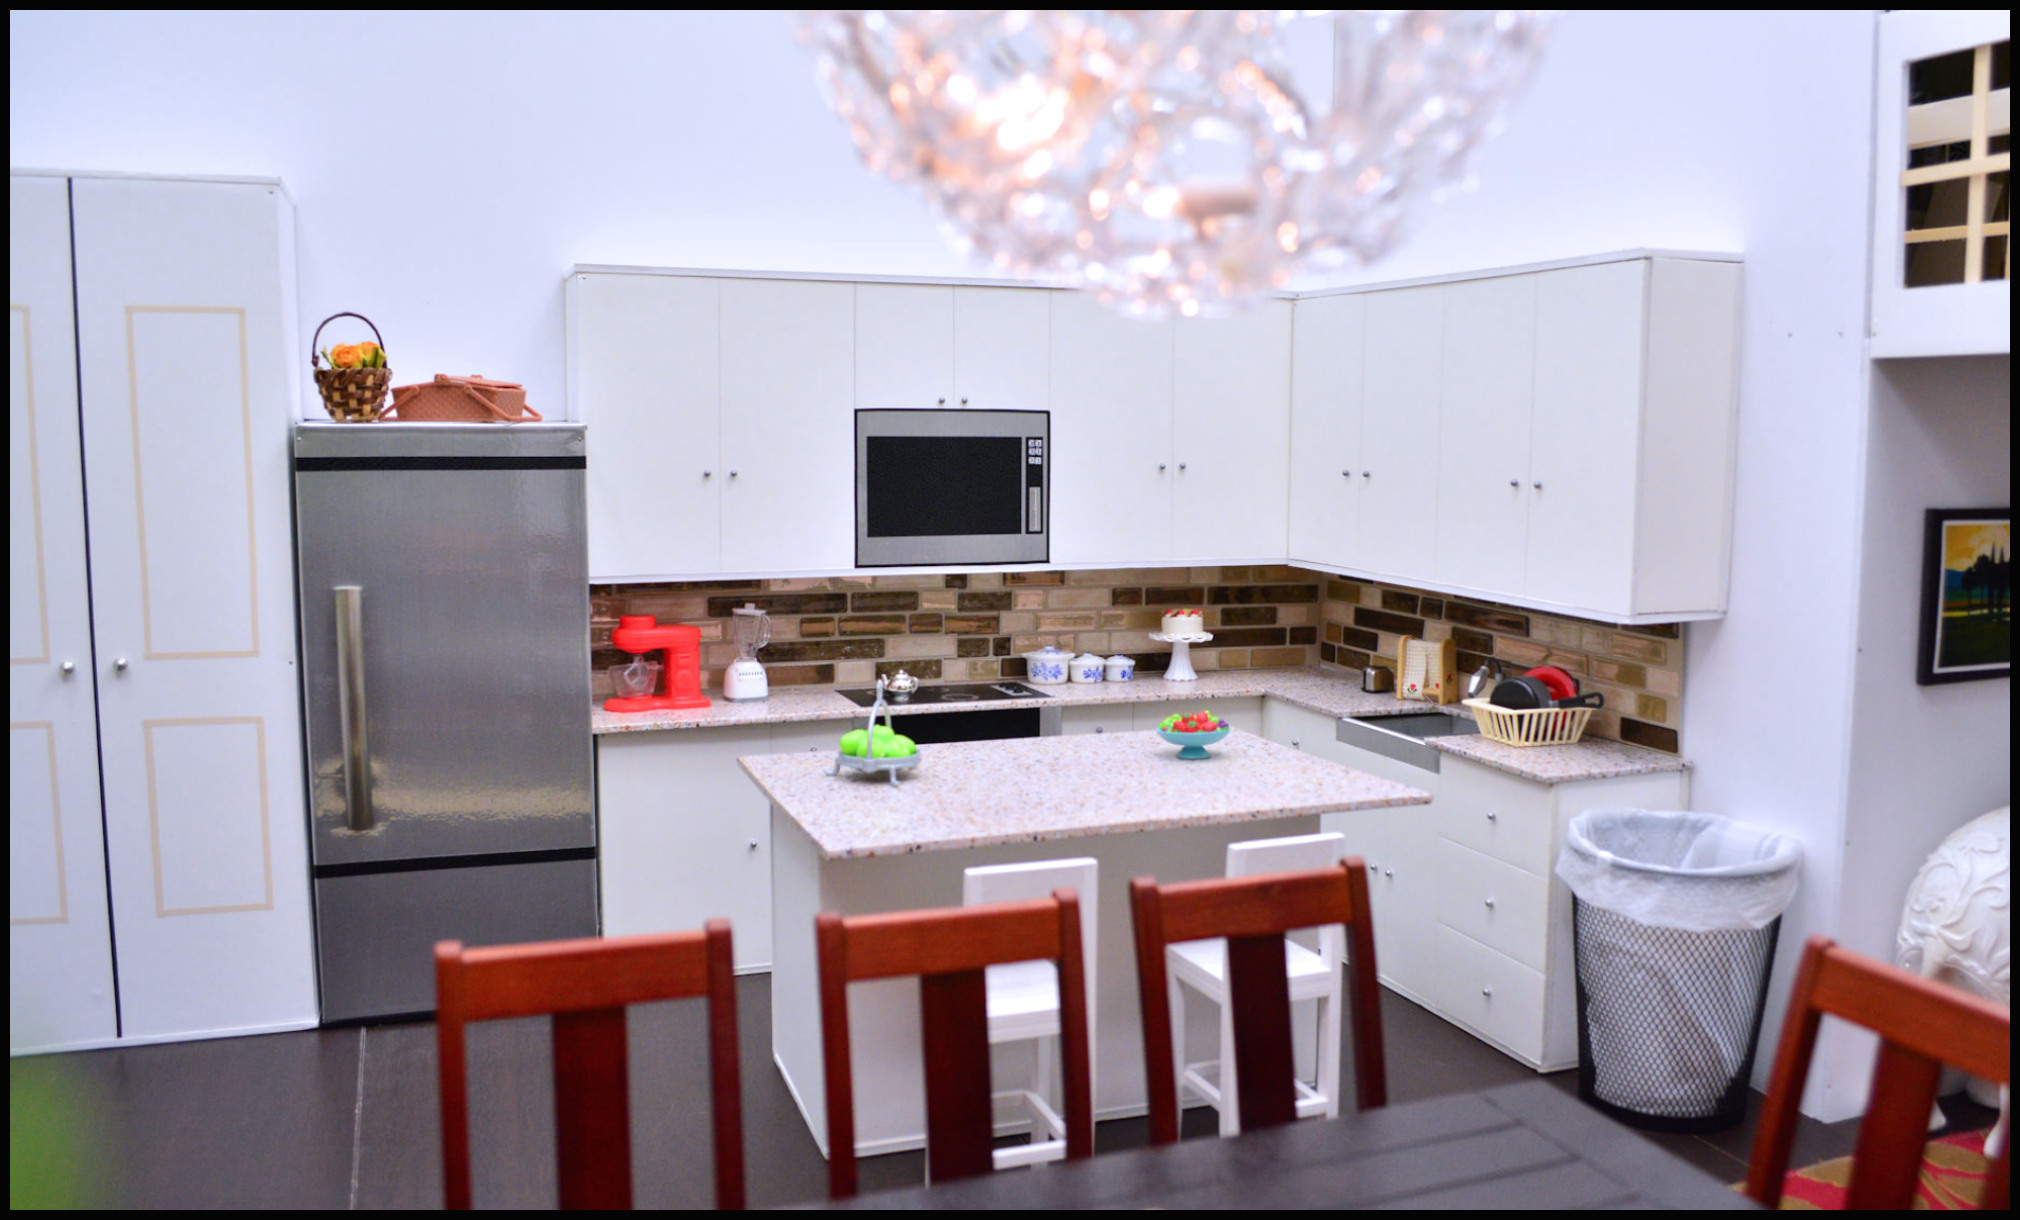
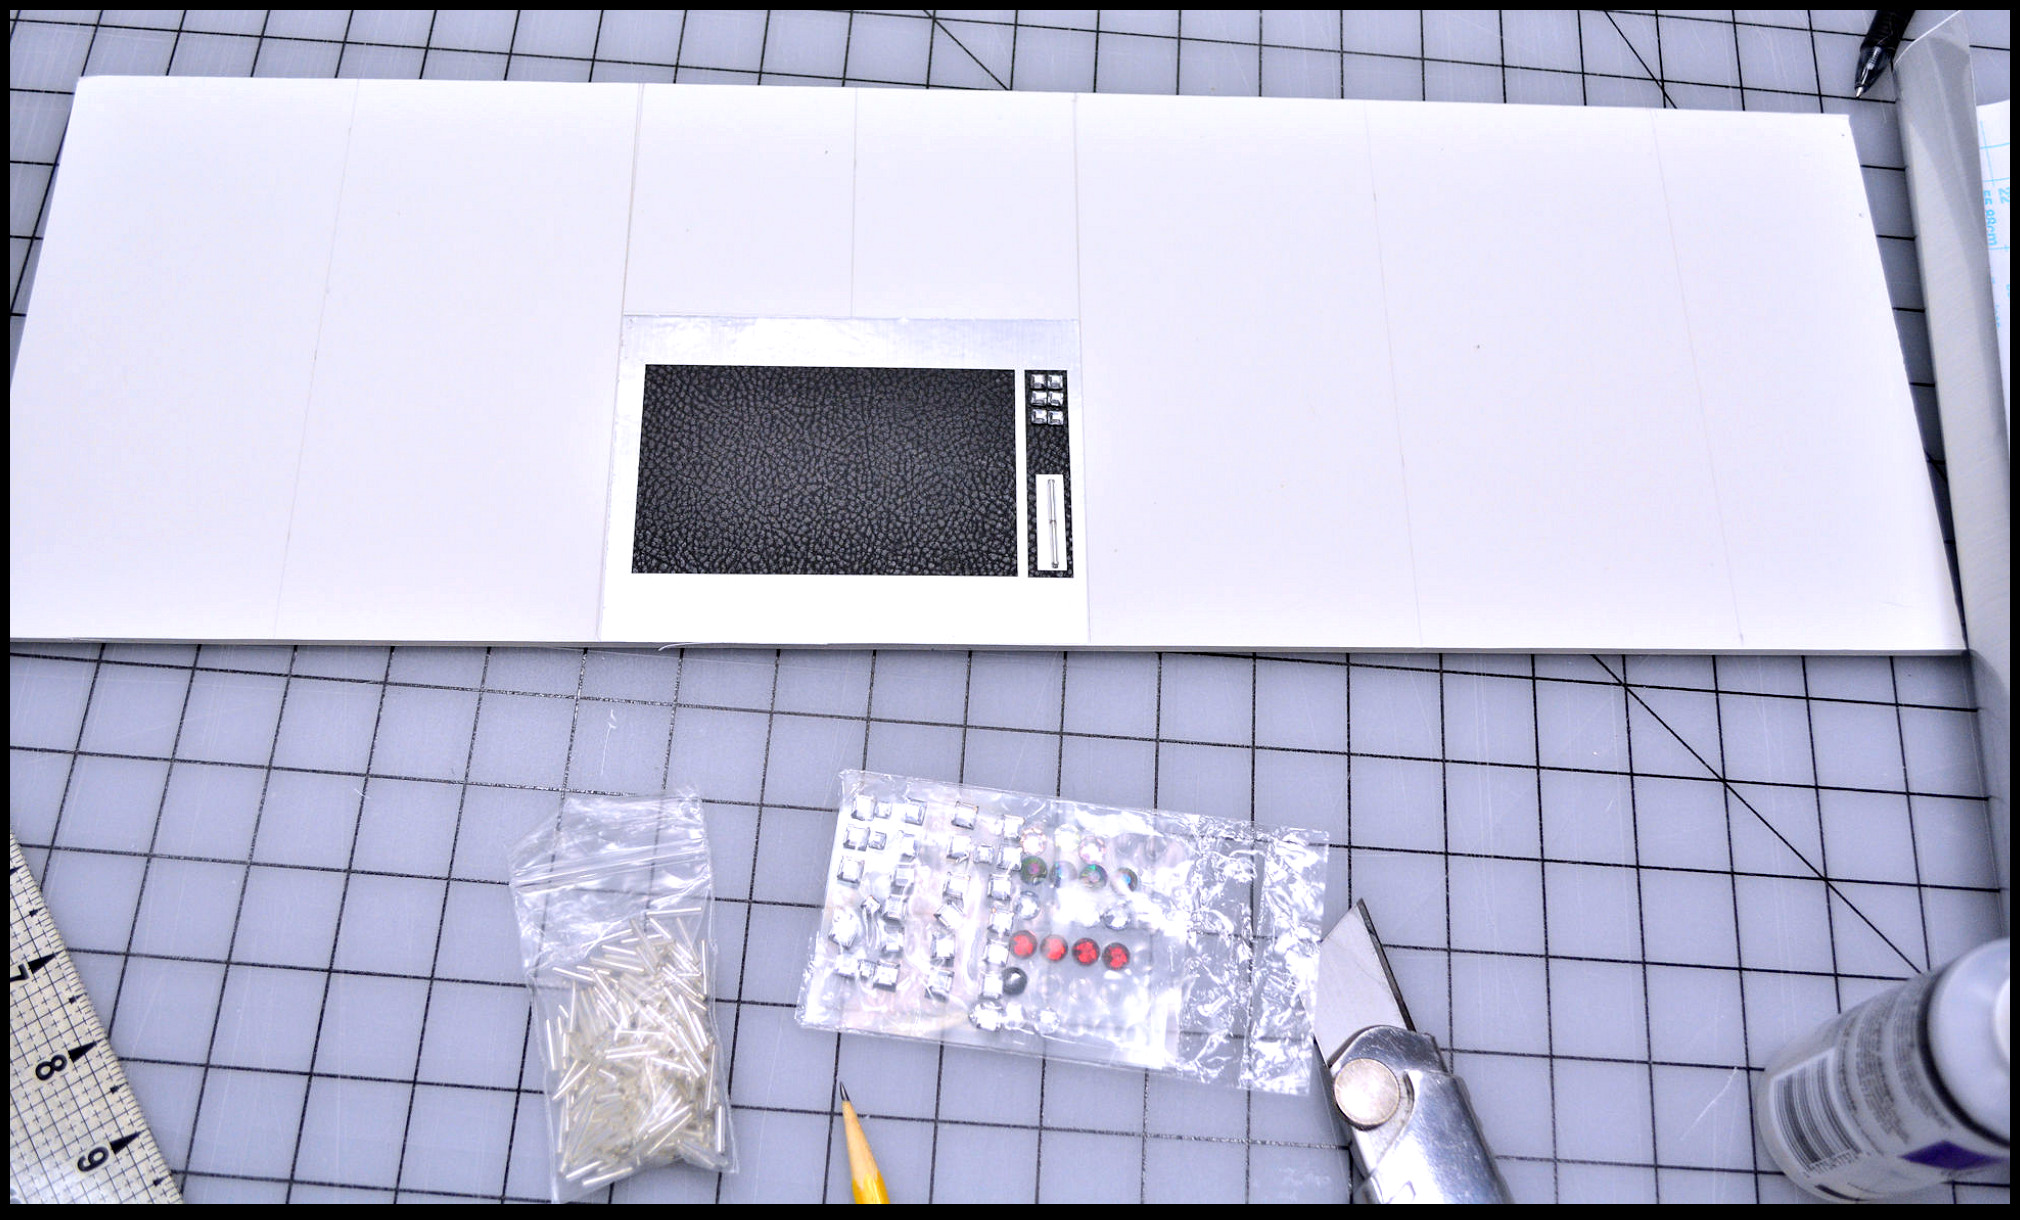
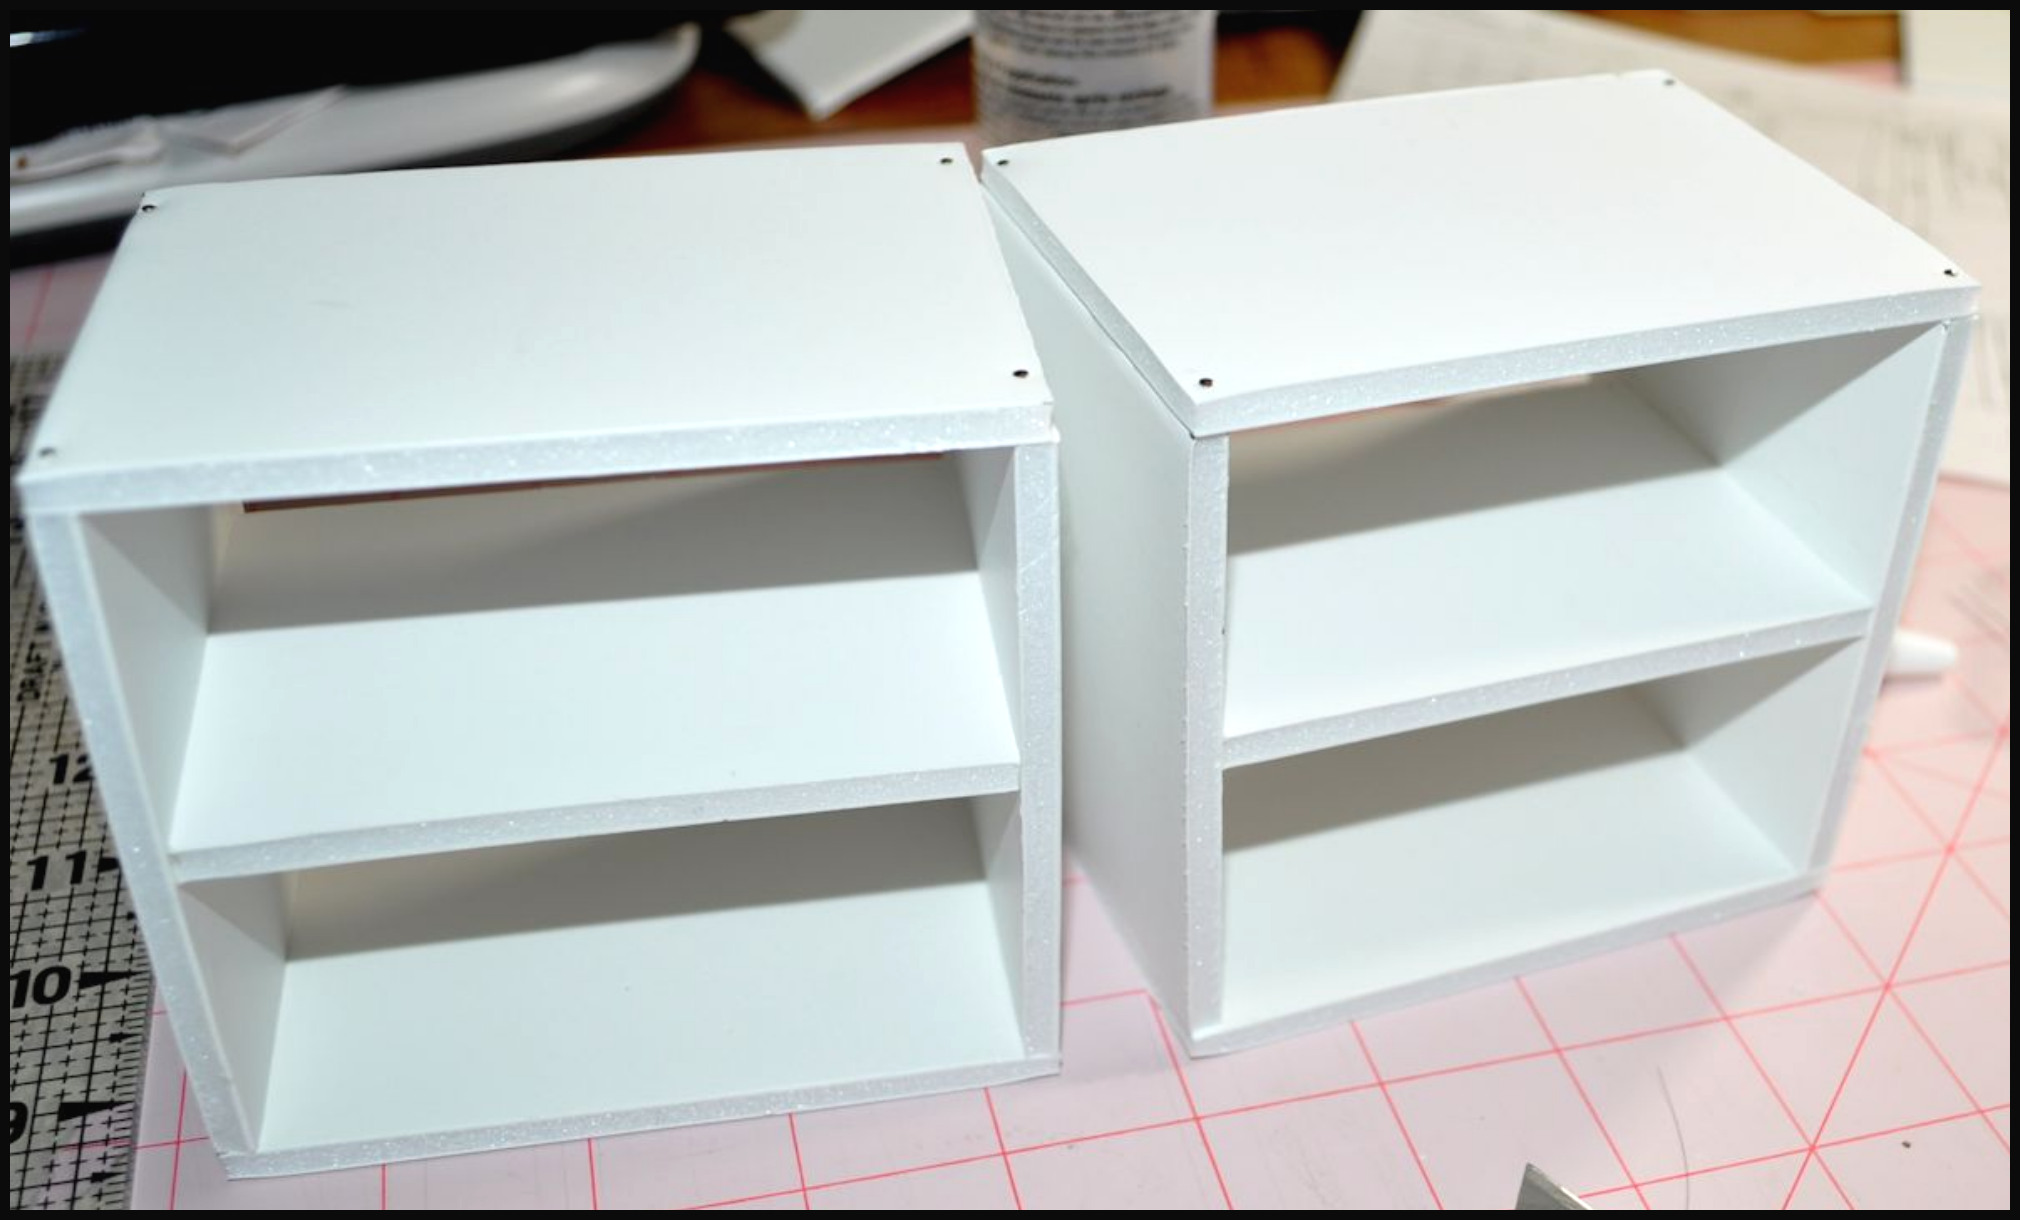
Kitchen #2 needed top cabinets with doors to match. Two sets of white 1/4″ foam board cabinets were pinned & glued as separate units. The space in-between cabinets are cut, then a pencil draws on the line to make it look like separate pieces. The microwave is made with silver & black contact paper and 3-D gem stickers
Before the front face of the top cabinet is pinned the glued together.

The cabinet is all together, now the white ball sewing pins which are pretending to be door pulls are painted silver to match the bottom cabinets.
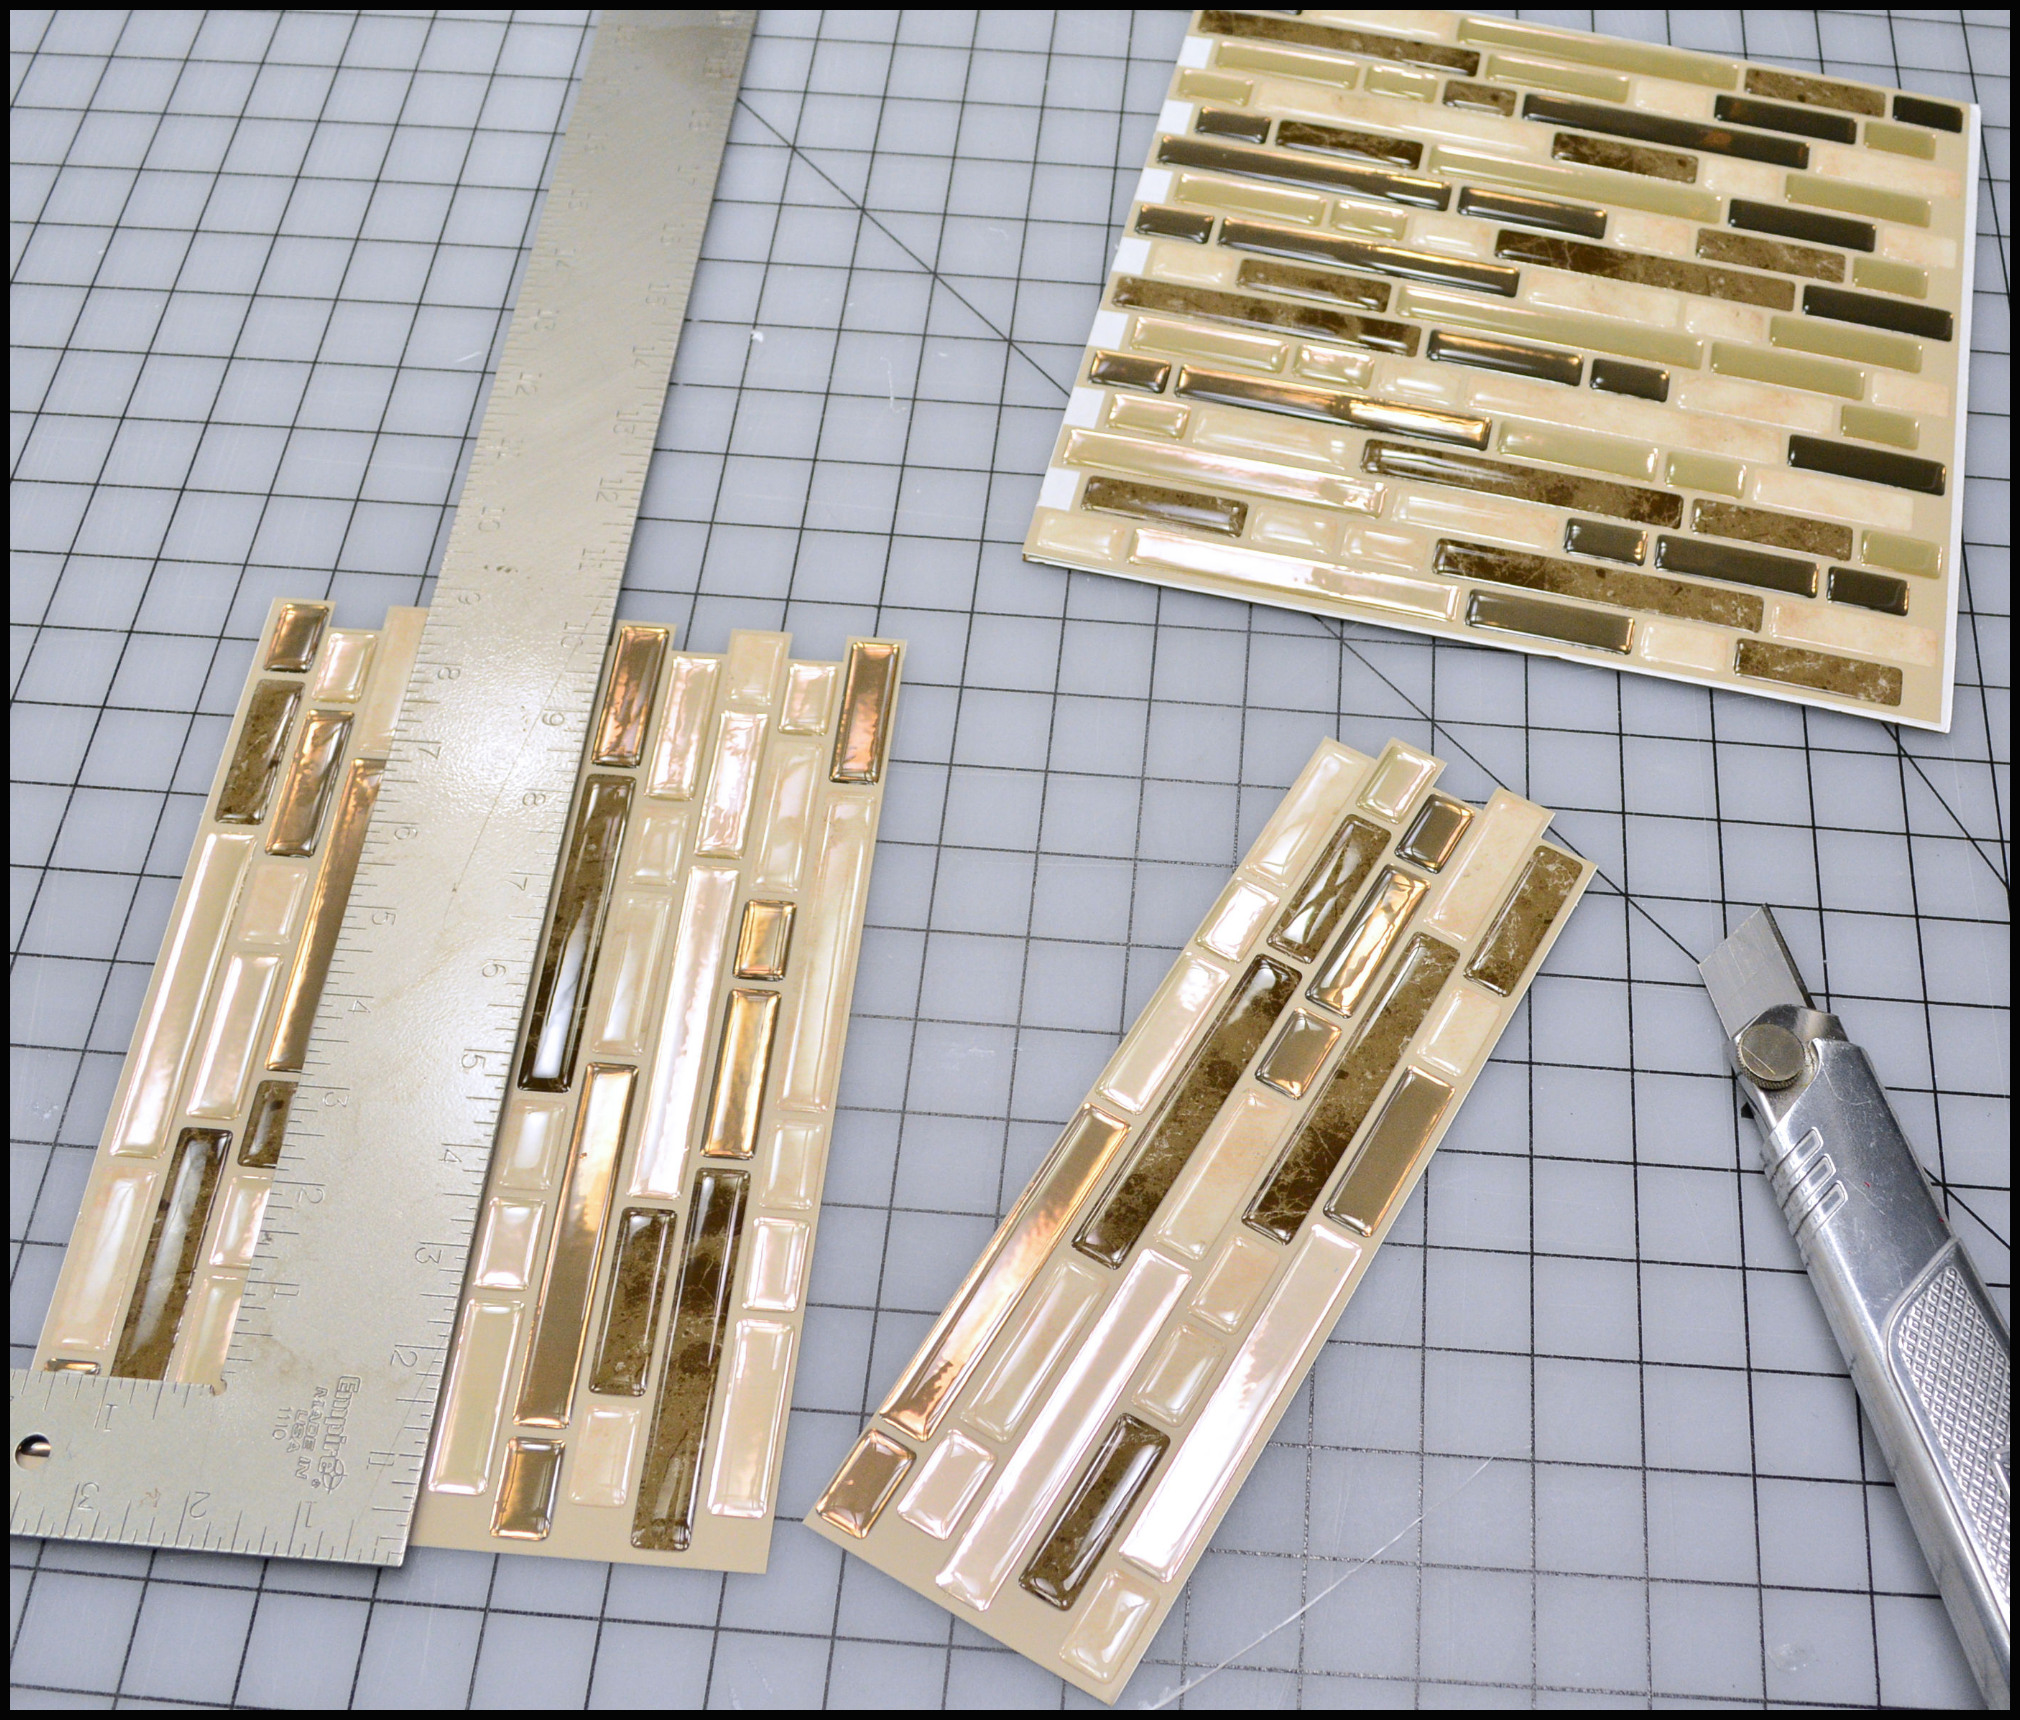
Lowe’s hardware store had this amazing stick-on tile that was super thin and the right size. I bought a few sheets, then cut them in strips, so they fit on the wall between the top and bottom cabinets.
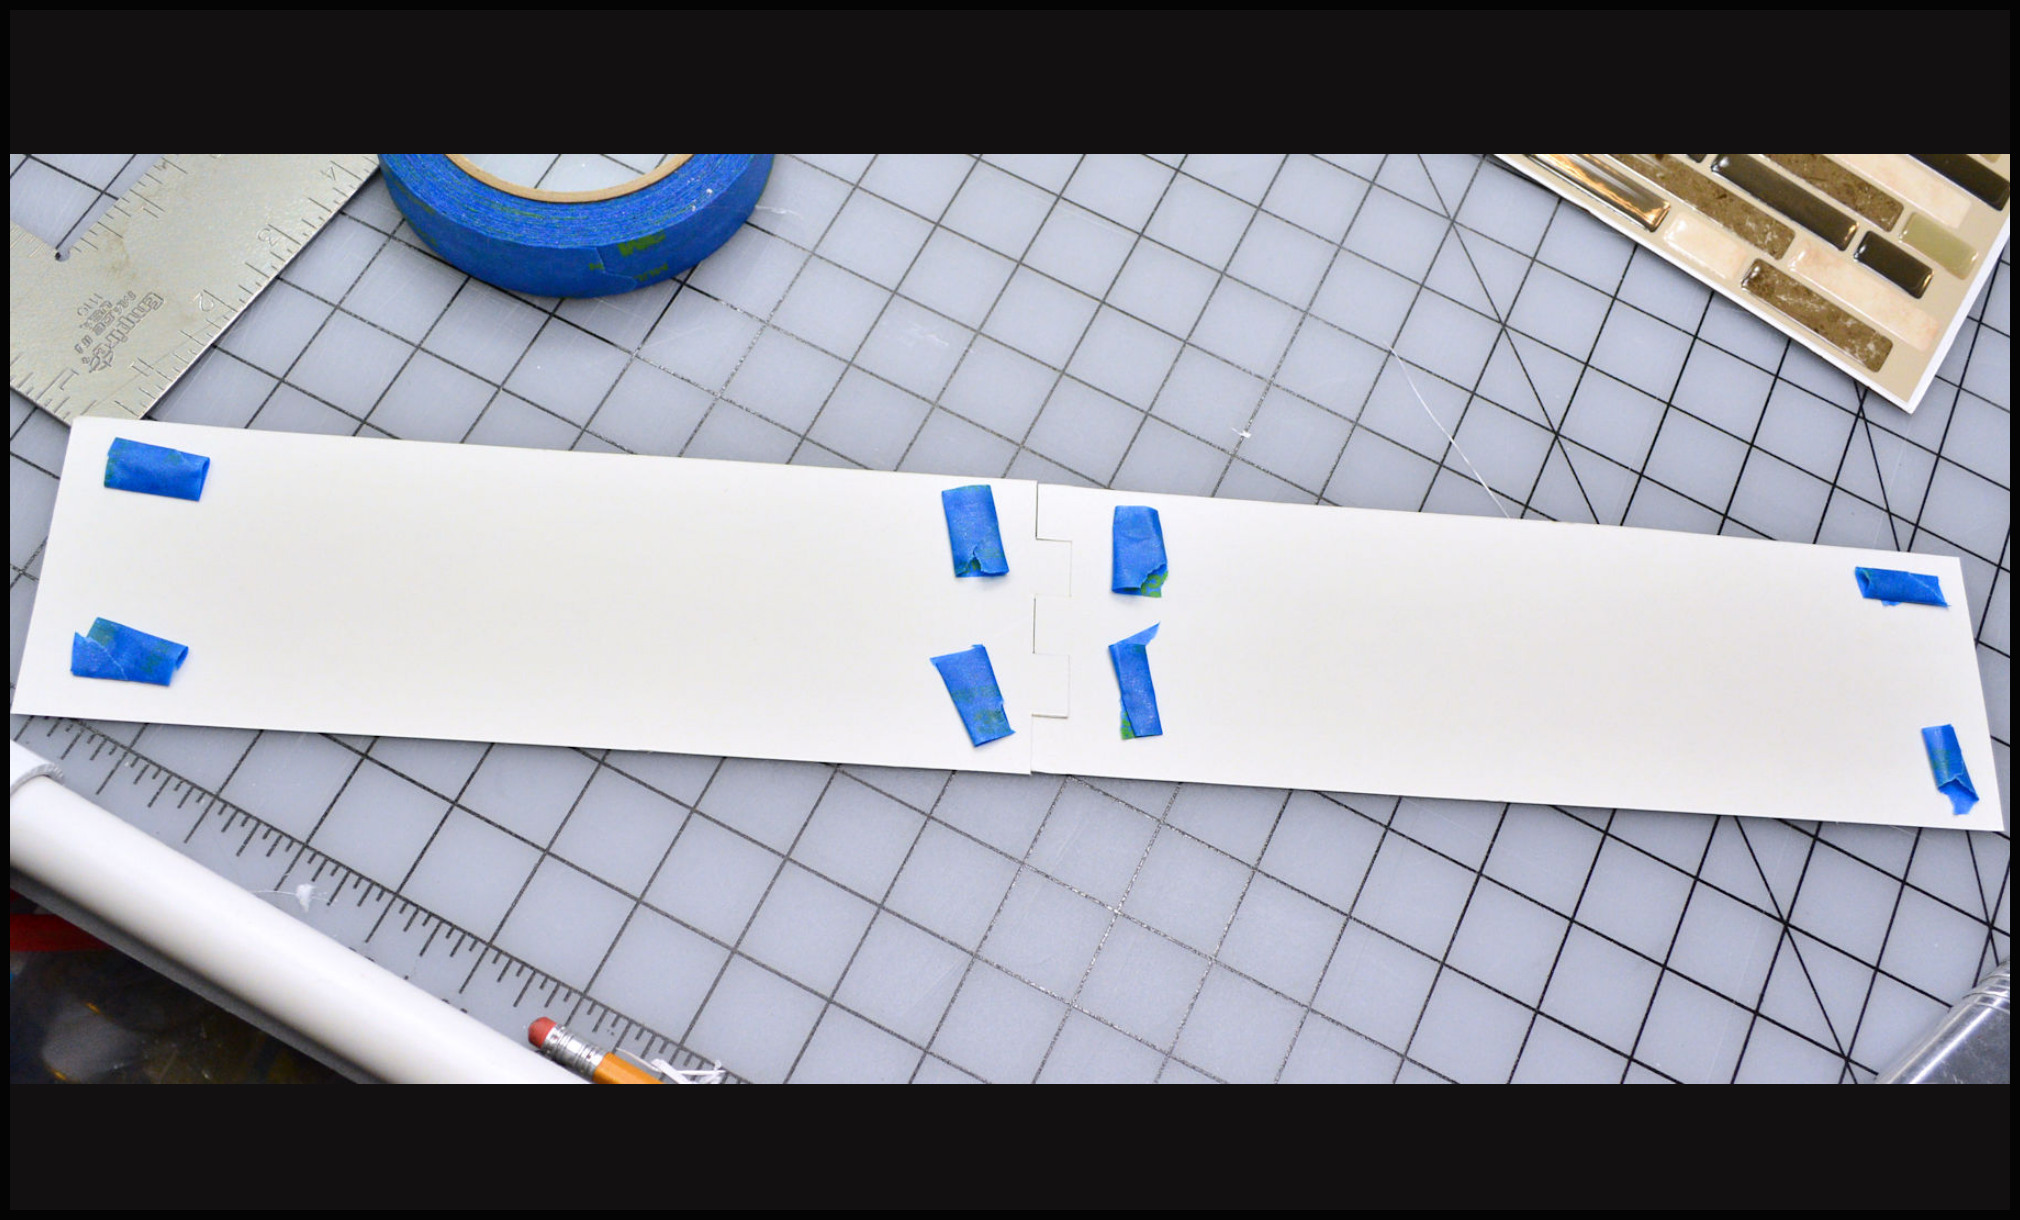
For the longer side two pieces needed to be taped together connected by brick-like cuts in both pieces.
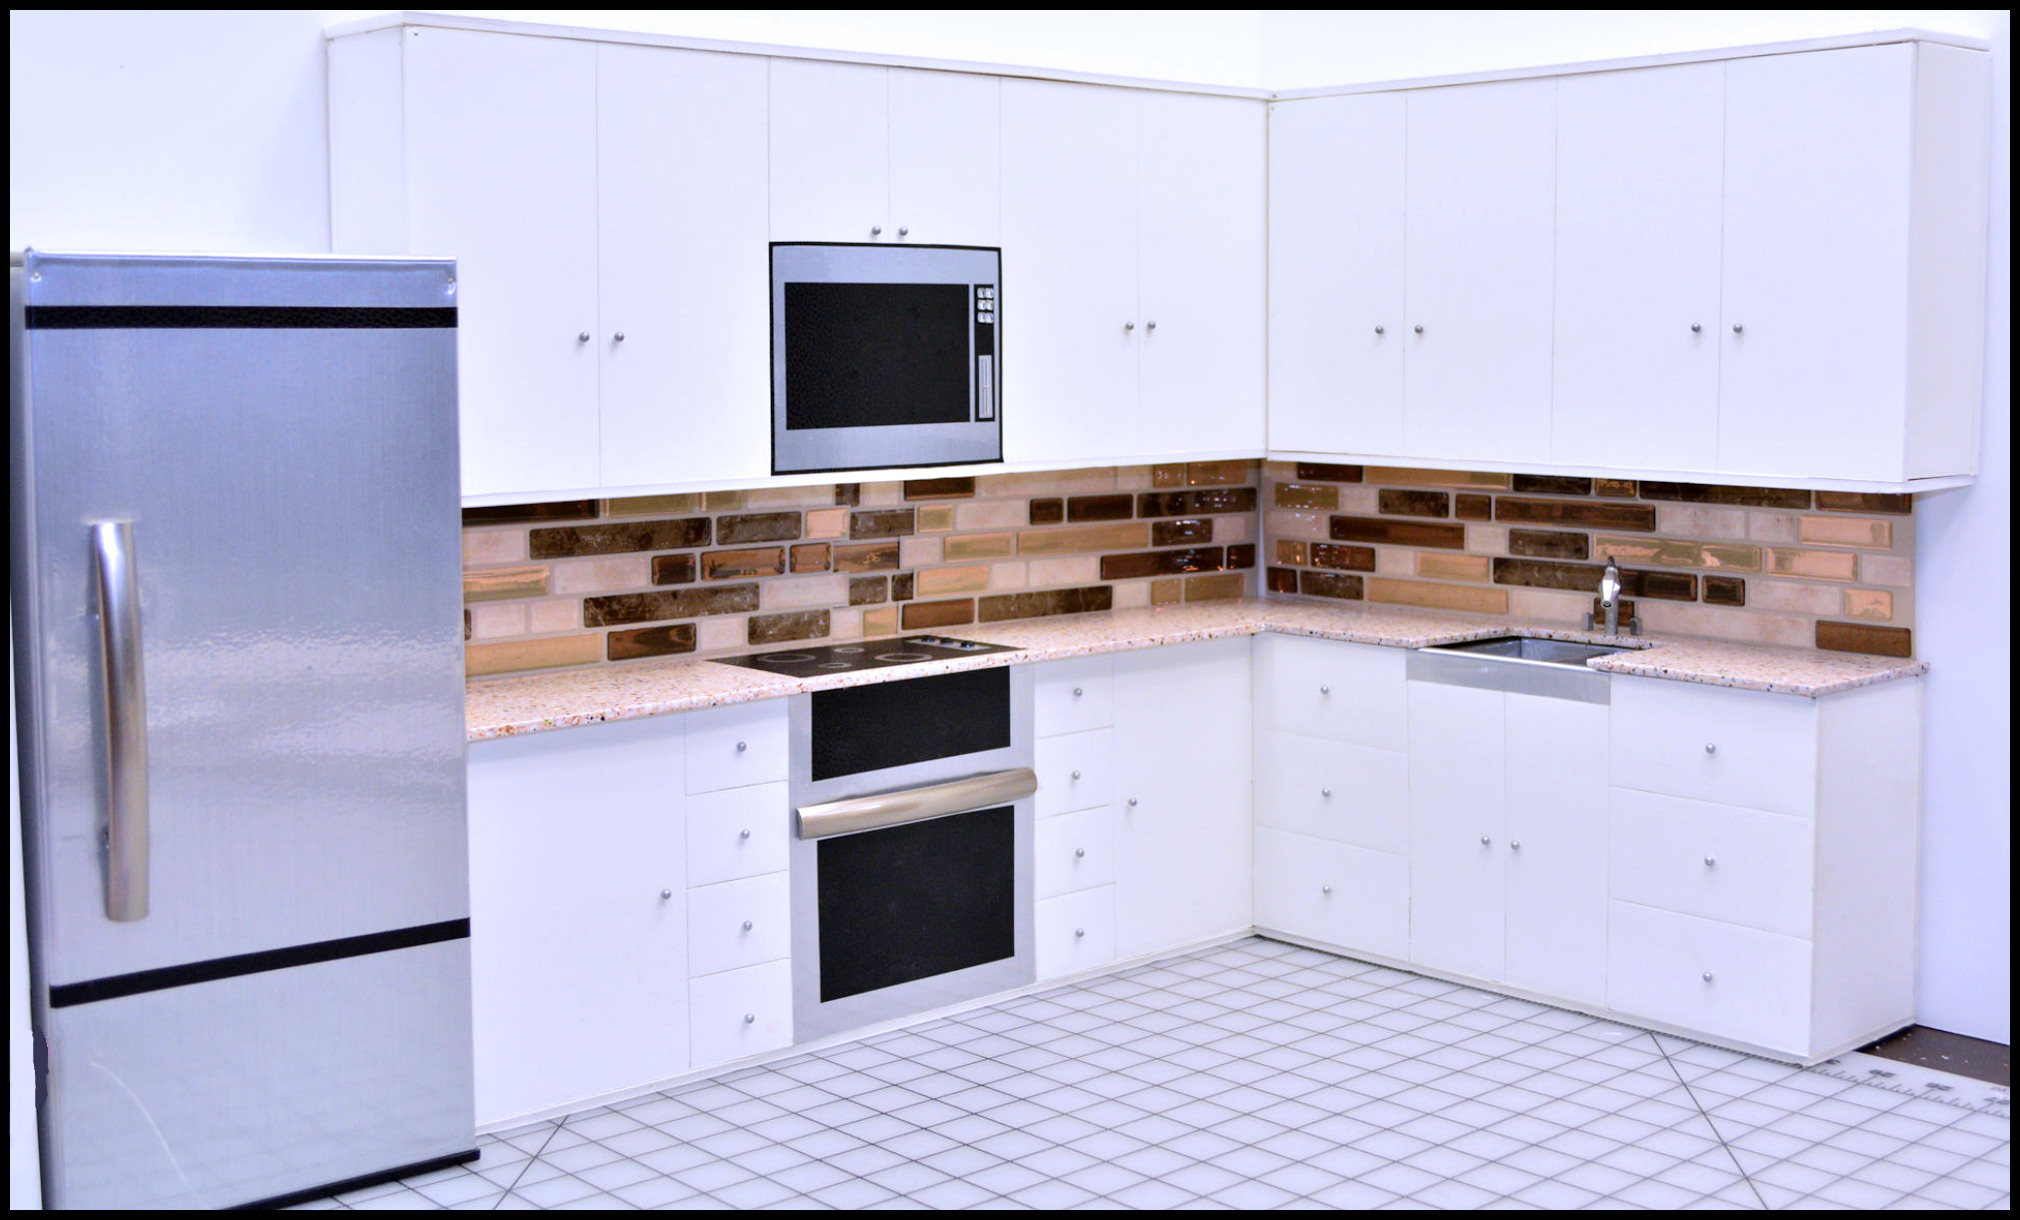
These two top cabinets needed to be pinned to taller 40″ 1/2″ foam board walls, which made it more difficult to see if I was pinning them straight, you might need another person looking head-on at the cabinets while you pin behind the wall to assist.
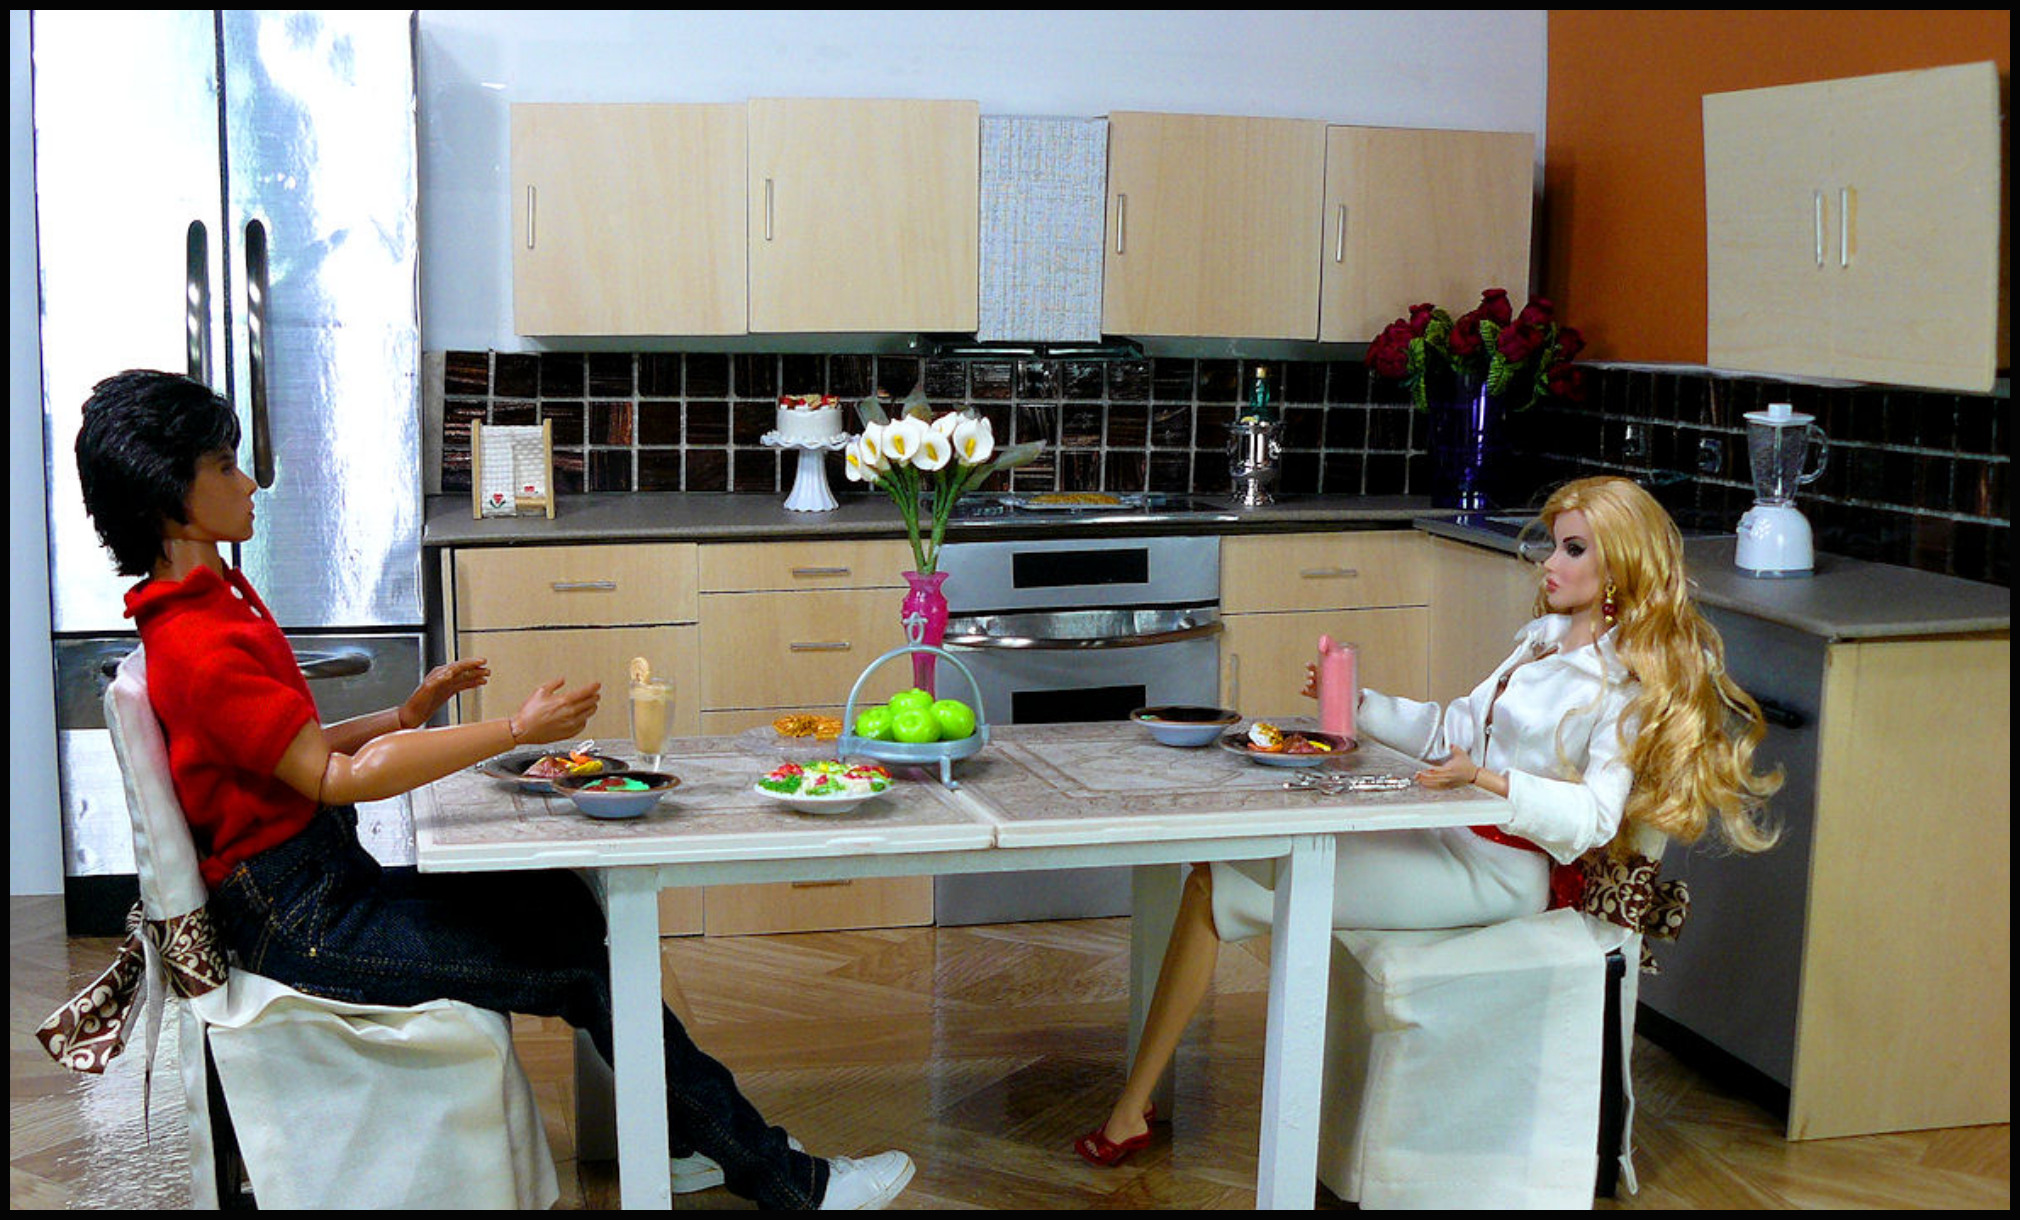
Below are other photos of the same kitchen in fully finished dioramas.
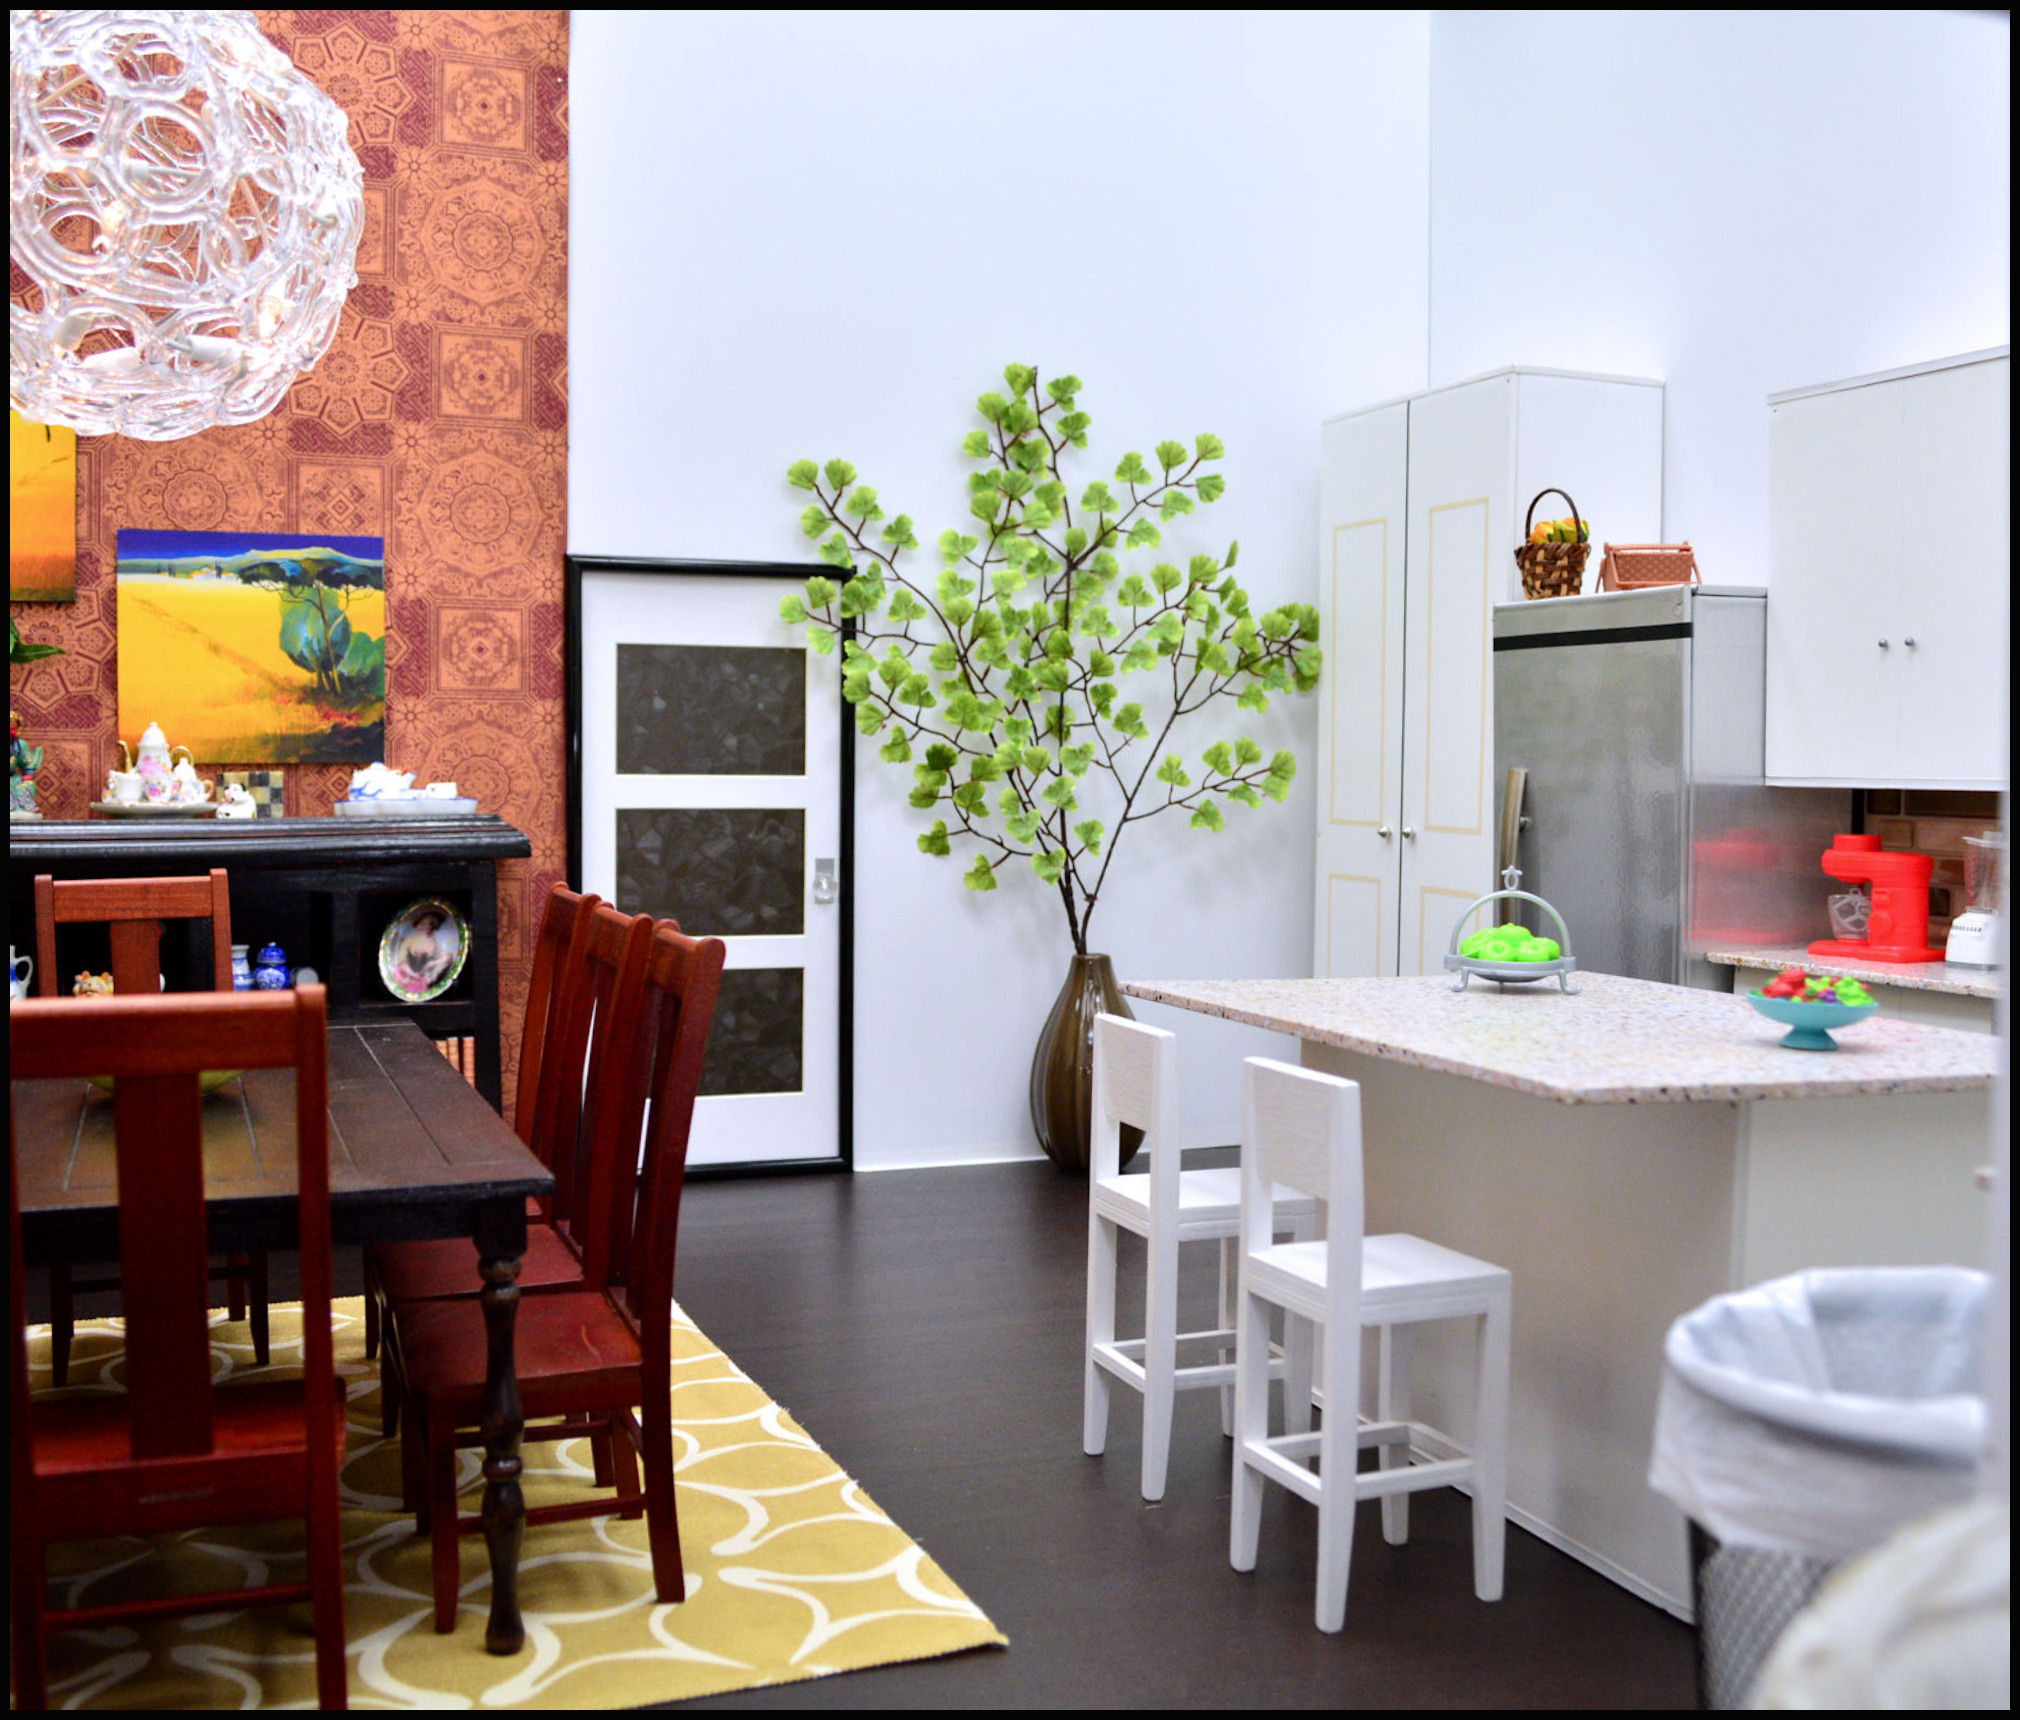
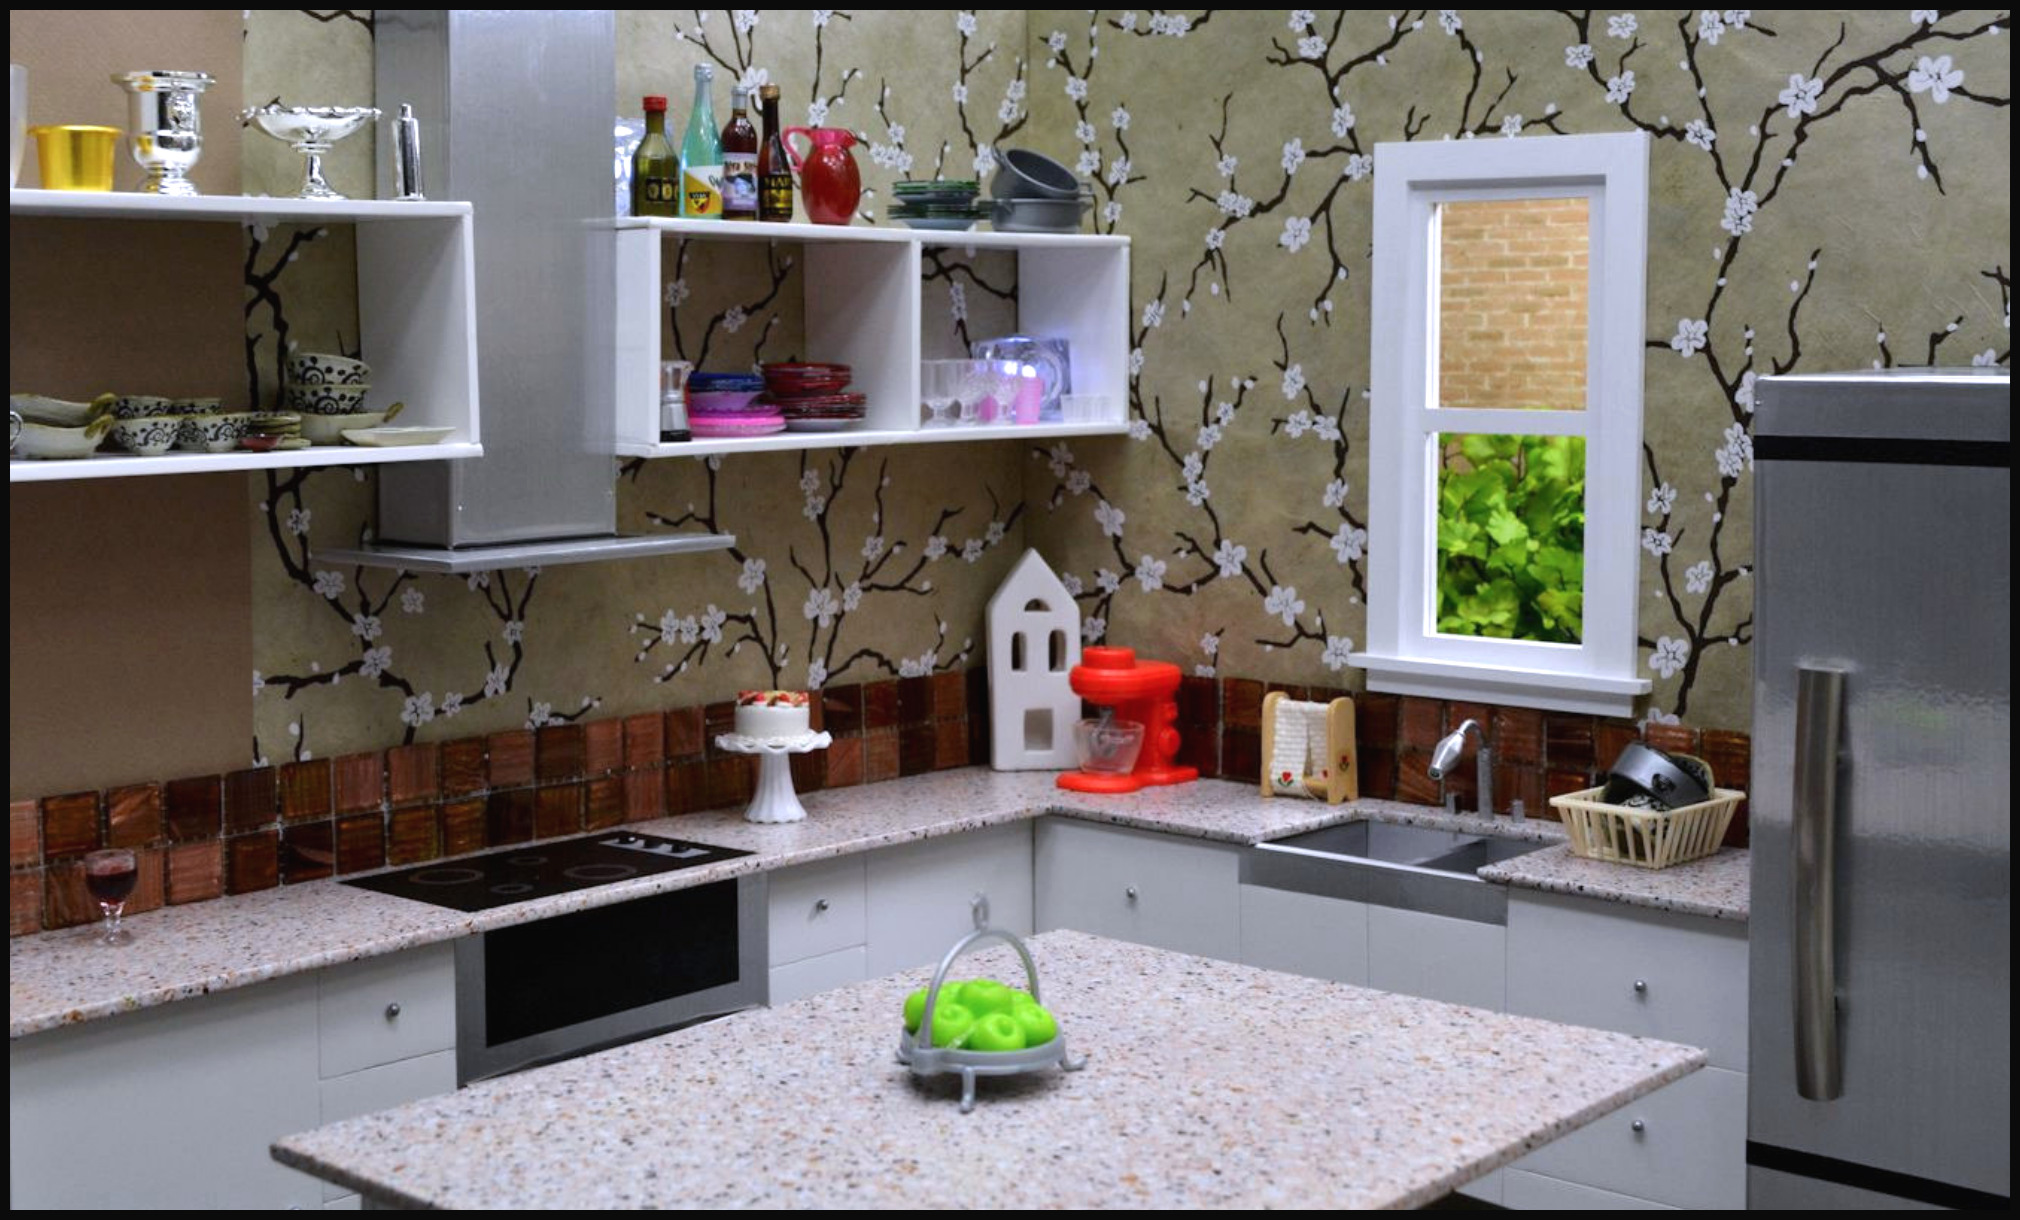
KITCHEN #3
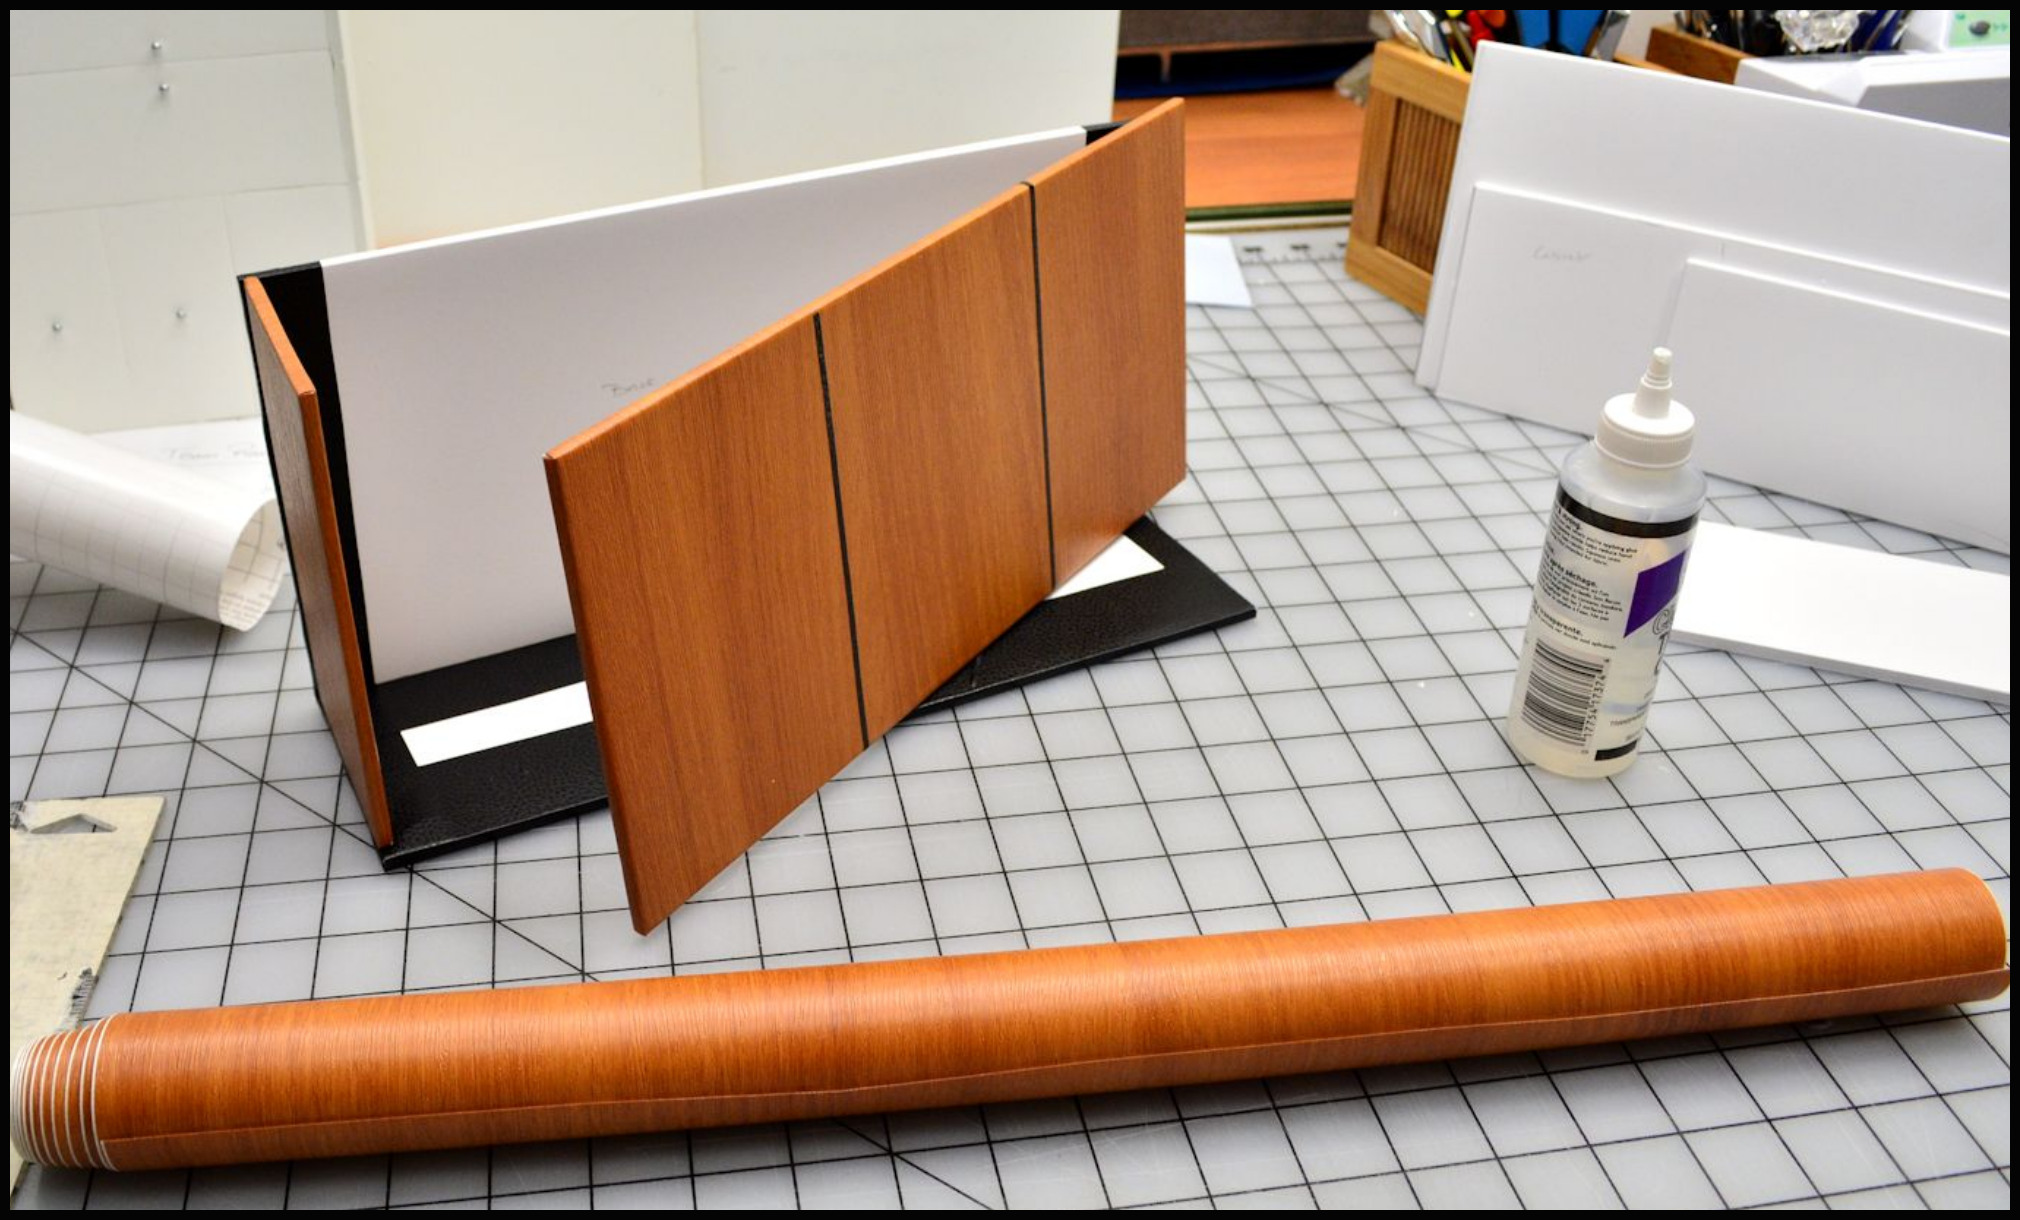
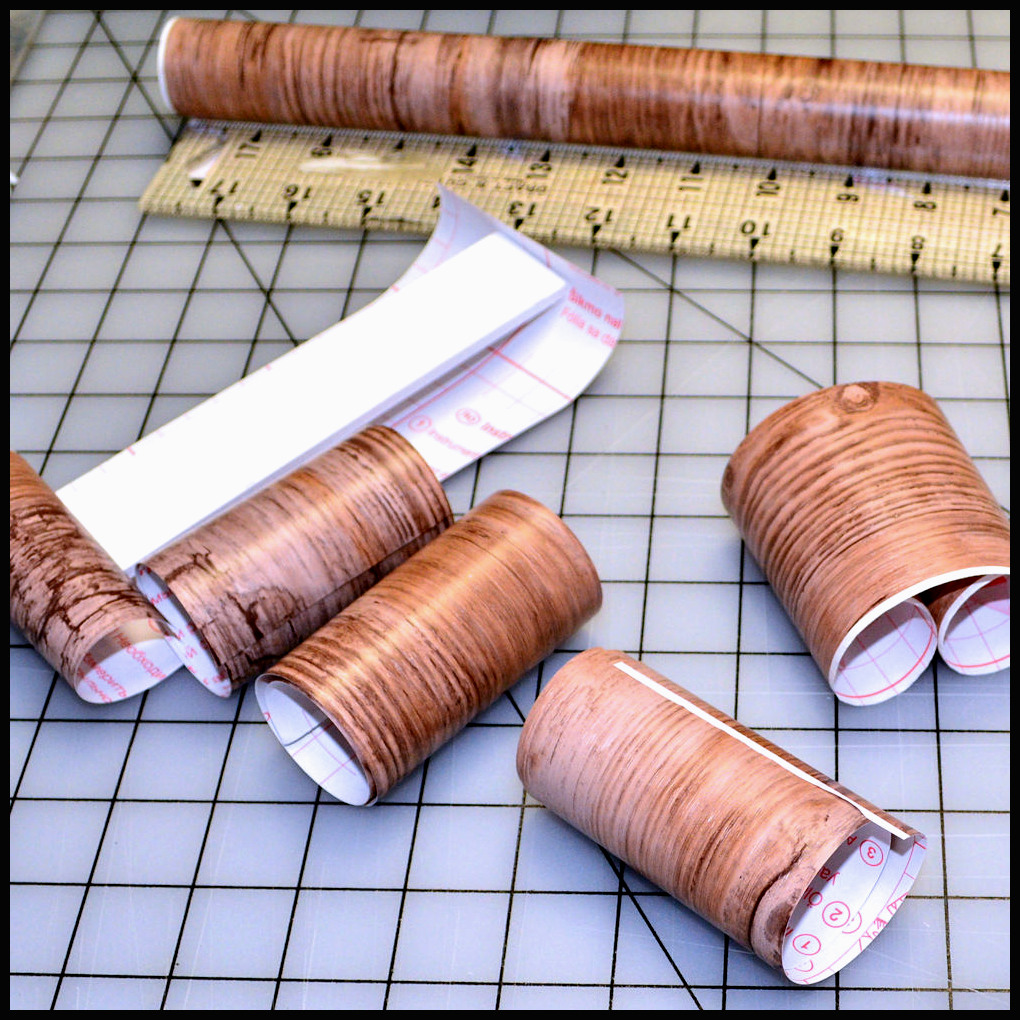
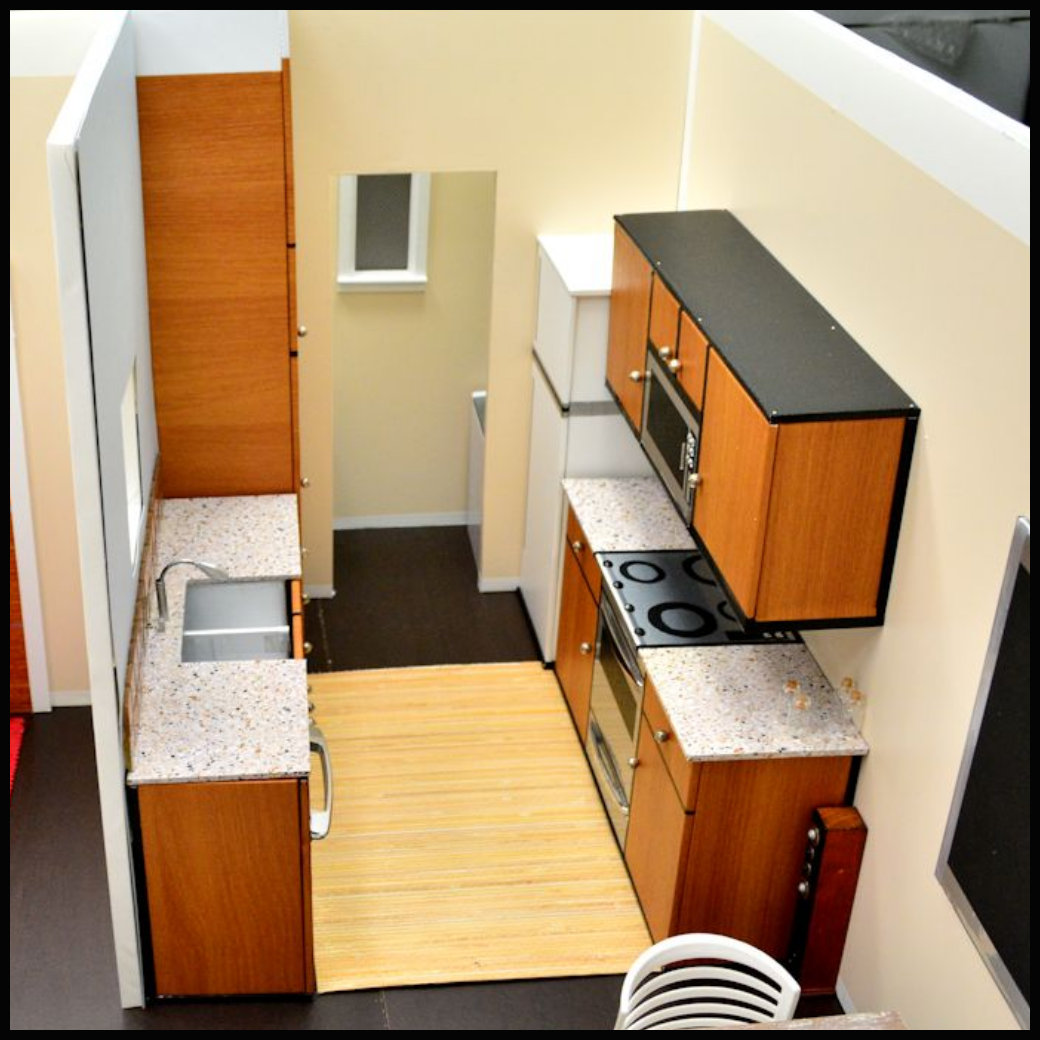
Using the same methods I learned in Kitchen #2, I wrapped the 1/4″ white foam board in a great textured wood contact paper first, then pinned & glued them together to make two bottom cabinet sections and one top cabinet section.

Drawer pulls were used for the oven, and jewelry beads were pinned to through the board to make drawer pulls for the drawers and cabinets.
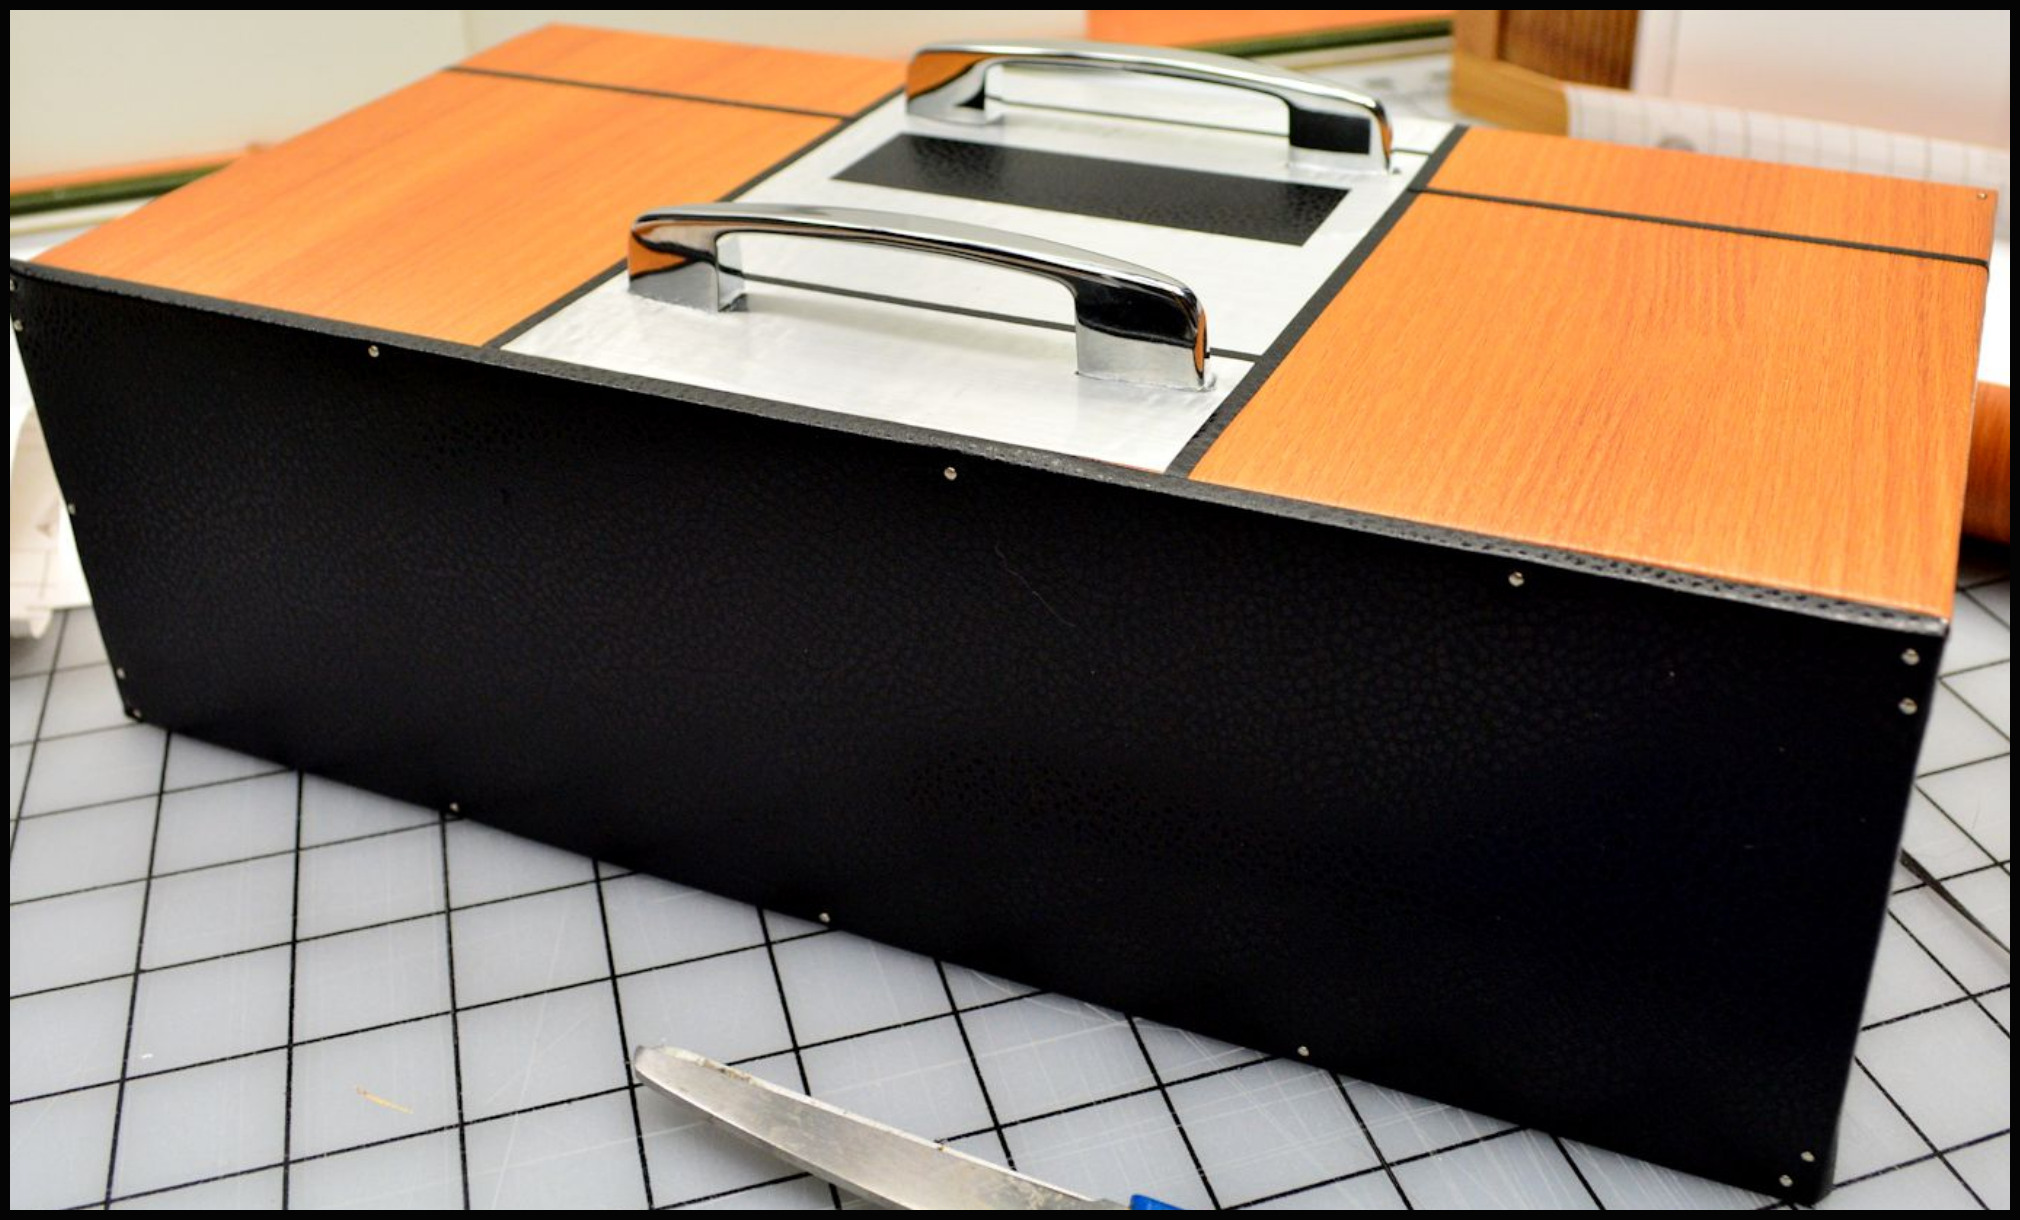
It’s sturdiest when all sides have a wall of foam board including the bottom.
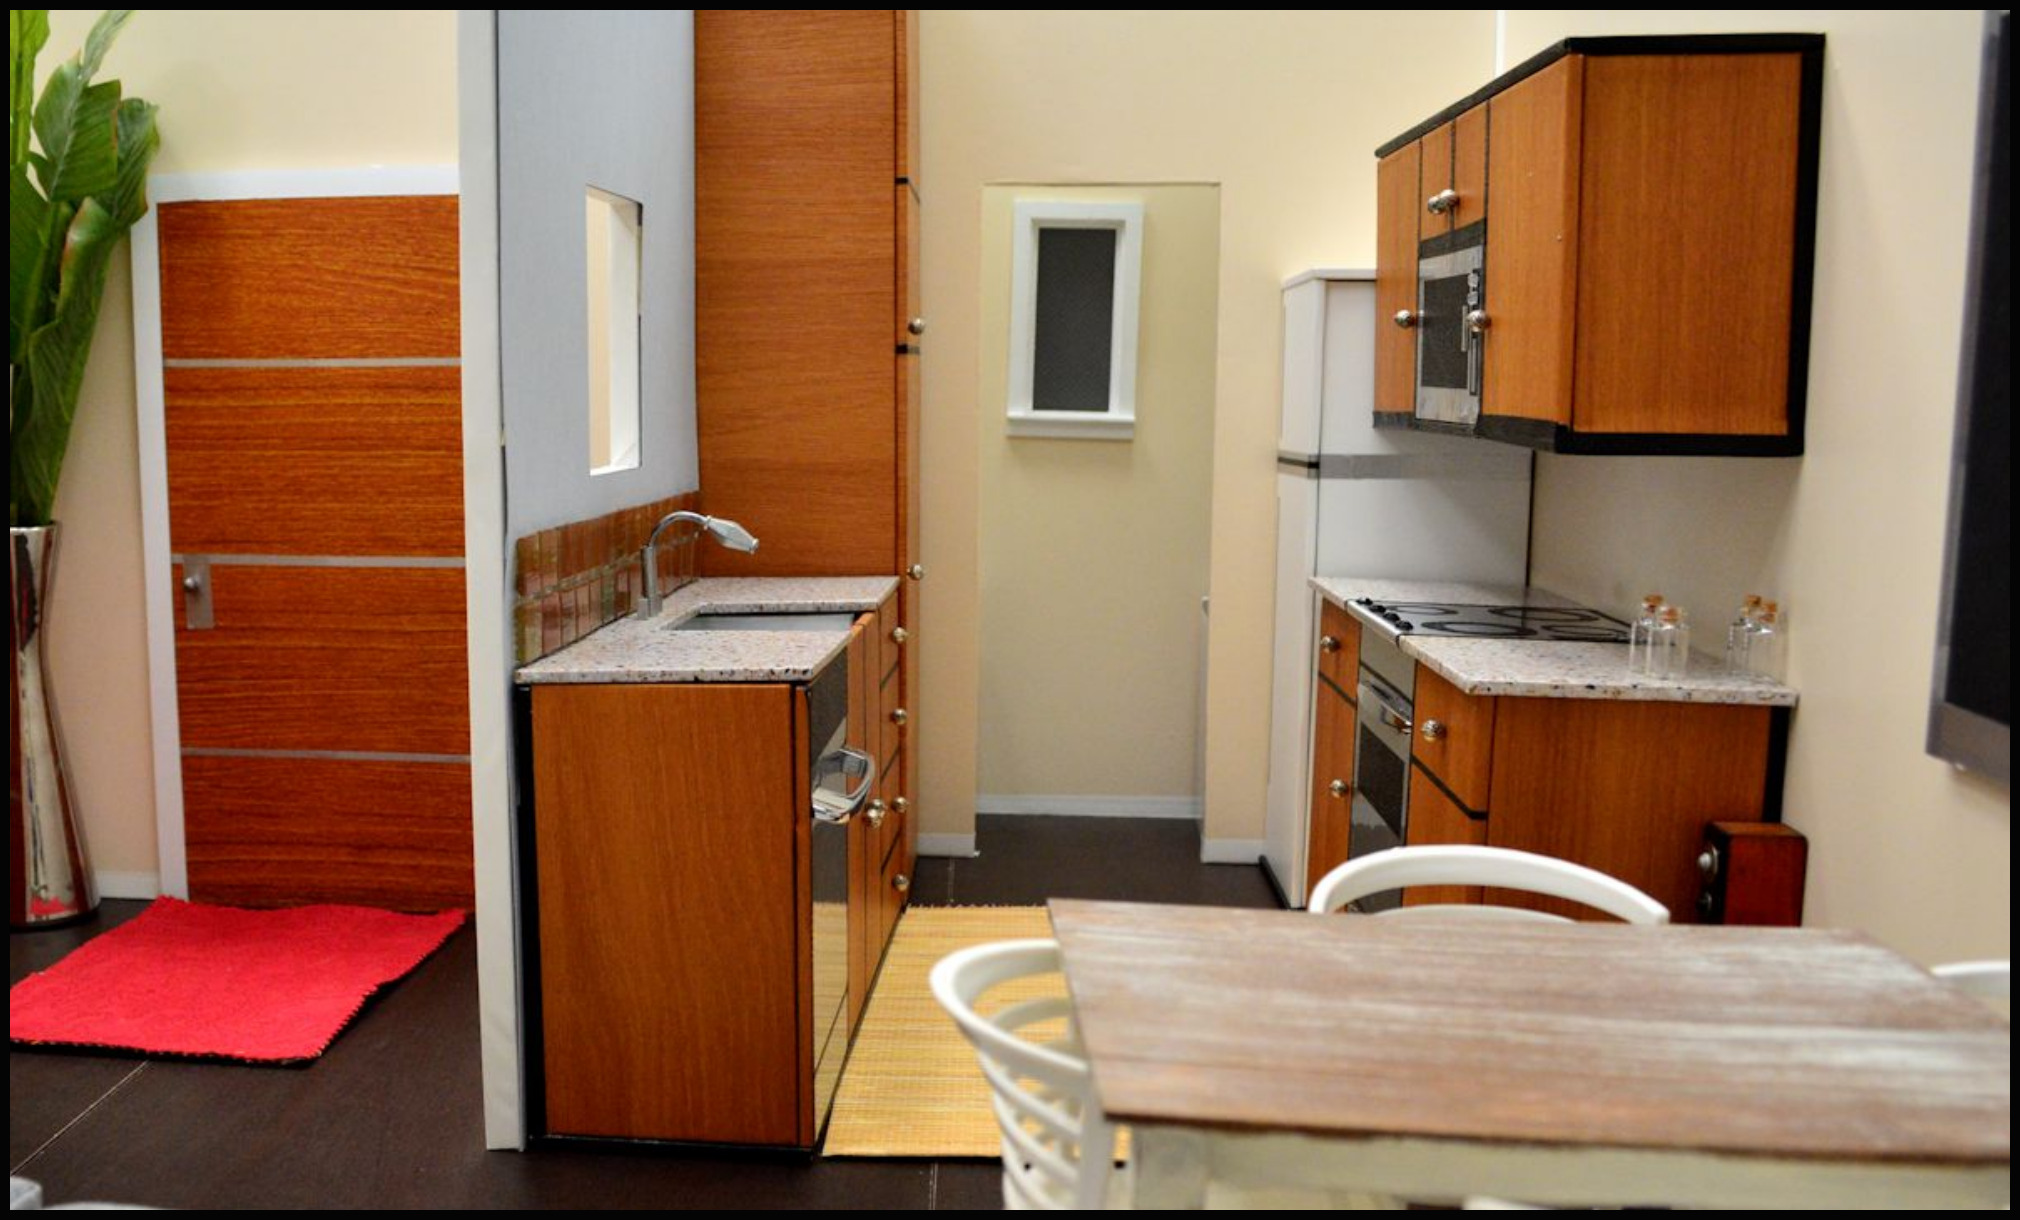
I always made a tall pantry closet with the matching wood. The apartment I created was actually a replica of the one I was living in at the time. And the galley kitchen most resembled mine.

Here is the finished sink counter with a dishwasher facade next to it. I removed the sink from the white kitchen and pinned it inside of this one.
The 3-Ply poster board has real human-sized tiles, and I mixed wood for the living areas of the apartment, and marble tiles for the kitchen and bathroom areas. I’ve placed my galley kitchen down to space out how much room I have for the laundry room that will go on the end.
To replicate my little white fridge, I made a rectangular box with uncovered white foam board.
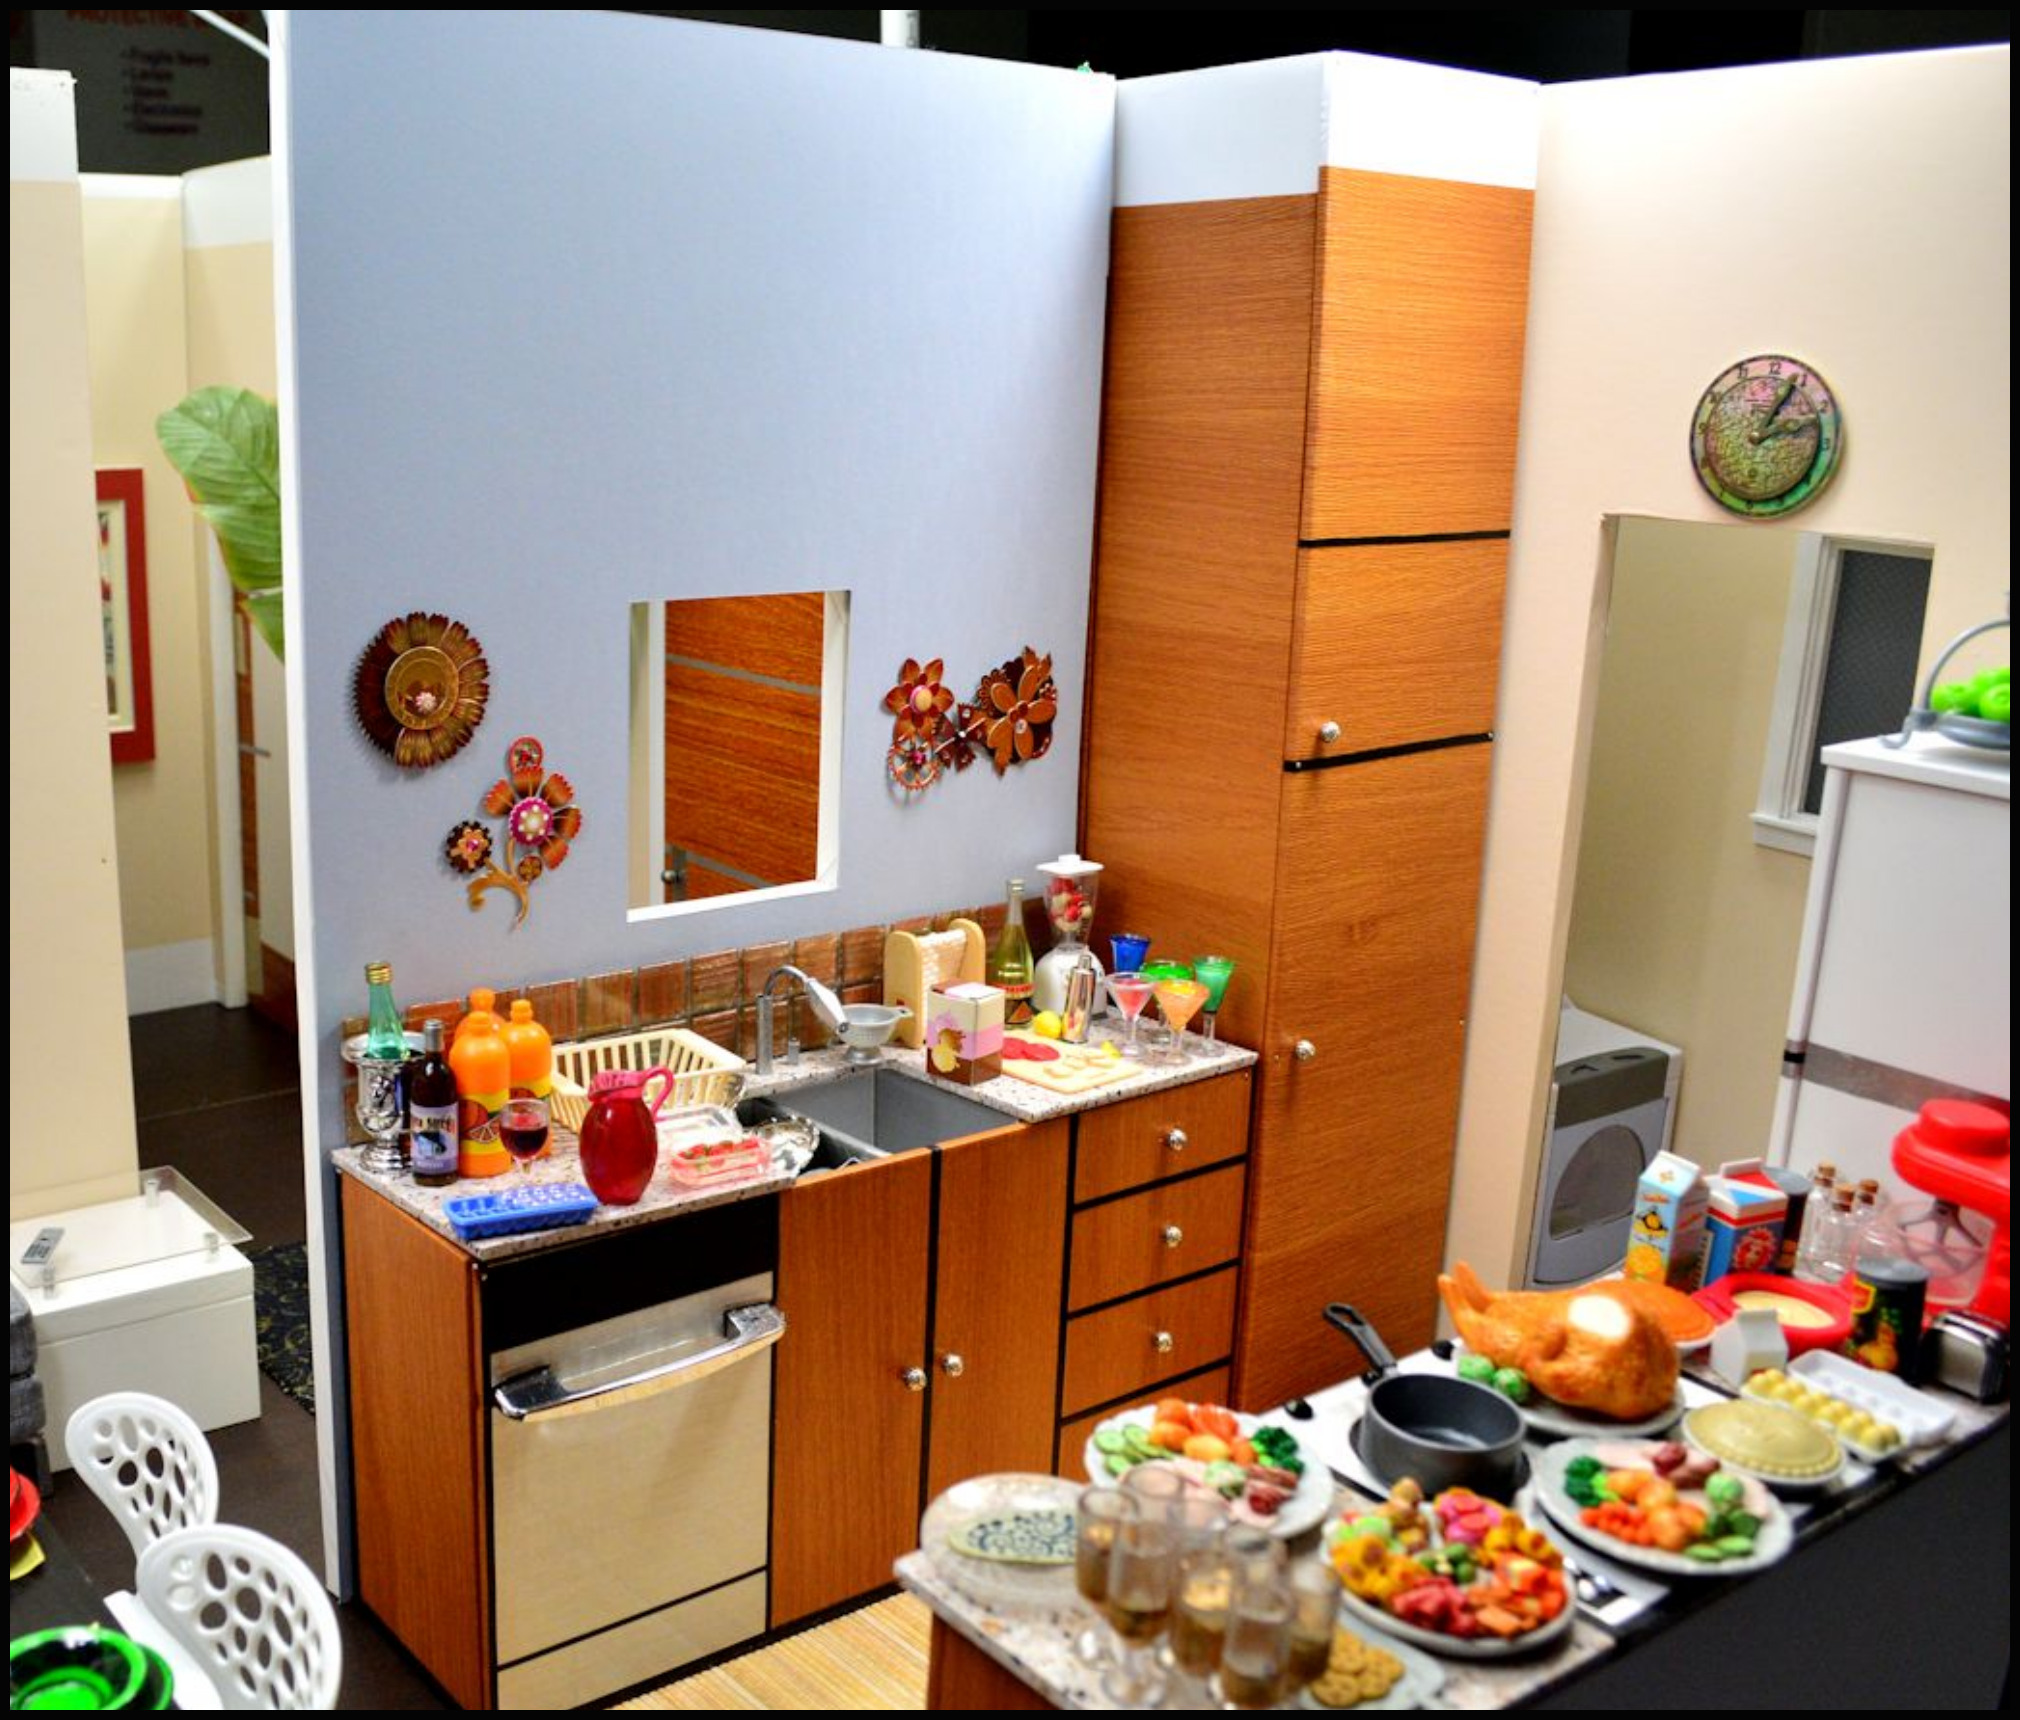
Below are photos of the kitchen finished before and after accessories are added.
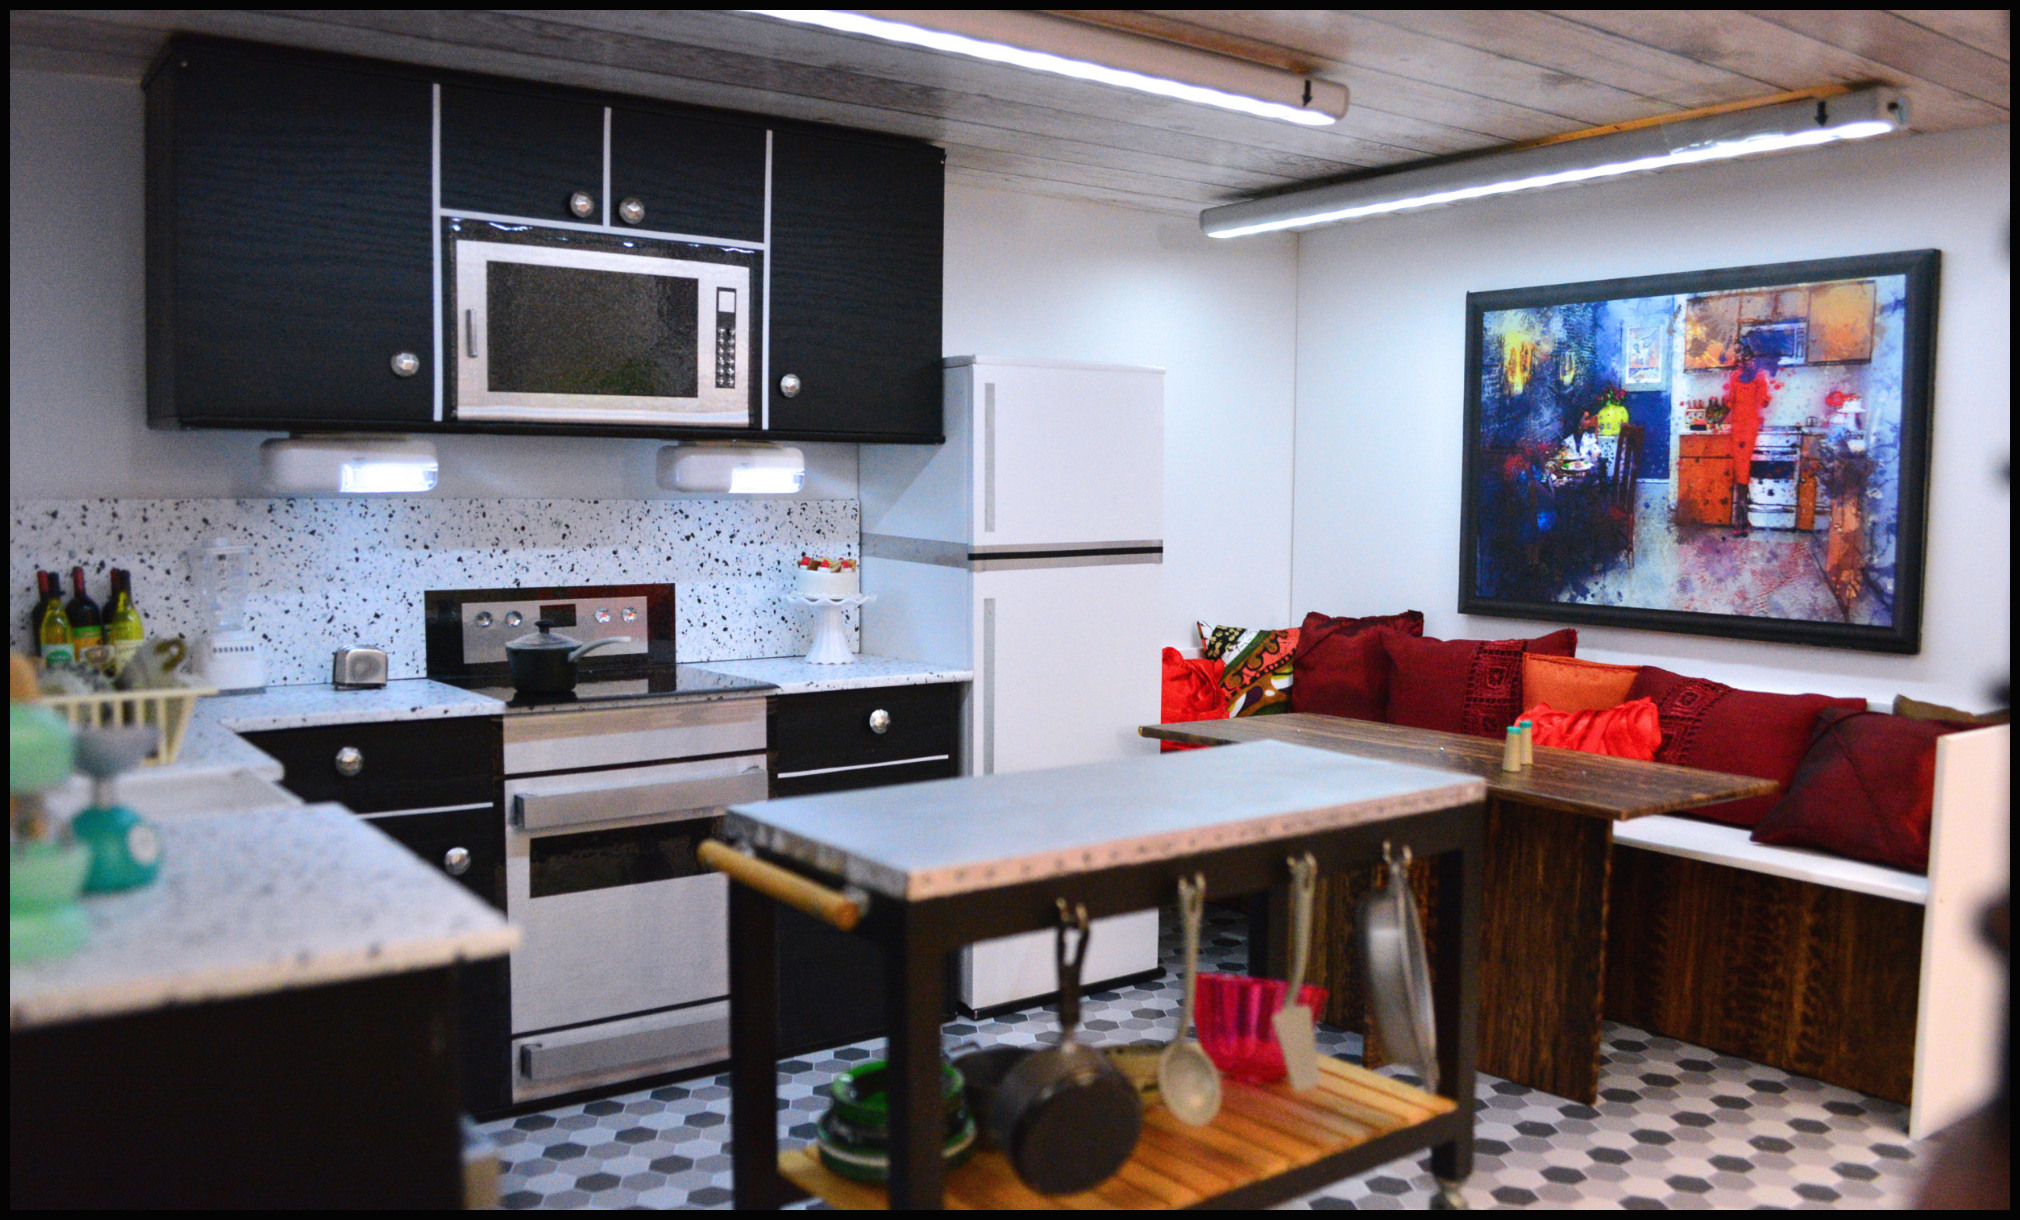
KITCHEN #4
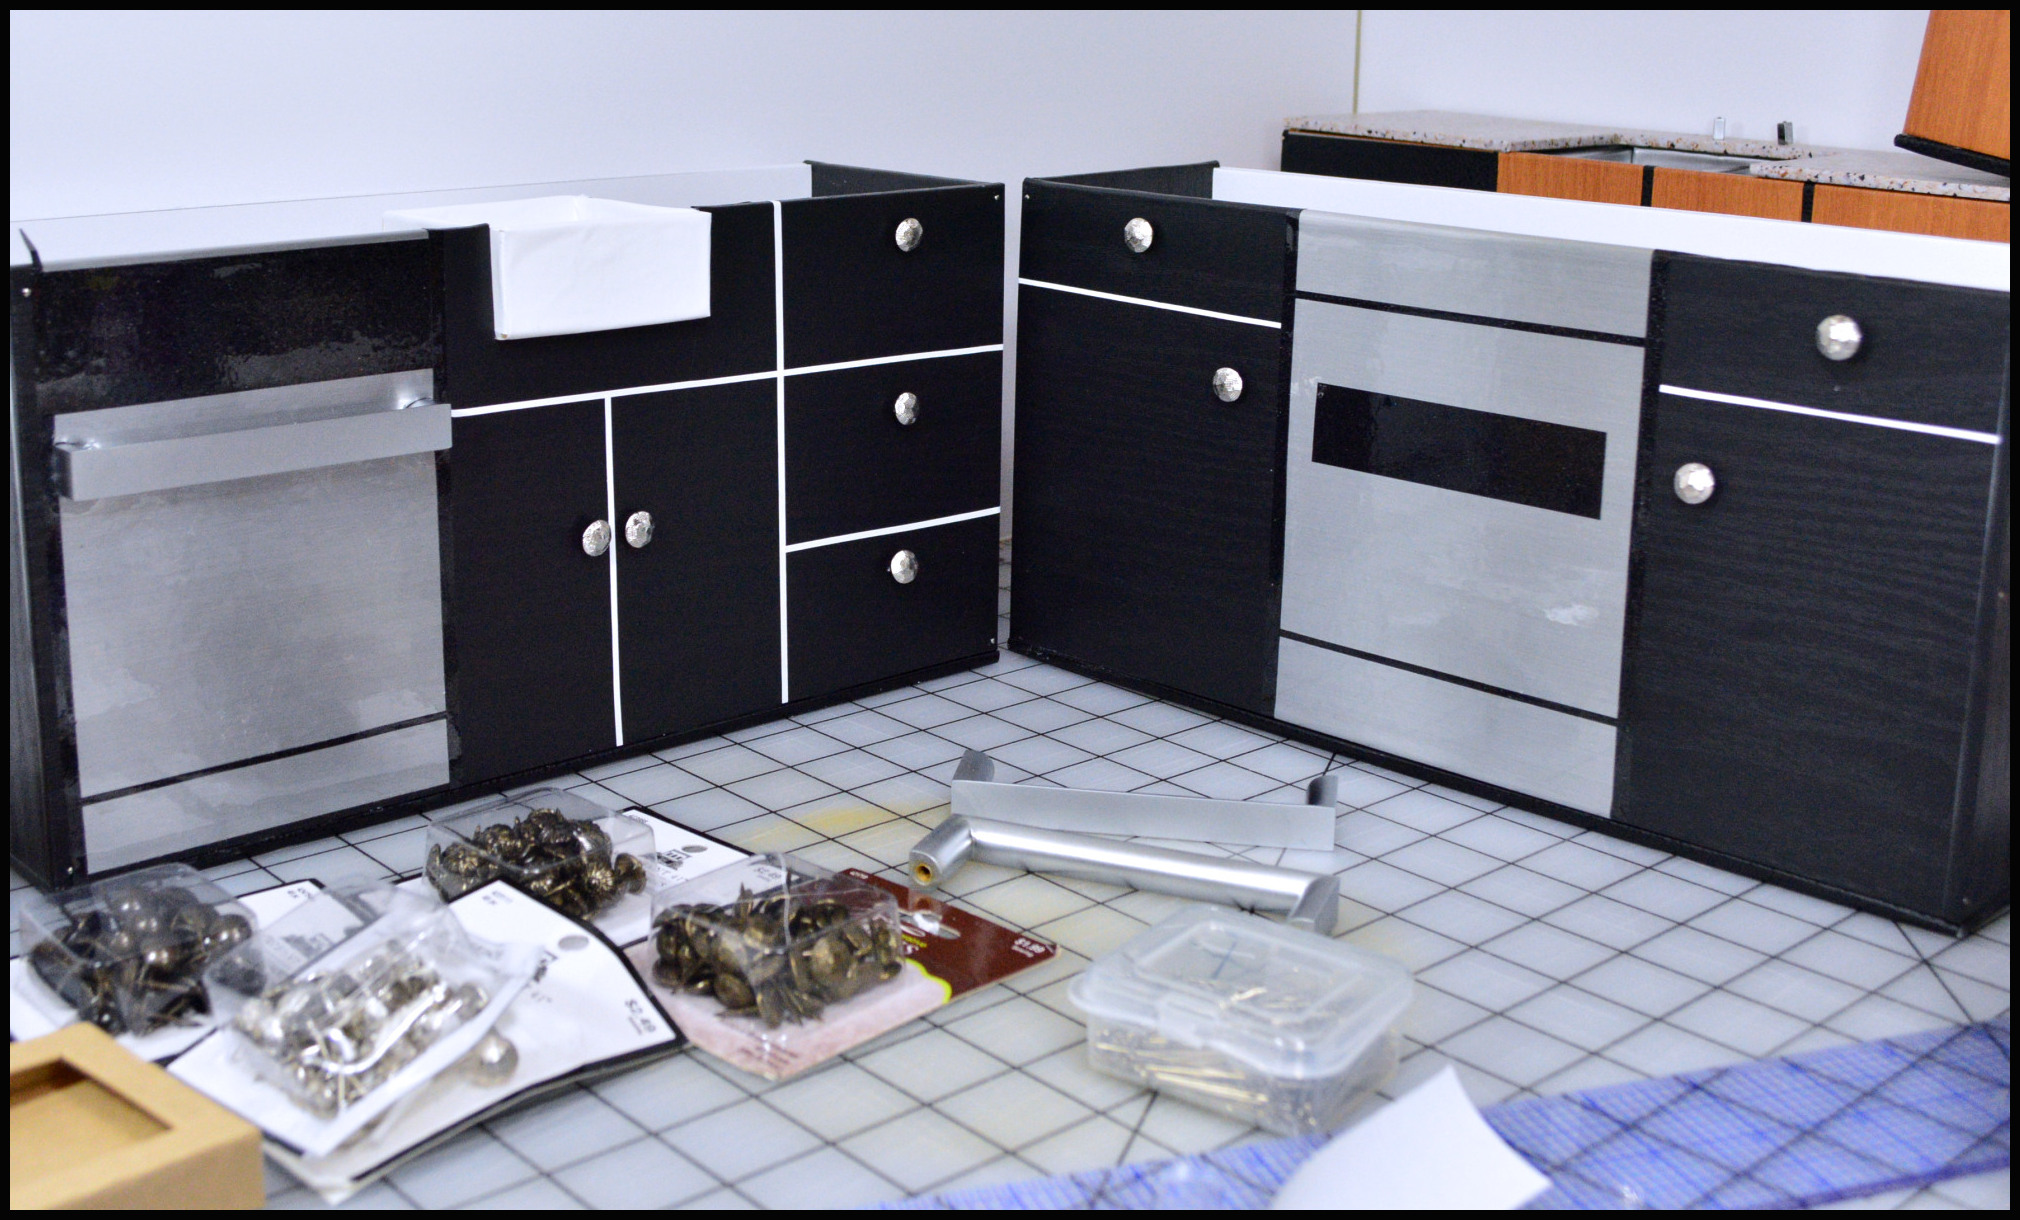
The bottom two sections of counters are the same technique I used for Kitchen’s 2 & 3 above. They’re 1/4″ pieces of black contact paper covered white foam board pinned and glued together. I used decorative takes for the cabinet and drawer pulls.
The farm sink is a white box I’ve fit into the unit and pinned. Still working on a way to make this look better. Next time I’ll make sure it sticks out over a ‘U’ shaped cut in the cabinet wall in front of it.
I found shiny black contact paper was perfect to put over the counter for a stop top, and for the microwave.
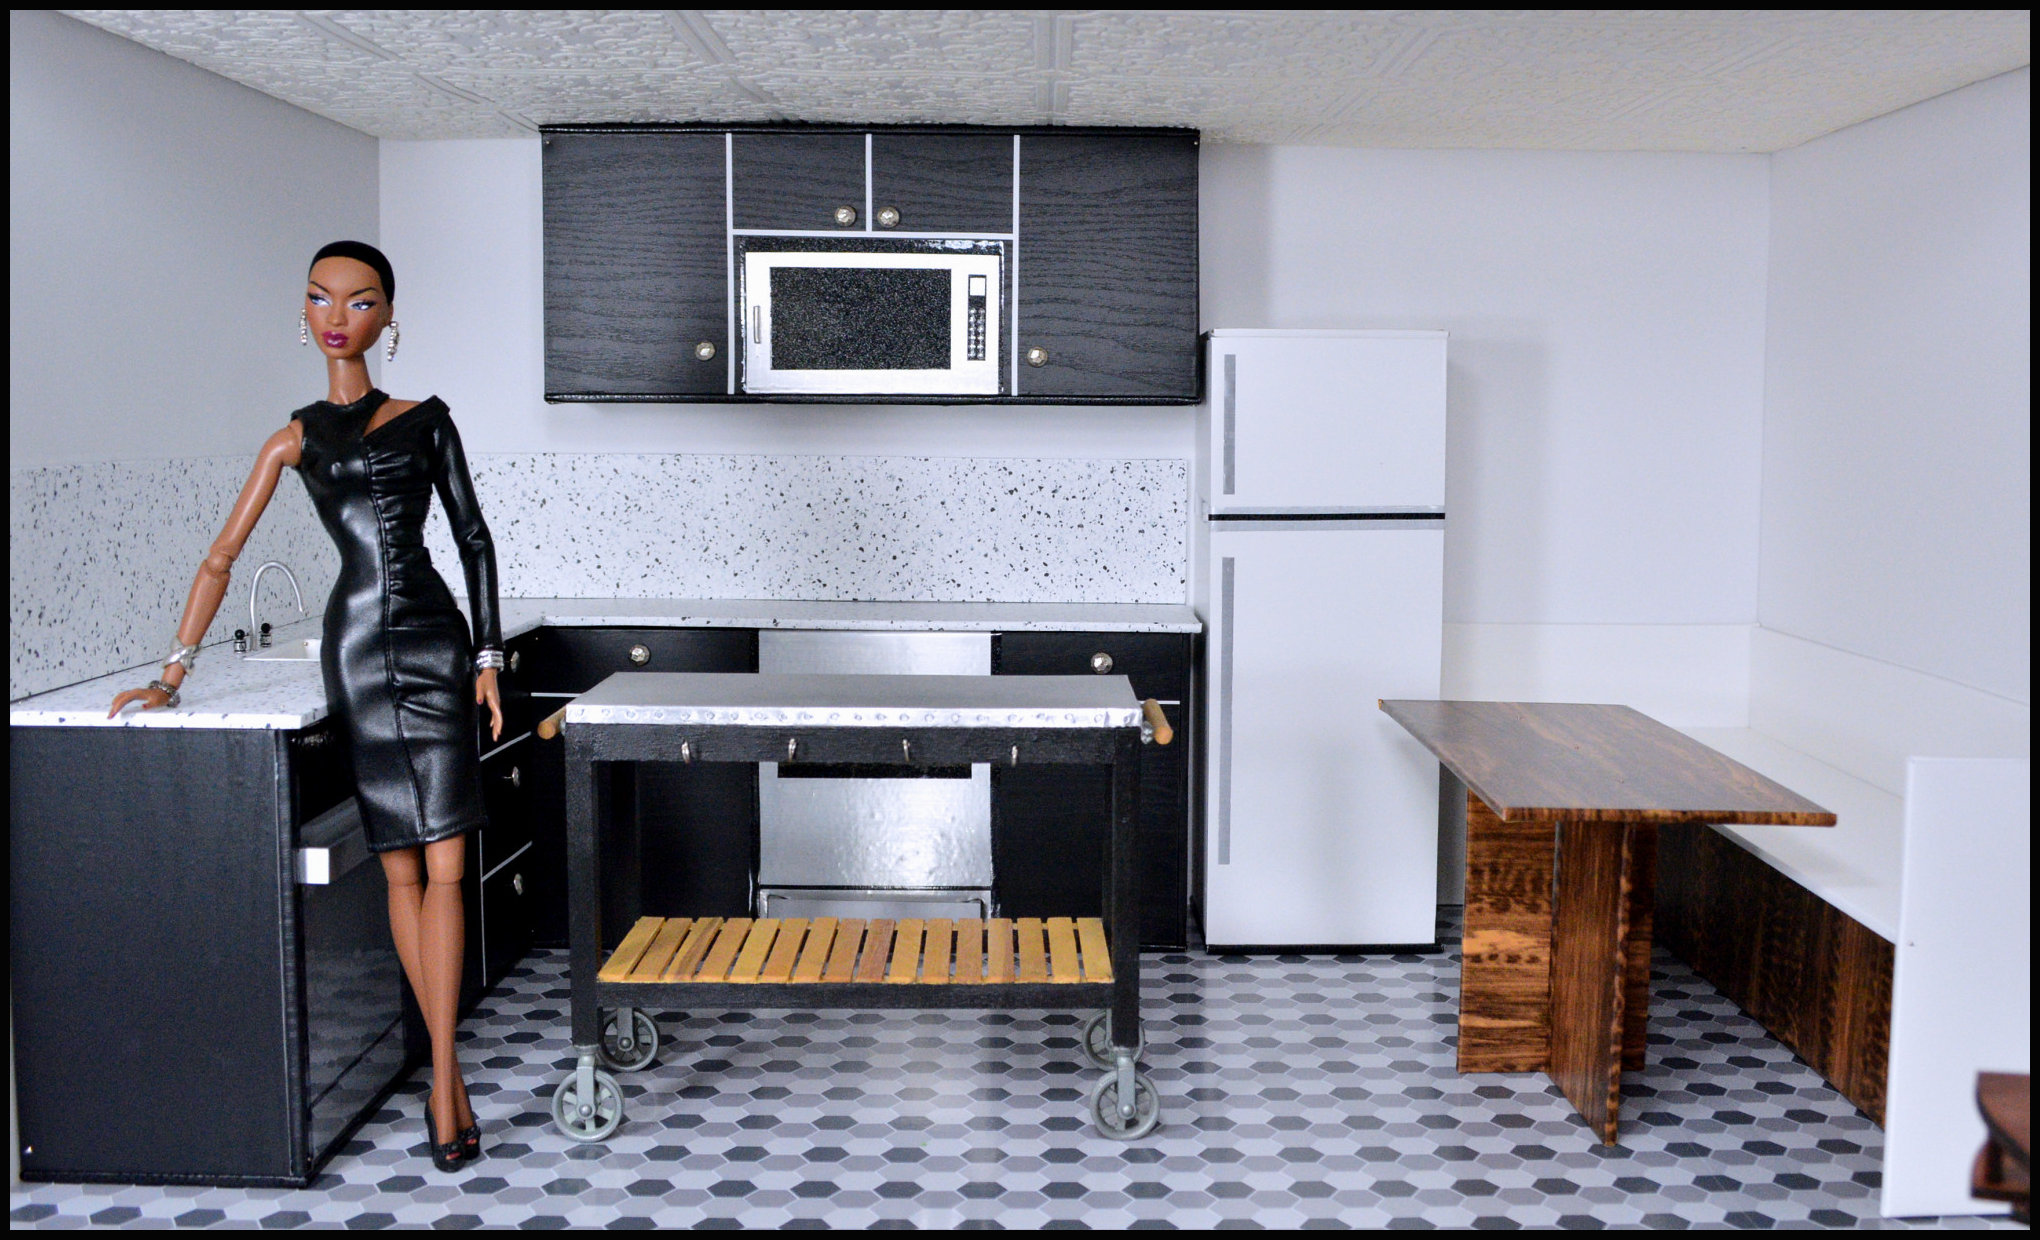
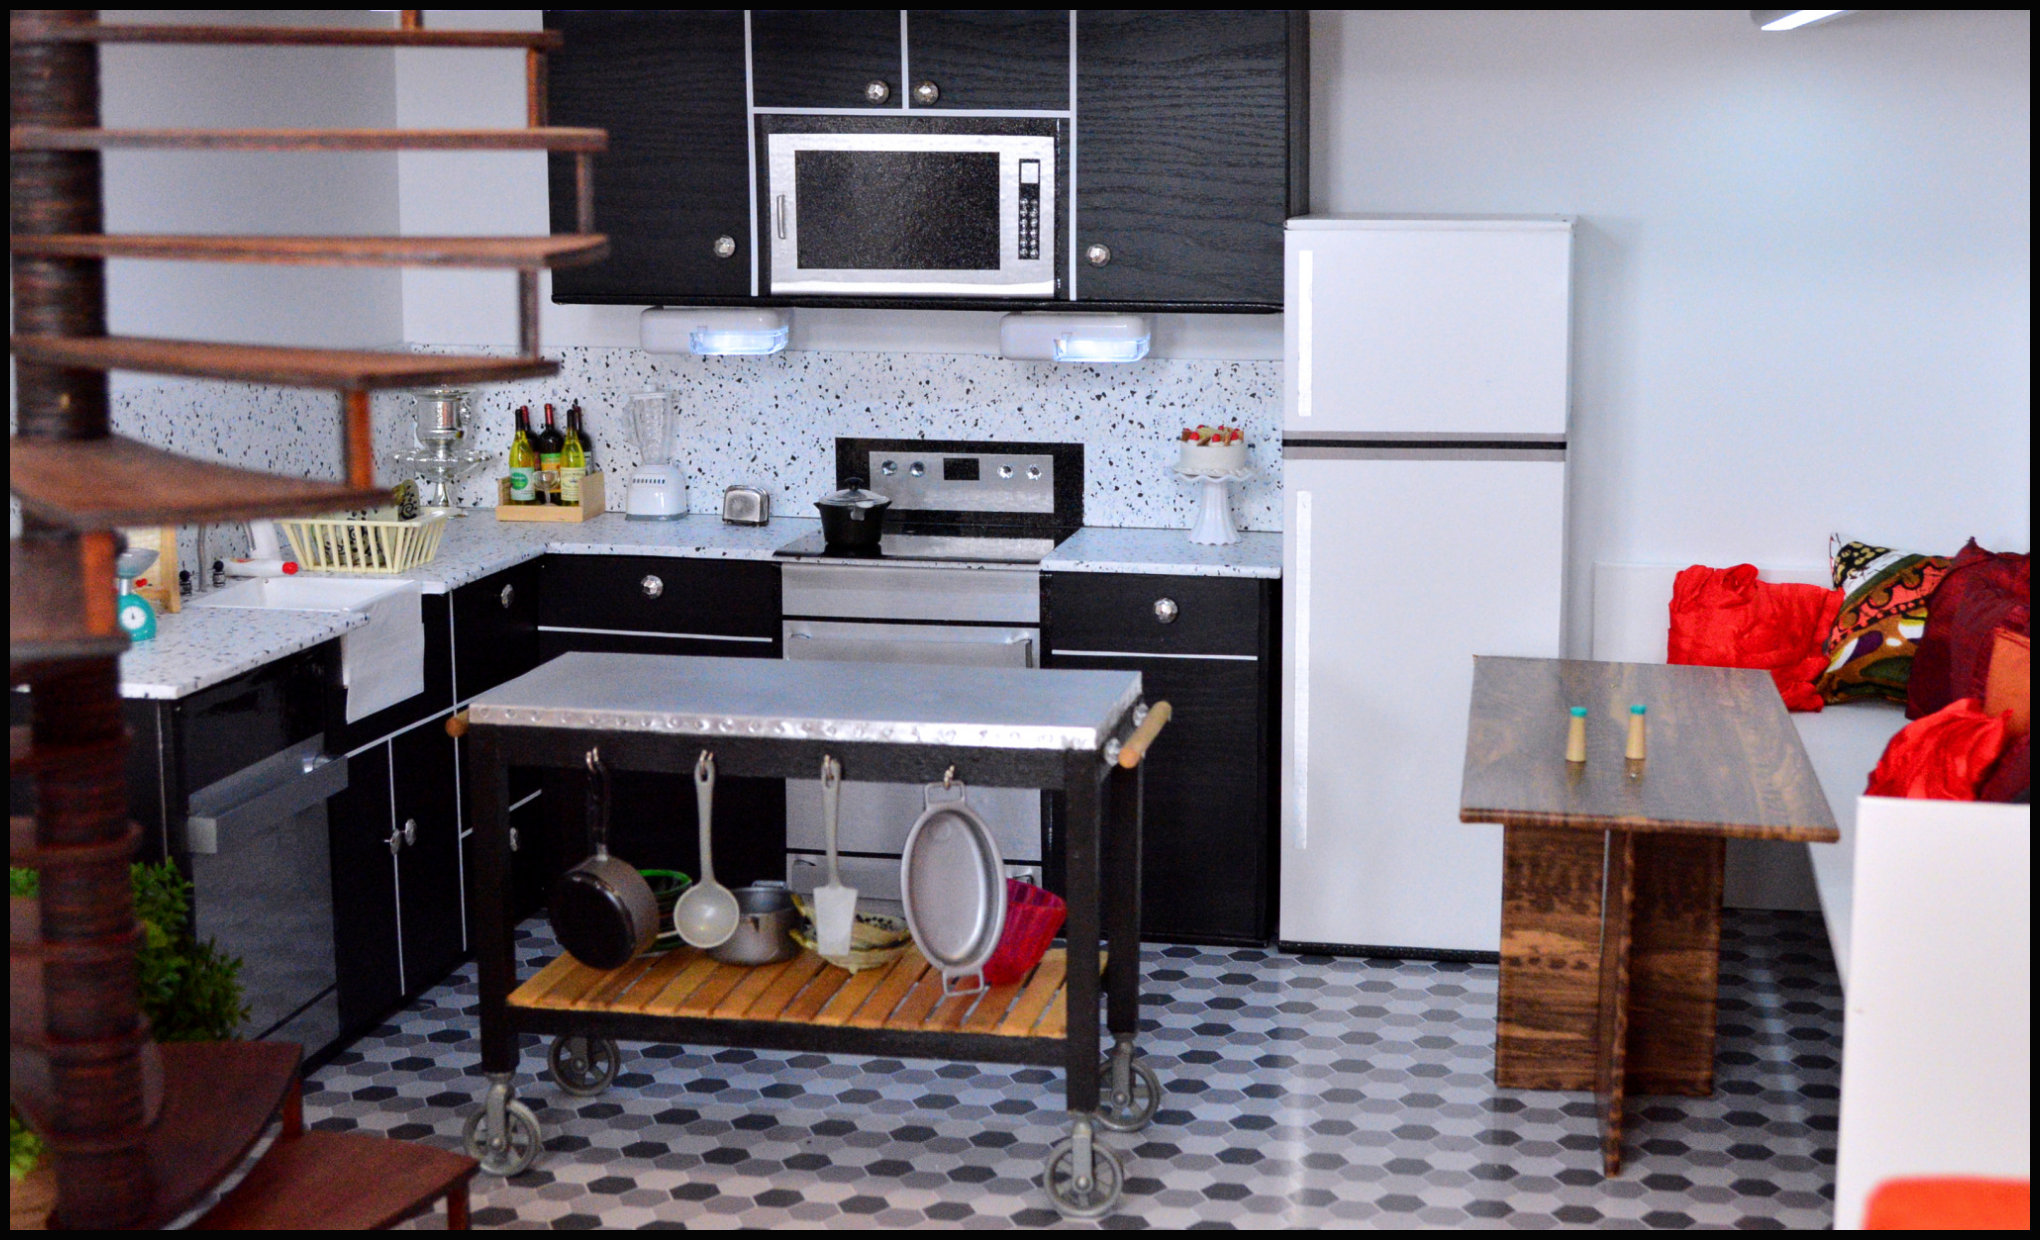
I improved the countertop by cutting an “L” shaped foam board piece I wrapped in white speckled marble contact paper. That way it was seamless. There are two strips of contact paper wrapped in the same contact paper on the two walls as a backsplash. I reused the tiny white fridge.
The island is purchased from Bachette’s on Etsy, love this piece.
The booth and table are foam board parts pinned together, the table is covered by a dark wood contact paper.
Lovely! I can’t wait to make our kitchen!
Thanks Rebecca! JATMAN
Fantastic!!
Thanks for sharing!!
Thanks so much Nilsa. I truly appreciate it. JATMAN
This is so inspirational! I loved getting to know a bit more of how you actually keep things in place with pins and what materials you use. It’s a gorgeous kitchen, I really like all the colours and textures too. Thanks for sharing with us 🙂
You’re very welcome Kristine, thanks so much for your comments. I truly appreciate it. JATMAN
OH MY GOODNESS FREAKING CRAP. This. Is. AWESOME. Thank you so much for doing a tutorial on this. I love that you were able to build a whole kitchen with three basic things and didn’t have to have a whole shop of expensive or specialized tools. I built my daughter a doll house for her last birthday out of a bookshelf and it turned out so cute and I’ve made a few pieces of furniture, but I’ve been struggling on how to go about doing the kitchen. I want it to be a bit more sturdy so I am going to use glue instead of pins (I’ve got to find a good glue that works on foam board, any suggestions?) but this tutorial is going to help so much! I just happened to stumble upon your blog on pinterest and I am so glad I did! I am going to spend all day looking at all the tutorials you’ve done. YOU ARE AMAZING! I’d love to post pictures of what I’ve done but I’m not sure how to do that. I don’t have a blog or website or anything but maybe I could email them to you? I’d love to post them in my comment though, is that doable somehow?
Hi Hanna,
Thanks so much for your lovely comments. Tacky glue from any crafts store works really well on foam board. I sometimes use pins and tacky glue together. Superglue also works for adding heavier things to foam board. I would love to see the final photos of your kitchen. Flickr is my favorite photo sharing sight, if you have a Flickr account I’ll definitely follow you. Unfortunately this comment box doesn’t take photos in it. Can’t change my WordPress template to do it either, sorry. I’ll email you so you can have that option too. Thanks again! JATMAN
Wow! As always, I am blown away. You take such simple materials and make such realistic things! Thank-you for sharing your brilliant ideas. 🙂 Ronda
This is awesome! I can’t wait to make one for my granddaughter.
What is the height of the walls? Everything is beautiful.
The super tall ones are 30″ high, the shorter walls are 20″ high. I usually use 30″ wide by 20″ board for most of my rooms, but when I have stairs or other high ceiling needs I use 40″ wide x 30″ tall 1/2″ wide board. Thanks for reading! JATMAN
Hi, You do amazing work. This kitchen is absolutely gorgeous and is an inspiration for my own kitchen project today. I have never made a foam core room before but am attempting it. I have several pieces of 30″x 20″ foam core board and am trying to figure out the best scale and how to cut it. What are your exact kitchen measurements for height and width of both kitchen walls? I am guessing 20″ high but can’t figure out the width. Thank you so much for the tutorial!
-Yvonne
Thanks Yvonne! I usually use 20″ walls, but for larger projects I use 30″ high x 50″ wide 1/2″ thick foam boards like I did in the newer kitchen dio, mainly because I had to put the stairwell next to the wall, and 20″ wasn’t high enough. Modify the room to the space you have to set it up. I’m limited to a 4′ x 5′ table. Everything has to fit inside it, so I turn the 30×20″ boards tall or wide depending on how much space I have left. I also have a lot of strips of board cut I can use to make really short walls that stick out for different effects, or to make the room wider. Sky’s the limit depending on your space and imagination. I hope that helps. JATMAN
hey JATMAN
love love love your tutorial. i love the whole set. i have those same staircase thats been in my ebay cart for over a year now. i wanted to know is it truly to scale. i love the curling banisters in the front but am scared to purchase it just incase its not really to scale. you know how some of these things say 1/6 but they really are not and they money we dish out on them! so now that i see it in your fabulous set, makes me want to reconsider. Btw thanks so much for the love on flickr. girl you know you are my inspiration. u know i love you. i am such a fan!!! along with so many others. you really do wonderful work.
I’m THRILLED to the MAX when someone uses my tutorials and makes their own. Even more thrilled when them make them twice as good like you do. Diorama QUEEN!!! Go on with your bad self. Your gorgeous kitchen was spectacular, Love, love, love the cabinets. Your woodworking skills just keep improving. I’m waiting for the prices of the 3-D printer technology to go down to an affordable price. I’m hoping I can make a few diorama pieces with that someday.
The staircase is every so slightly smaller than 1/6 scale because it’s too narrow if it were for a real person, but it works well enough for dolls who don’t mine one up the stairs at a time. It doesn’t not stand up on it’s own and needs a stand like I built, or you need to secure it to a wall at the top. It’s heavier than it looks, so I couldn’t find a way to secure it, you have woodworking skills, knock that out. The railings are fragile, really really fragile, grip to hard and you can push it out of place and need to use superglue to secure it back.
Thanks as always great to hear from you!! JATMAN
Wow! Gorgeous! I love the results of all of your dioramas! So cool to see how you make them, as it will help me with my own personal collection. Thank you!
Good luck with your dioramas. I’m so glad you found this helpful. JATMAN
Great tutorials….so creative, and I hope your new endeavors are wonderful and successful…I hope it’s a book! Grins, Sandi
WOW – a book would be awesome! But whatever your new project, best of luck and hope it’s lots of fun!